6-12
Fuel pump
0
1
2
3
4
5
6
7
8
9
10
A
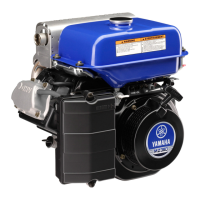
4. Install the pin e.
5. While holding the fuel pump body 1
assembly a in place, insert a flathead
screwdriver into the hole d of the
plunger c and rotate it 90° until the tab
e on the diaphragm is aligned with the
slot f in the fuel pump body 1 assembly
a.
6. Remove the fuel pump body 1 assembly
a from the vise, and then push down on
the plunger several times to make sure
that it moves smoothly.
7. Assemble the fuel pump assembly.
TIP:
Make sure to align the projections a, b, and
c.
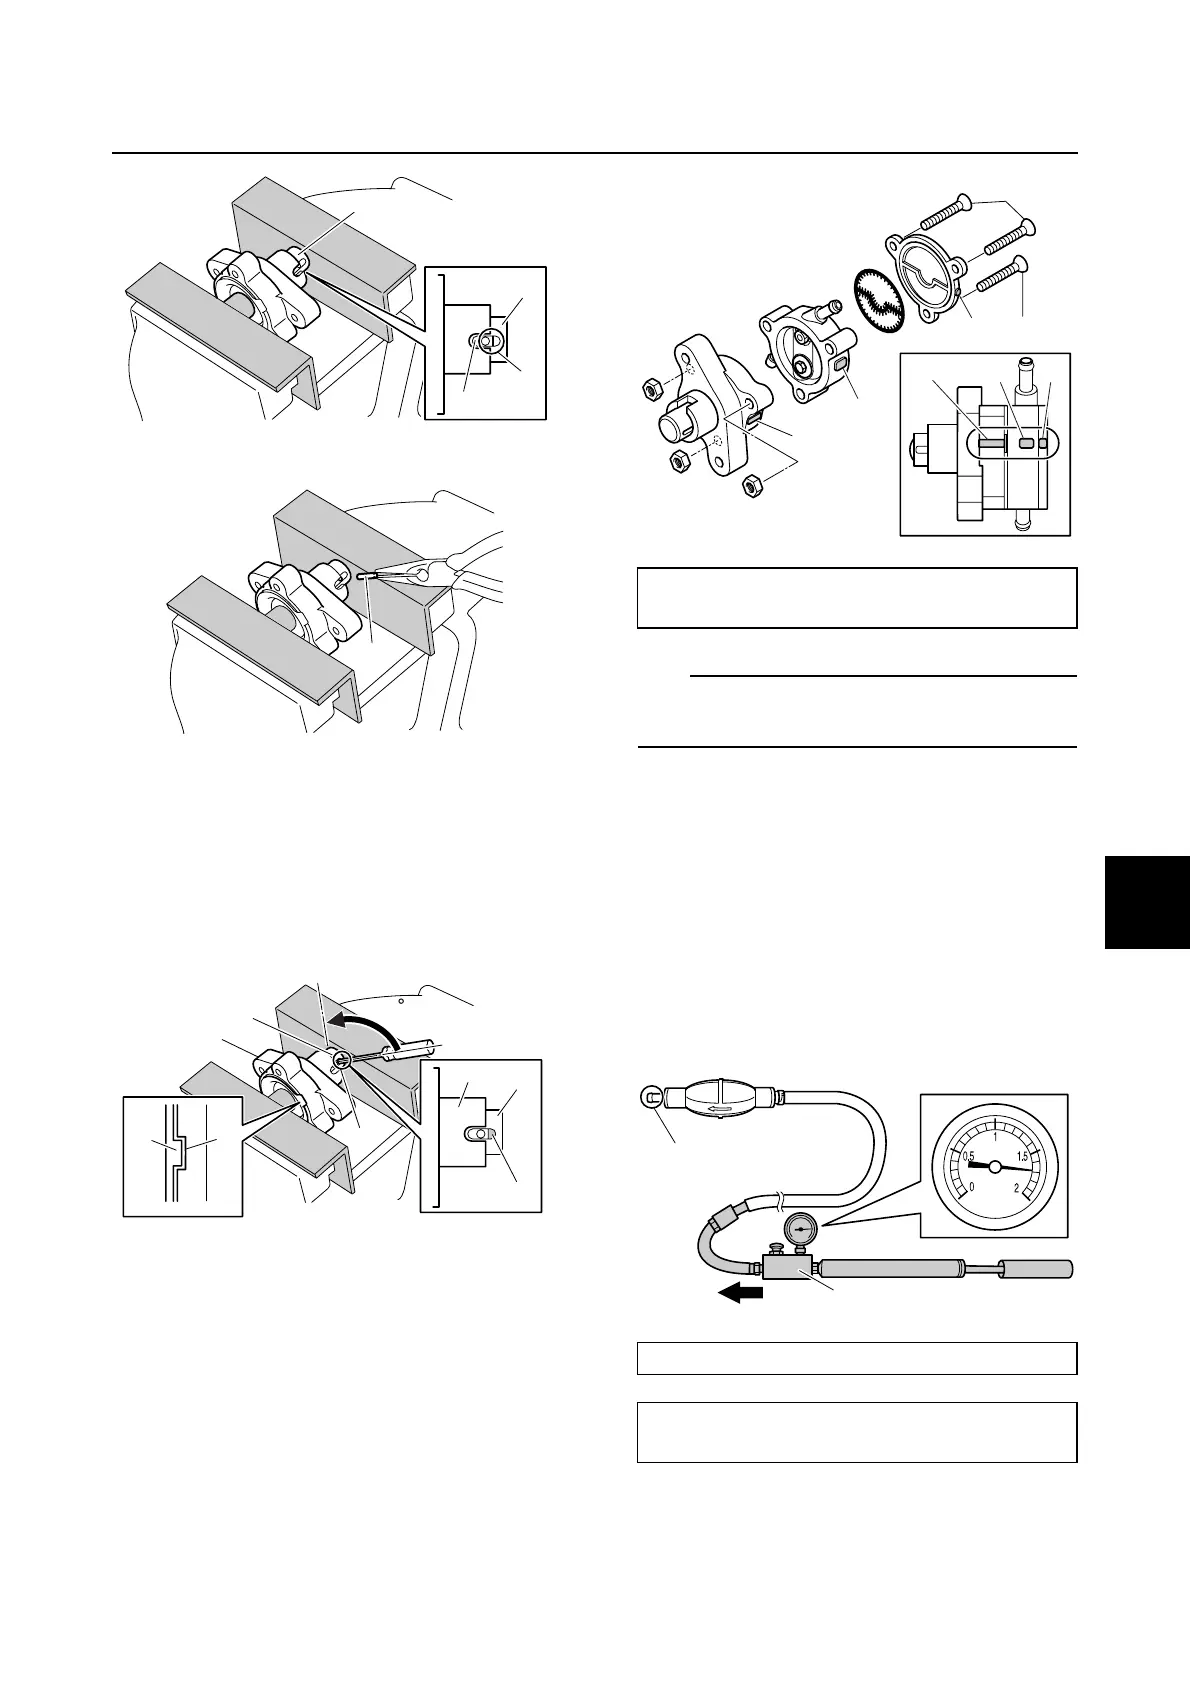
Checking the primer pump
1. Connect the special service tool a to the
primer pump inlet hose.
2. Cover the fuel outlet a with a finger.
3. Apply the specified positive pressure to
check that the pressure is maintained for
at least 30 seconds. Replace the primer
pump if it does not maintain pressure.
c
d
c
c
e
d
90
c
a
e
f
d
c
a
Fuel pump screw f:
4 N·m (0.4 kgf·m, 3.0 ft·lb)
Leakage tester a: 90890-06840
Specified positive pressure:
170.0 kPa (1.70 kgf/cm
2
, 24.7 psi)
f
f
c
abc
b
a
a
a
 Loading...