12
MW10
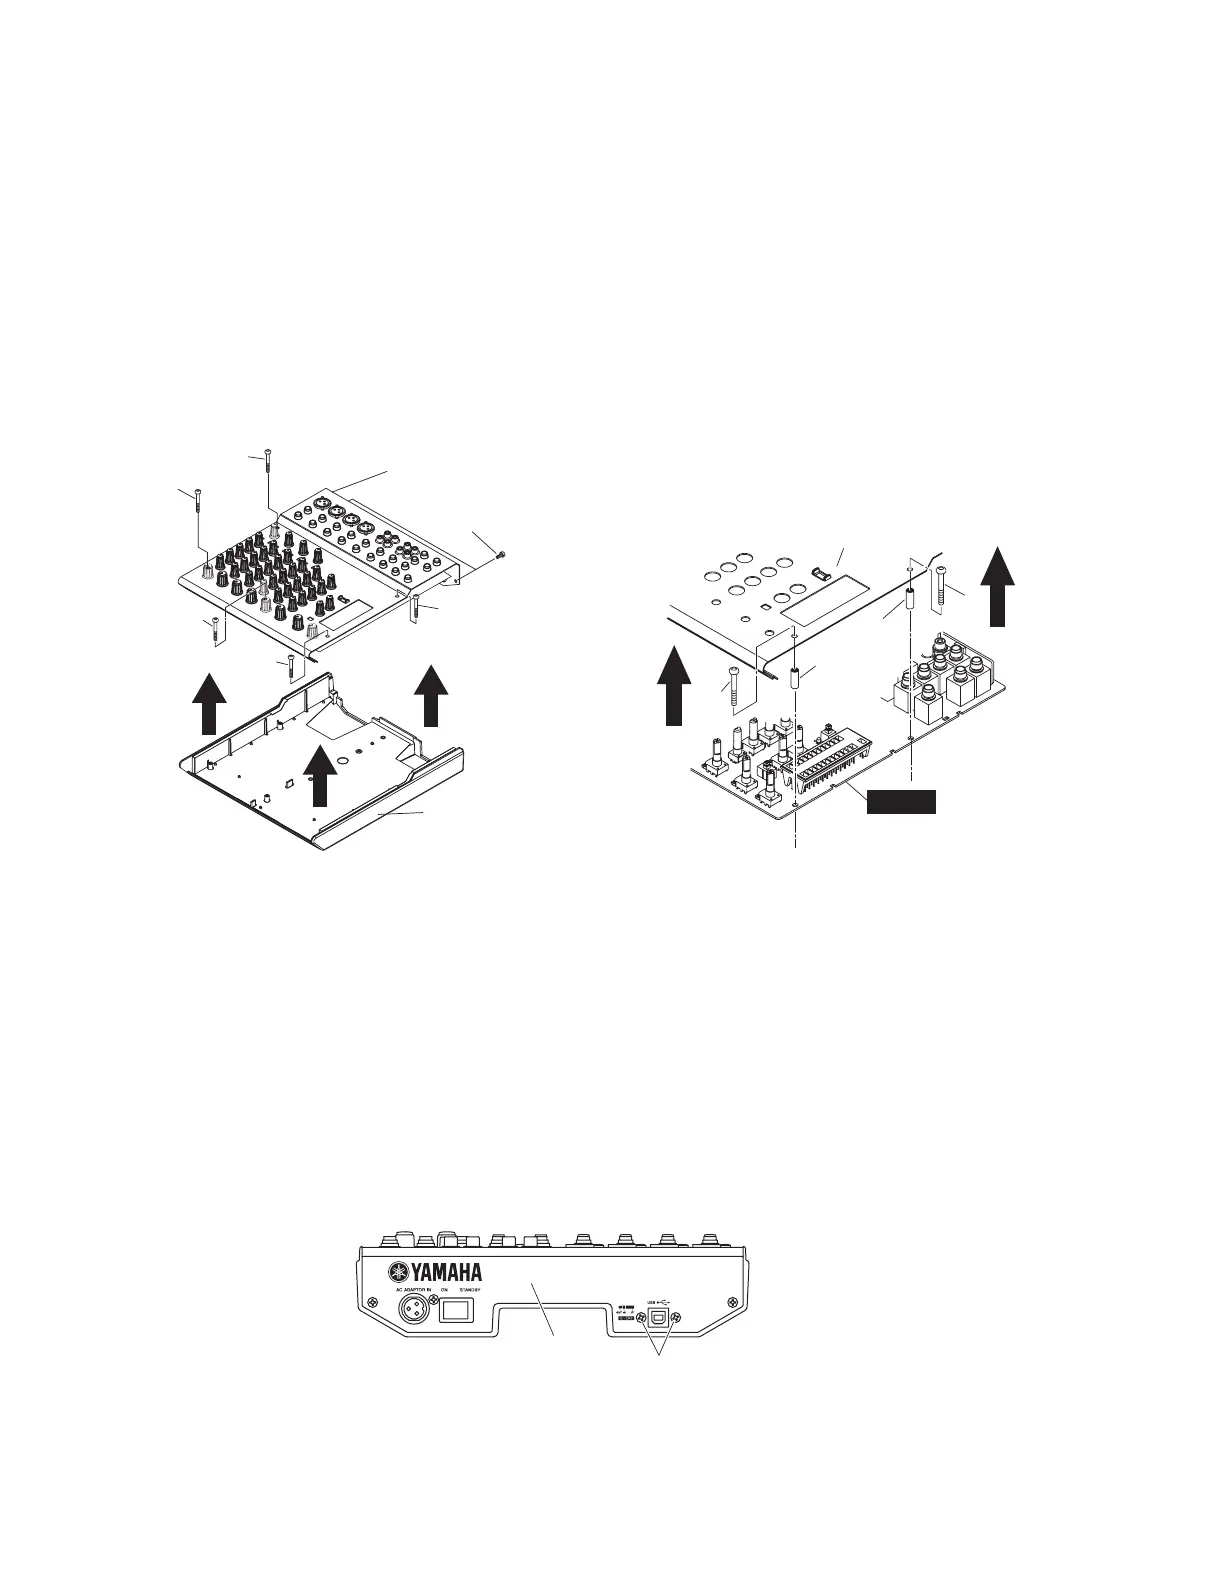
■ DISASSEMBLY PROCEDURE(分解手順)
1. Bottom Case
(Time required: About 1 minute)
1-1 Remove the two (2) screws marked [260]. (Fig.1)
1-2 Remove the five (5) screws marked [265] using a
hexagonal wrench. (Fig.1)
* The spacers [160] have been attached to the five (5)
screws marked [265] respectively. Be careful not to lose
the spacers while disassembling. (Fig.2)
1-3 Under such a condition, lift the top cover up. The bottom
case (with the sheet shield) can then be removed. (Fig.1)
1. ボトムケース
(所要時間:約1分)
1-1 [260]のネジ2本を外します。(Fig.1)
1-2 [265]のネジ5本を六 角レンチで外します。(Fig.1)
*[265]のネジ5本には、それぞれ[160]のスペーサーが付
いています。作業時にスペーサーを無くさない 様 に 注 意し
て下さい。(Fig.2)
1-3 この状態で、トップカ バ ー部分を上に持ち上げると、ボトム
ケース(シートシールド付 )が外れます。(Fig.1)
(Fig.1) (Fig.2)
[260]: Bind Head Tapping Screw-B 3.0X8 MFZN2W3 (WE774300)
Bタイト+BIND
[265]: Socket Head Cap Screw-P 3X25 MFZN2W3 (WG349100)
Pタイト6角孔付き
Top Cover
(トップカバー)
Bottom Case
(ボトムケース)
[265]
[265]
[265]
[265]
[265]
[260]
[265]
[160]
[160]
[265]
Top Cover
(トップカバー)
MAIN
[160]: Spacer,MIX (WD237400) スペーサーMIX
[265]: Socket Head Cap Screw-P 3X25 MFZN2W3 (WG349100)
Pタイト6角孔付き
2. USB Assembly (USB Circuit Board)
(Time required: About 2 minutes)
2-1 Remove the bottom case. (See procedure 1.)
2-2 Remove the two (2) screws marked [430]. The USB
assembly can then be removed. (Fig.3)
2. USBAssy(USBシート)
(所要時間:約2分)
2-1 ボトムケースを外します。(1項参照)
2-2 [430]のネジ2本を外し、USBAssyを外します。(Fig.3)
[430]
Top Cover
(トップカバー)
(Fig.3)
[430]: Bind Head Tapping Screw-S 3.0X6 MFZN2W3 (WE877900) Sタイト+BIND
 Loading...