'
I
..
2-8
TOP
END
REASSEMBLING
CRANKSHAFT
ASSEMBLY
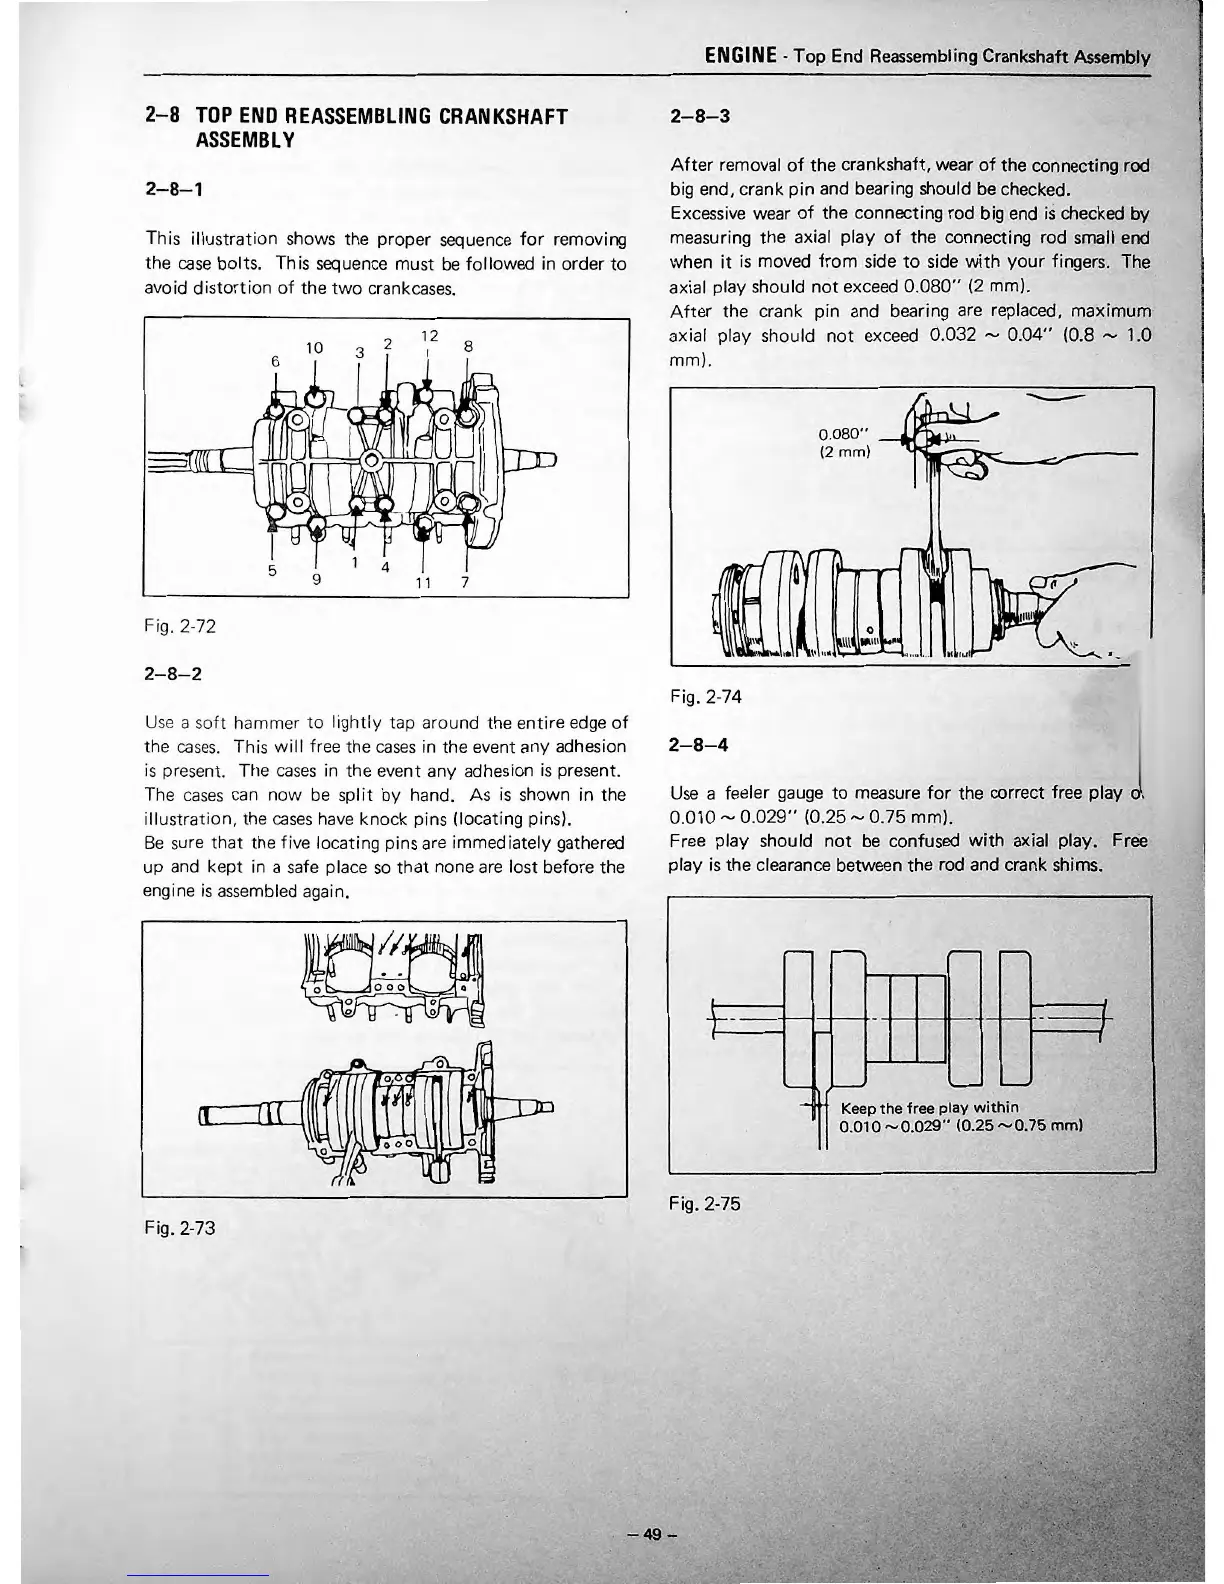
2-8-1
This i
llustration
shows the
proper
sequence
for
removing
the
case
bolts. This sequence must be
followed
in
order
to
avoid
distort
ion
of
the
two
crankcases.
10
3 2
12
6
8
5
1 4
9
11
7
Fig. 2-
72
2-8-2
Use
a
soft
hammer
to
I ightly tap around the
en
t
ir
e edge
of
the
ca
se
s.
Th is
wi
11
free the
case
s in the event any adhesion
is
present. The
cases
in
the
event any adhesion
is
present.
The
ca
ses
ca
n
now
be
split
by
hand. As
is
shown in the
illustrat
ion,
th
e
ca
s
es
have
kno
ck pins (locating pins).
Be
sure
that
th
e
fi
ve locating pins are immediately gathered
up
and kept in a safe place so
that
none are lost before
the
engine
is
a
sse
mbled again.
0
ooo
0
Fig. 2-73
ENGINE·
Top
End
Reassembling Crankshaft Assembly
2-8-3
After
removal
of
the
crankshaft, wear
of
the
connecting rod
big end, crank
pin
and bearing should be checked.
Excessive wear
of
the
connecting rod big end
is
checked
by
measuring
the
axial
play
of
the
connecting rod small
end
when
it
is
moved
from
side
to
side
with
your
fingers. The
axial play should
not
exceed
0.080''
(2 mm).
After
the crank
pin
and bearing are replaced,
maximum
axial play should
not
exc
eed
0.032
,....,
0.04''
(0.8
,....,
1.0
mm).
Fig. 2-74
2-8-4
0.080''
-
(2
mm)
--....
.
-
Use
a feeler gauge
to
measure
for
the correct free
play
•
0.010,...., 0.
029''
(0.25,....,
0.75
mm).
Free play should
not
be confused
with
axial play. Free
play
is
the
clearance between the rod and crank shims.
-
I ' I -
- '
:
' • I 1
I
'
I
1 i I
-
-
-
-
' I ;
i
l
'
11
l .
.•
-
•
.
1~
·-
ithin
Keep
the
free
play
w
0.010
"'0.029''
(0.2
5
"'0.75
mm)
Fig. 2-75
•
..
. - 49 -
 Loading...