CLUTCH
5-52
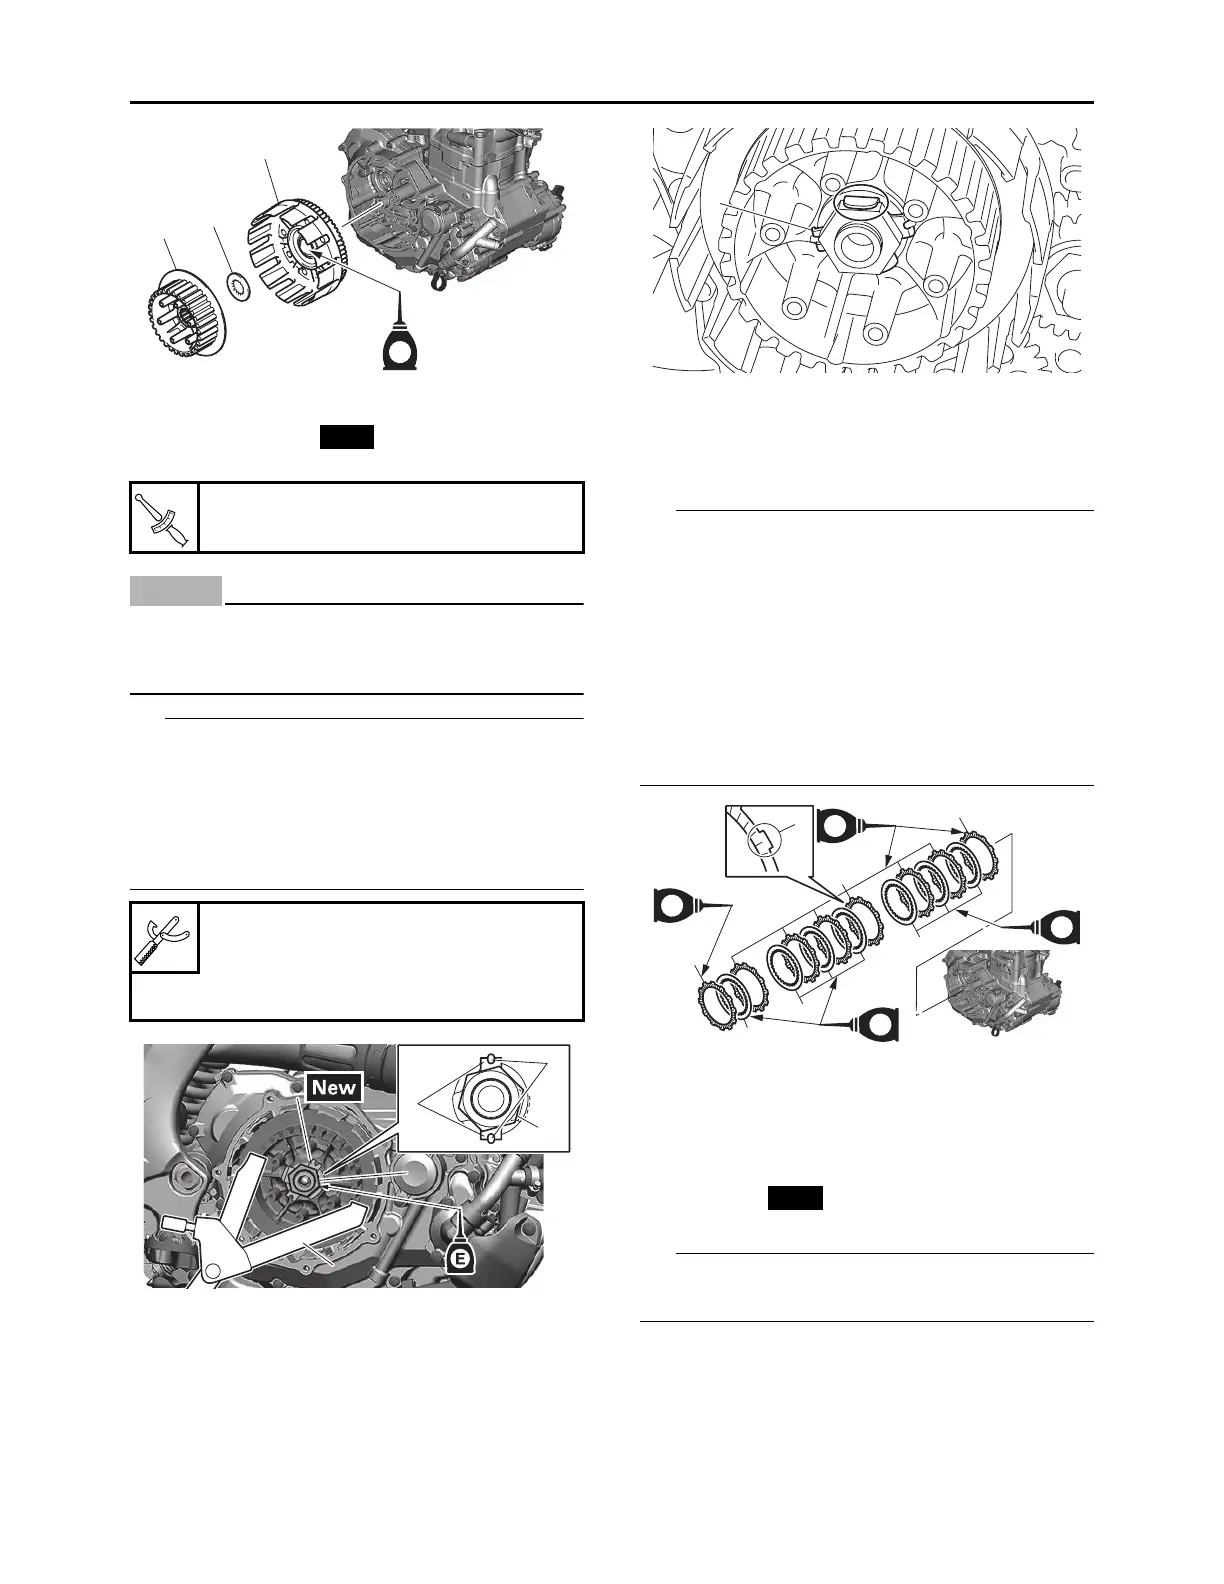
6. Install:
• Lock washer “1”
• Clutch boss nut “2”
ECA24660
Make sure to tighten to specification; other-
wise, it may damage the other part that is fas-
tened together.
• Align the notch in the lock washer “1” with the
detent rib “a” of the clutch boss.
• Apply engine oil to the threads and contact sur-
face of the clutch boss nut.
• Use the universal clutch holder “3” to hold the
clutch boss.
7. Bend the lock washer “1” tab.
8. Install:
• Friction plate 1 “1”
• Clutch plate “2”
• Friction plate 2 “3”
• Install the clutch plates and friction plates alter-
nately on the clutch boss, starting with a friction
plate and ending with a friction plate.
• From the clutch boss side, install the friction
plates in order: friction plate 1 (identification
color: black) 1, friction plate 2 (identification
color: purple) 6, and friction plate 1 (identifi-
cation color: black) 1.
• Apply the engine oil on the friction plates and
clutch plates.
9. Install:
• Bearing “1”
• Washer “2”
• Circlip “3”
(to the push rod 1 “4”)
Apply the engine oil on the bearing, washer and
push rod 1.
Clutch boss nut
75 N·m (7.5 kgf·m, 55 lb·ft)
Universal clutch holder
90890-04086
Universal clutch holder
YM-91042
1
1
2
3
E
a
2
1
11
22
3
3
a. Identification color
1
a
1
3
2
2
2
1
E
E
E
E












 To Next Page