ENG
2. Install:
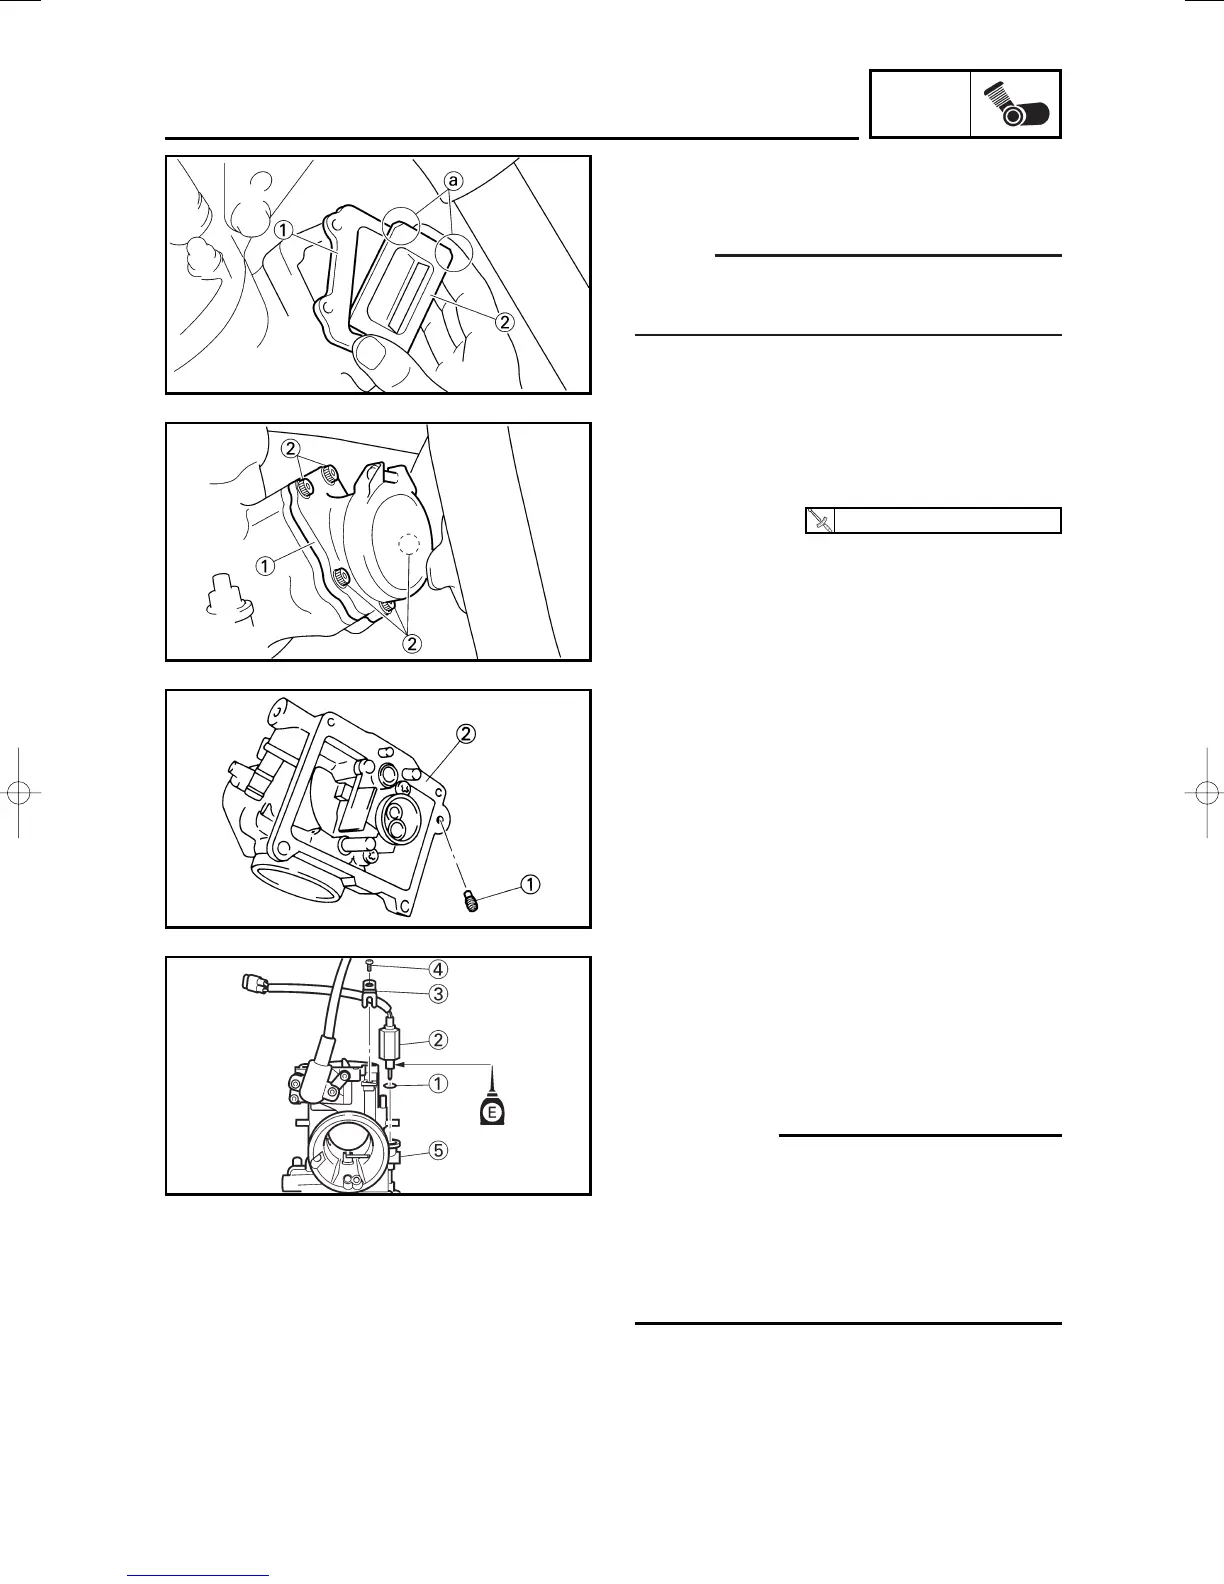
9Reed valve assembly 1
9Reed valve spacer 2
NOTE:
Install the reed valve spacer with its chamfered
side a to the right.
3. Install:
9Carburetor joint 1
9Bolt (carburetor joint) 2
4-13
CARBURETOR AND REED VALVE
10 Nm (1.0 m•kg, 7.2 ft•lb)
EC4652F0
Carburetor
1. Install:
9Power jet 1
To carburetor 2.
2. Install:
9O-ring 1
9Solenoid valve 2
9Clamp 3
9Screw (clamp) 4
To carburetor 5.
cC
9Before installing the solenoid valve, blow air
on the solenoid valve and its installing loca-
tion on the carburetor in order to remove
any foreign particles such as chips etc.
9Apply the engine oil on the solenoid valve
thread.
5MW-9-30-4A 7/3/00 5:24 PM Page 26

 Loading...