31
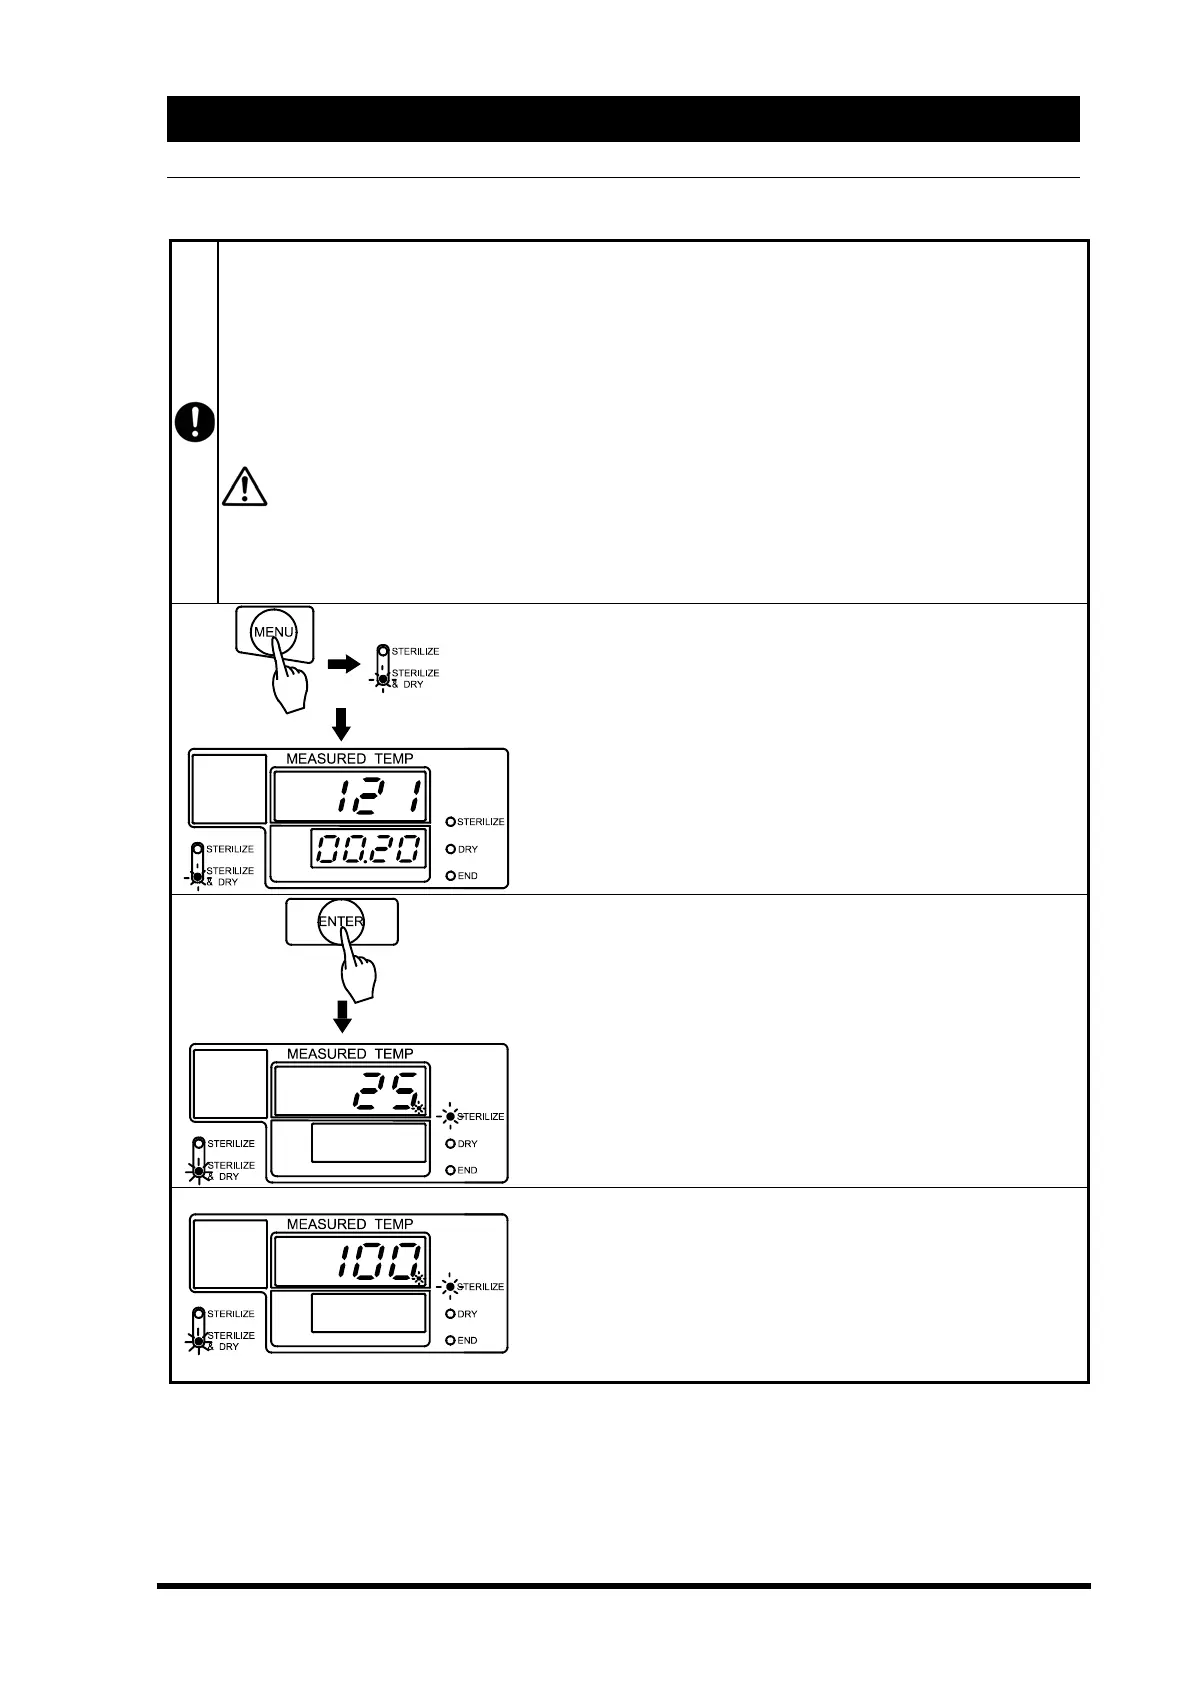
Run “MENU”
“STERILIZE & DRY” Procedure
“STERILIZE & DRY” procedure
Check the following.
①Is the drain valve closed? Pg.10
②Is the drain filter in place? Pg.15
③Is the bottom plate set? Pg.15
④Is the bottle set? Pg.16
⑤Is water in chamber? Pg.17
⑥Is the kid closed? Pg.18
In “STERILIZE & DRY” operation, the water is automatically drained from the chamber to
the bottle before the drying process. Be sure to check the water level prior to operation or
an overflow can occur.
◇Turn on the main circuit breaker.
◇Push the “MENU” key to select “STERILIZE & DRY”.
(See P28)
◇Set the temperature and time you desire.
(See P25 and 26)
→The main display blinks the set temperature.
→The sub display blinks the set time.
→Sterilize & Dry menu lamp blinks.
◇Push the “ENTER” key.
Operation begins. The sterilization heater turns on.
The solenoid exhaust valve remains open to exhaust air from
the chamber.
→The main display shows water temperature.
→The sub display goes off.
→Sterilize lamp blinks.
→Sterilize & Dry menu lamp is lit.
After air purge, the solenoid exhaust valve is closed, and
pressurization starts. (Approximately 20-25 minutes)
→The main display shows chamber temperature.
→Sterilize lamp blinks.
→Sterilize & Dry menu lamp is lit.