36 support@yardistrystructures.com
Slide Gable Polycarbonate Panel
with notched end positioned to the
right.
Slide Gable Polycarbonate Panel
with notched end positioned to the
right.
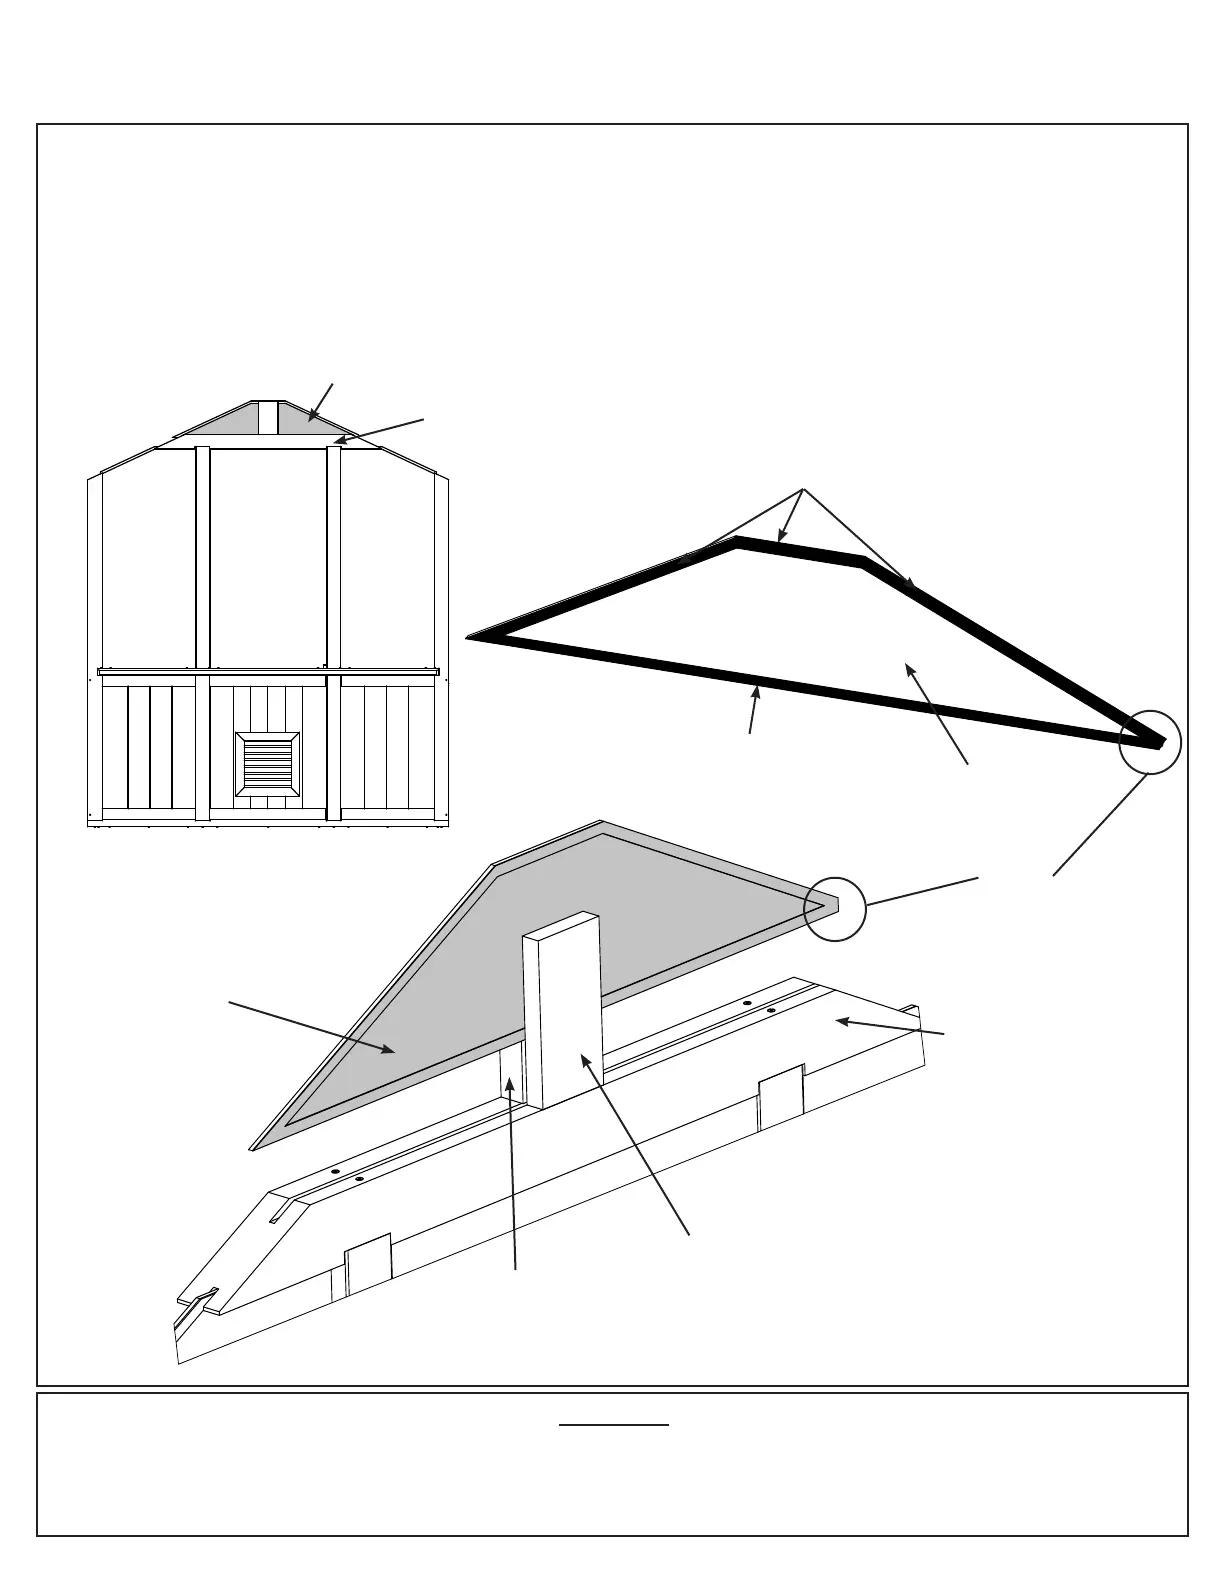
Step 3: Back Wall Assembly
Part 9
SLIDE GABLE POLYCARB. PANEL
THRU. THE GROOVES IN FRONT
GABLE BEAM
NOTE: Notch is on right corner of
Polycarb Panel
Remove lm from both sides of Gable Panel.
M: Refer to pages 16 and 17 and apply top and bottom tape to Gable Panel.
N: Slide Gable Panel down into the grooves of (1117) Back Gable Beam, in between (1121) Upright Inside and
(1122) Upright Outside. Make sure the notch at the bottom is on the right side of the panel. The UV coated side
must be to the outside of the frame. (F3.19, F3.20 and F3.21)
Components
1 x Gable Panel
Top Tape
Bottom Tape
Gable Panel
Top Tape
Bottom Tape
Note: UV
Coating to the
outside of the
frame
(1117) Back
Gable Beam
F3.19
F3.20
F3.21
Gable Panel
Notch on
this side
Gable
Panel
(1117) Back
Gable Beam
(1121)
Upright
Inside
(1122)
Upright
Outside
Outside View