41 support@yardistrystructures.com
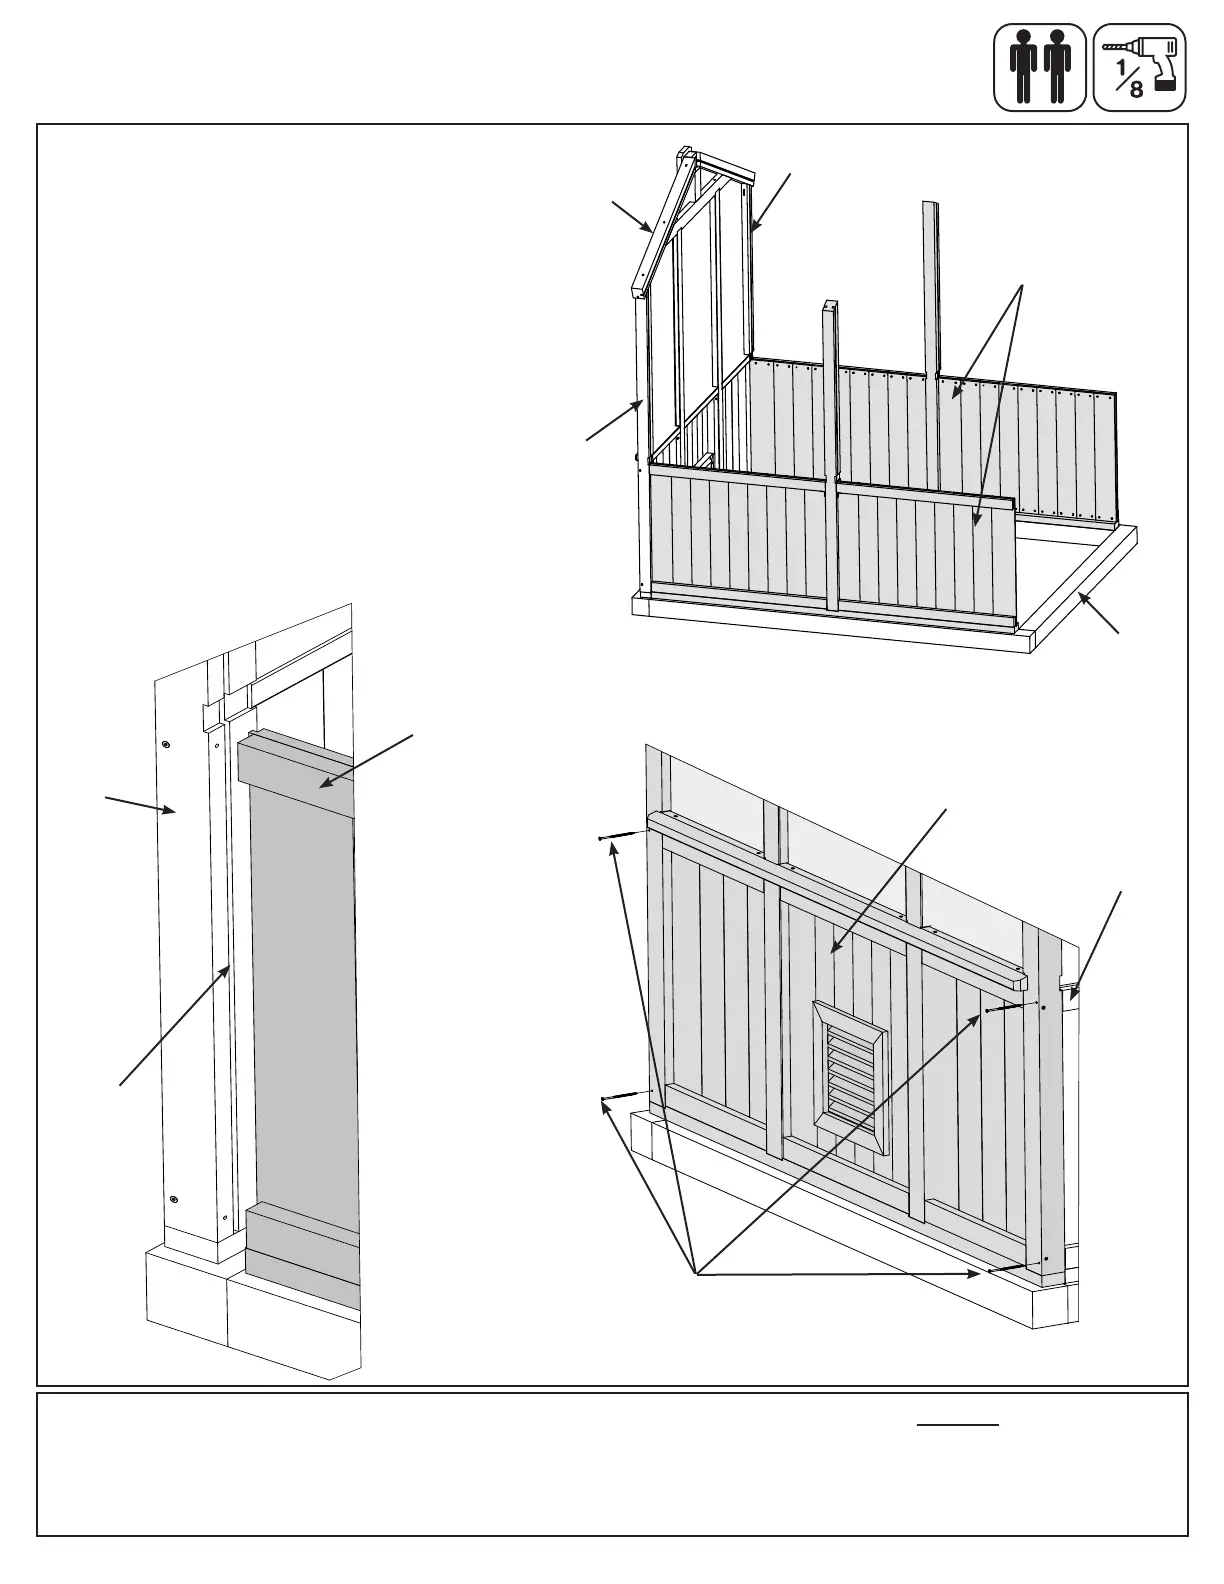
Step 5: Connect Wall Assemblies
Part 1
If using a treated lumber base it should
be placed in the nal location. Images
will only show treated lumber base.
Same instructions apply for concrete
base, unless otherwise specied.
A: With a helper, stand Back Wall
Assembly on base then slide Side Wall
Assemblies into grooves of (1108) Left
Post and (1109) Right Post. Pre-drill
with a 1/8” drill bit then attach Back Wall
Assembly to Side Wall Assemblies with
two #10 x 4” Wood Screws per side.
(F5.1, F5.2 and F5.3)
Slide the tongue from the SIDE
WALL into the groove of the BACK
POST
Rest BACK WALL ASSEMBLY on the 4
x 4 Frame prior to sliding into SIDE
WALL ASSEMBLY
#10 X 4” Wood Screws
Connects BACK WALL POSTS to the
SIDE WALLS.
PRE-DRILL prior to fastening
Slide the tongue from the SIDE
WALL into the groove of the BACK
POST
Rest BACK WALL ASSEMBLY on the 4
x 4 Frame prior to sliding into SIDE
WALL ASSEMBLY
Inside View
Inside View
Outside View
F5.1
#10 x 4”
Wood Screw
Side Wall
Assembly
Side Wall
Assembly
Back Wall
Assembly
Side Wall
Assembly
Back Wall
Assembly
F5.2
F5.3
(1109)
Right Post
(1108)
Left Post
Base
Post
Hardware
4 x #10 x 4” Wood Screw
Groove
on post