EasyManua.ls Logo

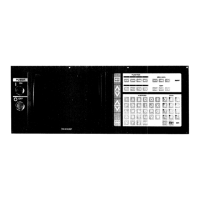
YASKAWA YASNAC 3000G

YASKAWA YASNAC 3000G
203 pages
To Next Page IconTo Next Page
To Previous Page IconTo Previous Page
Loading...
QKKI
m
01
Di
D
S
O*
03
0?
D
I
DO
n
r#
n
n
L*.
v
u
*-
ALARM-'
COO
c
NUMBER
n
n
u
u
I
o
L
STATUS
J
COO*
START
•Amity
ADDRESS
o
G?
Z
4
/
N
G1
«
R
7
8
9
AS
G
D
M
p
Q
F
S
T
*
4
5
6
1
2
3
FUNCTION
ADDRESS
NUMBER
RESET
iHMnlHHM
m
EH
0
CAN
7S~
-X
r
CURRENT
POSITION
-10MM
COMMANDED
TERMINAL
POSITION
OFFSET
Fig.
4.
3.
7.
2
Display
of
tool
offset
value
for
tool
position
offset
A
To
display
the
current
tool
offset
value
to
which
tool
position
offset
A
is
functioning,
proceed
as
follows.
3.
Select
the
address
character
of
the
axis
with
the
ADDRESS
key
when
displaying
the
param¬
eters
requiring
axes
selection.
The
parameter
data
will
be
displayed
as
it
is
entered
on
the
universal
display.
If
the
ad¬
dress
character
except
for
axis
X,
Y,
Z,
or
4
is
selected
for
parameters
requiring
axis
selection,
the
display
will
be
blank.
Depress
the
OFS
key
and
set
NUMBER
at
l.
00.
Select
the
address
character
X,
Y,
Z
or
4.
Then
the
display
shows
the
current
offset
value
for
the
selected
axis.
The
value
dis¬
played
means
the
departure
of
the
tool
from
the
commanded
position
without
being
off¬
set.
2.
4.3.9
WRITING
PARAMETERS
Optimum
data
of
parameters
have
been
set
ac¬
cording
to
machine
performance
and
applications.
Parameters
are
interlocked
by
setting
SYSTEM
NO.
switch
at
"0"
so
that
the
data
are
not
acci¬
dentally
erased
or
changed.
Where
it
is
desired
to
modify
the
data
of
parameters,
consult
the
ma¬
chine
tool
builder.
Procedure
is
as
follows.
4.3.8
PARAMETER
DISPLAY
Parameters
stored
in
memory
are
to
determine
the
operating
conditions
such
as
rapid
traverse
rate
and
tape
code.
Parameter
display
can
be
made
in
any
mode
of
operation
using
the
follow¬
ing
procedure.
For
meanings
of
parameters,
see
Table
4.
3.
2
List
of
Parameters.
1.
Set
the
SYSTEM
NO.
switch
at
"1."
2.
Depress
the
PRM
key,
and
it
is
illuminated.
3.
Set
the
parameter
number
using
the
NUMBER
key.
1.
Depress
the
PRM
key,
and
it
lights
up.
2.
Set
the
parameter
number
using
NUMBER
key.
REH1
Efl
07
06
Dt.
n
4
03
07
01
DO
BUFFER
I
U
O
‘-STATUS-’
CODE
*—
ALARM—1
COOL
NUMBER
START
BATTERY
ADDRESS
o
N
Gl
2
4
G2
X
Y
J
R
K
7
8
9
AS
o
-H
9
0
s
T
P
Q
H
O
M
L
4
5
6
1
2
3
FUNCTION
ADDRESS
NUMBER
RESET
HariHffl
Hi
0
CAN
WR
Fig.
4.3.8
-
95
-

Table of Contents

Related product manuals