EasyManua.ls Logo

YASKAWA YASNAC 3000G

YASKAWA YASNAC 3000G
203 pages
To Next Page IconTo Next Page
To Previous Page IconTo Previous Page
Loading...
HlSflBH
IH
D?
O*.
D‘.
Di
01
O?
D
l
DO
L
**CL
»«1A
3
5
000
«*o»
o
o
o
L-AL
A
AM
-*
CODE
NUWBf*
J
coot
START
*PU'
NC
CAAOA
ALA
A
M
AATTCAV
ADDRESS
o
o
o
SjPl
1
AS
Gi
(.2
/
n
i
u
I
I
s
0
*
ills
r\
RESET
NUMBER
APORESS
FUNCTION
!
=ia
H
Bala
:
:
\
1
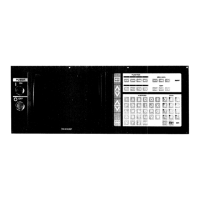
Fig.
4.5.3
4.5.3
STORING
PART
PROGRAM
FROM
MD1+
7.
Depress
the
WR
key
The
data
just
keyed
in
is
registered
as
a
new
command
data,
and
flickering
stops.
BUFFER
lamp
lights
up.
Set
the
MODE
SELECT
switch
to
EDT.
1.
2.
Depress
the
RESET
key.
Memory
is
rewound,
and
LABEL
SKIP
lamp
is
on.
to
store
the
programs
from
the
first
address
in
the
memory.
8.
Repeat
steps
4
through
6
until
a
block
of
data
has
been
written.
It
indicates
that
the
control
is
ready
9.
Check
the
input
data,
referring
to
4.3.1
Display
of
Command
Data.
Then
depress
the
EOB
key.
The
data
of
a
block
in
buffer
register
is
stored
into
memory,
and
BUFFER
lamp
goes
out.
Depress
the
COM
key,
and
it
lights
up.
3.
Set
the
NUMBER
at
other
than
"00."
With
the
NUMBER
set
at
"00"
in
the
EDT
mode,
free
address
setting
is
not
allowed
because
the
addresses
already
stored
in
the
buffer
register
are
scanned.
4.
Repeat
steps
4
through
9
to
complete
the
part
program
storage.
Store
the
block
in¬
cluding
"M02"
or
"M30"
command
as
the
final
block
of
the
part
program.
10.
Select
the
address
character
using
the
AD¬
DRESS
key.
5.
Check
the
program
stored
after
depressing
the
RESET
key.
See
4.6.1
Display
of
Stored
Part
Program.
11.
6.
Key
in
the
data
through
the
DATA
keyboard.
The
display
shows
the
data
as
it
is
entered,
flickering
the
last
significant
digit.
To
cor¬
rect
the
data
just
keyed
in,
depress
the
CAN
key,
then
key
in
the
correct
data.
12.
Correct
the
data,
if
necessary,
referring
to
4.
6.
2
Editing
Stored
Part
Program.
Depress
the
RESET
key
again
to
rewind
memory.
LABEL
SKIP
lamp
will
light
up.
13.
3
<
P
V
-
107
-

Table of Contents

Related product manuals