EasyManuals Logo

Yealink VC Series Administrator's Guide

Yealink VC Series
180 pages
To Next Page IconTo Next Page
To Previous Page IconTo Previous Page
Page #30 background imageLoading...
Page #30 background image
Administrators Guide for Yealink Video Conferencing Systems
20
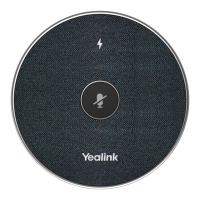
2. Lock the L-bracket with the M3× 8 screws.
3. Move the setscrews on the L-bracket to the left holes.
4. Lock the L-bracket to the wall with T4× 30 screws.
5. Connect one end of the DVI cable to the camera and put the other end of the cable
through the L-bracket.
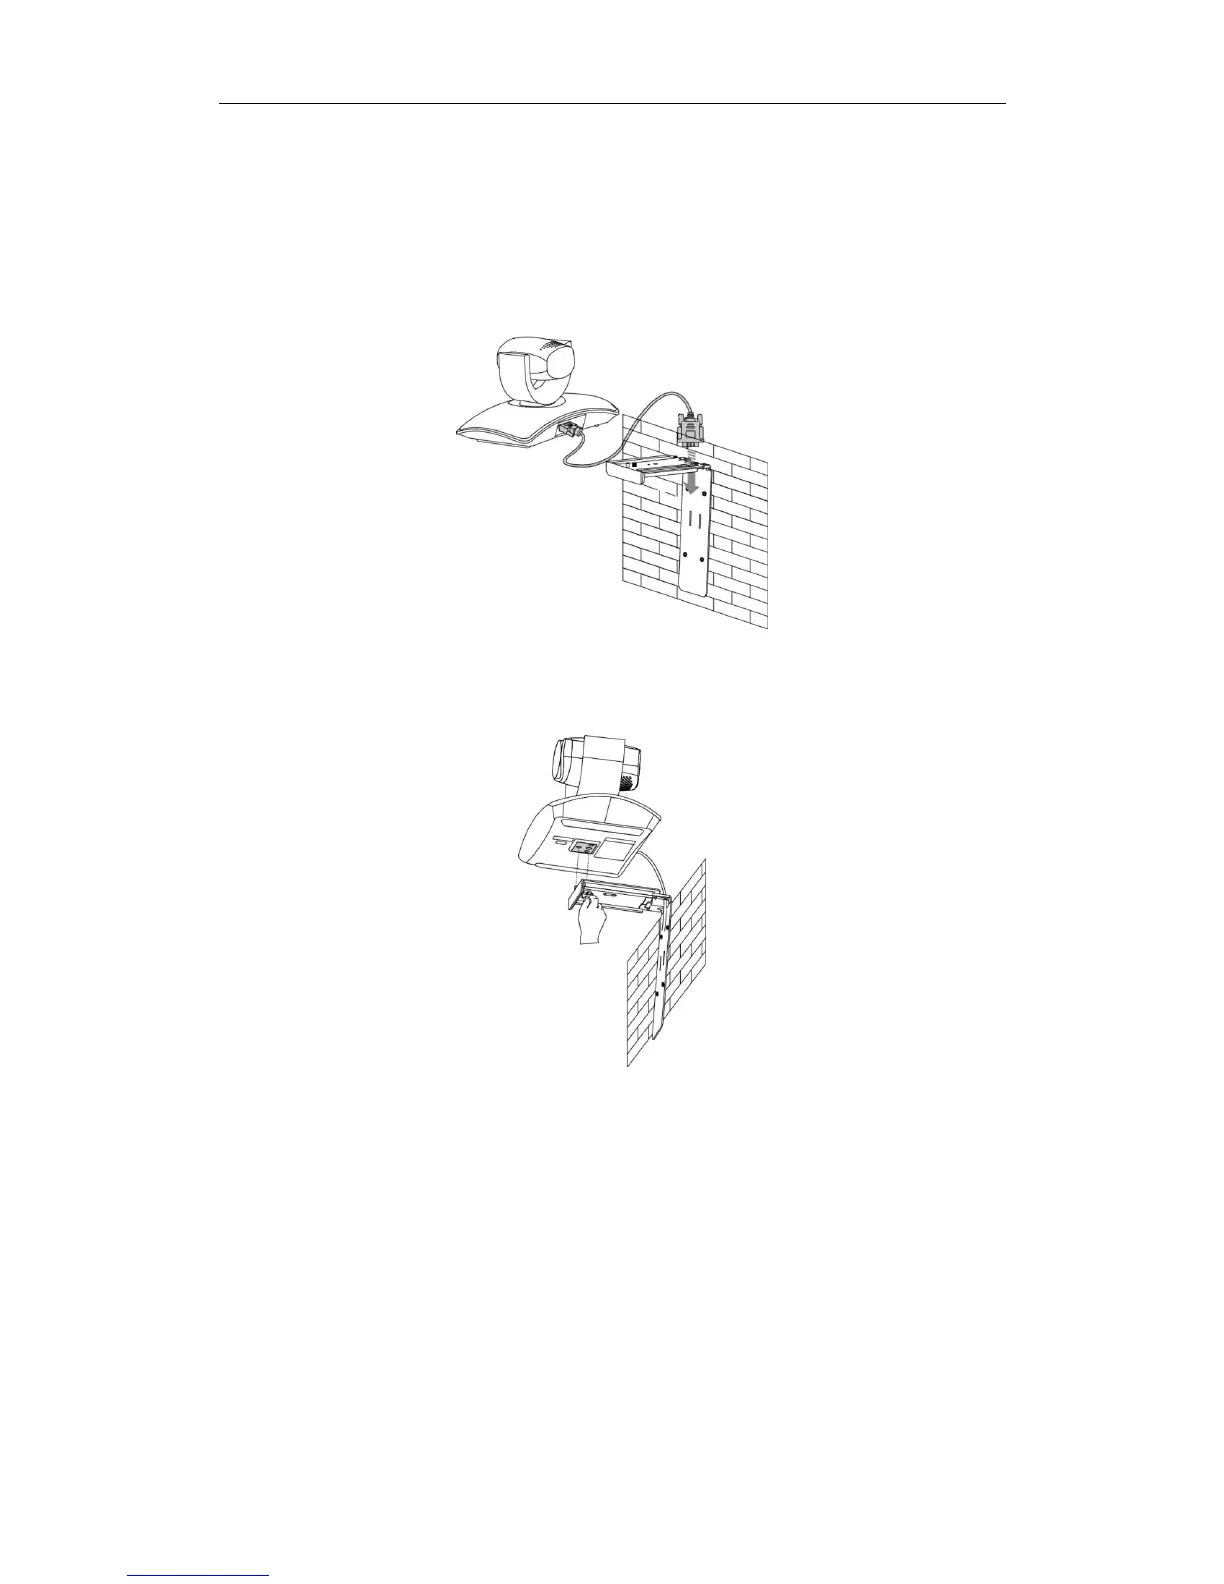
6. Lock the camera to the L-bracket, and then connect the other end of the DVI cable
to the VC400/VC120 codec.

Table of Contents

Other manuals for Yealink VC Series

Questions and Answers:

Question and Answer IconNeed help?

Do you have a question about the Yealink VC Series and is the answer not in the manual?

Yealink VC Series Specifications

General IconGeneral
BrandYealink
ModelVC Series
CategoryConference System
LanguageEnglish

Related product manuals