IM 12B07D02-01E
3-12 Installation and wiring
Extension cable may be purchased in bulk quantities, cut to length. Then it is necessary to terminate the
cable as shown below.
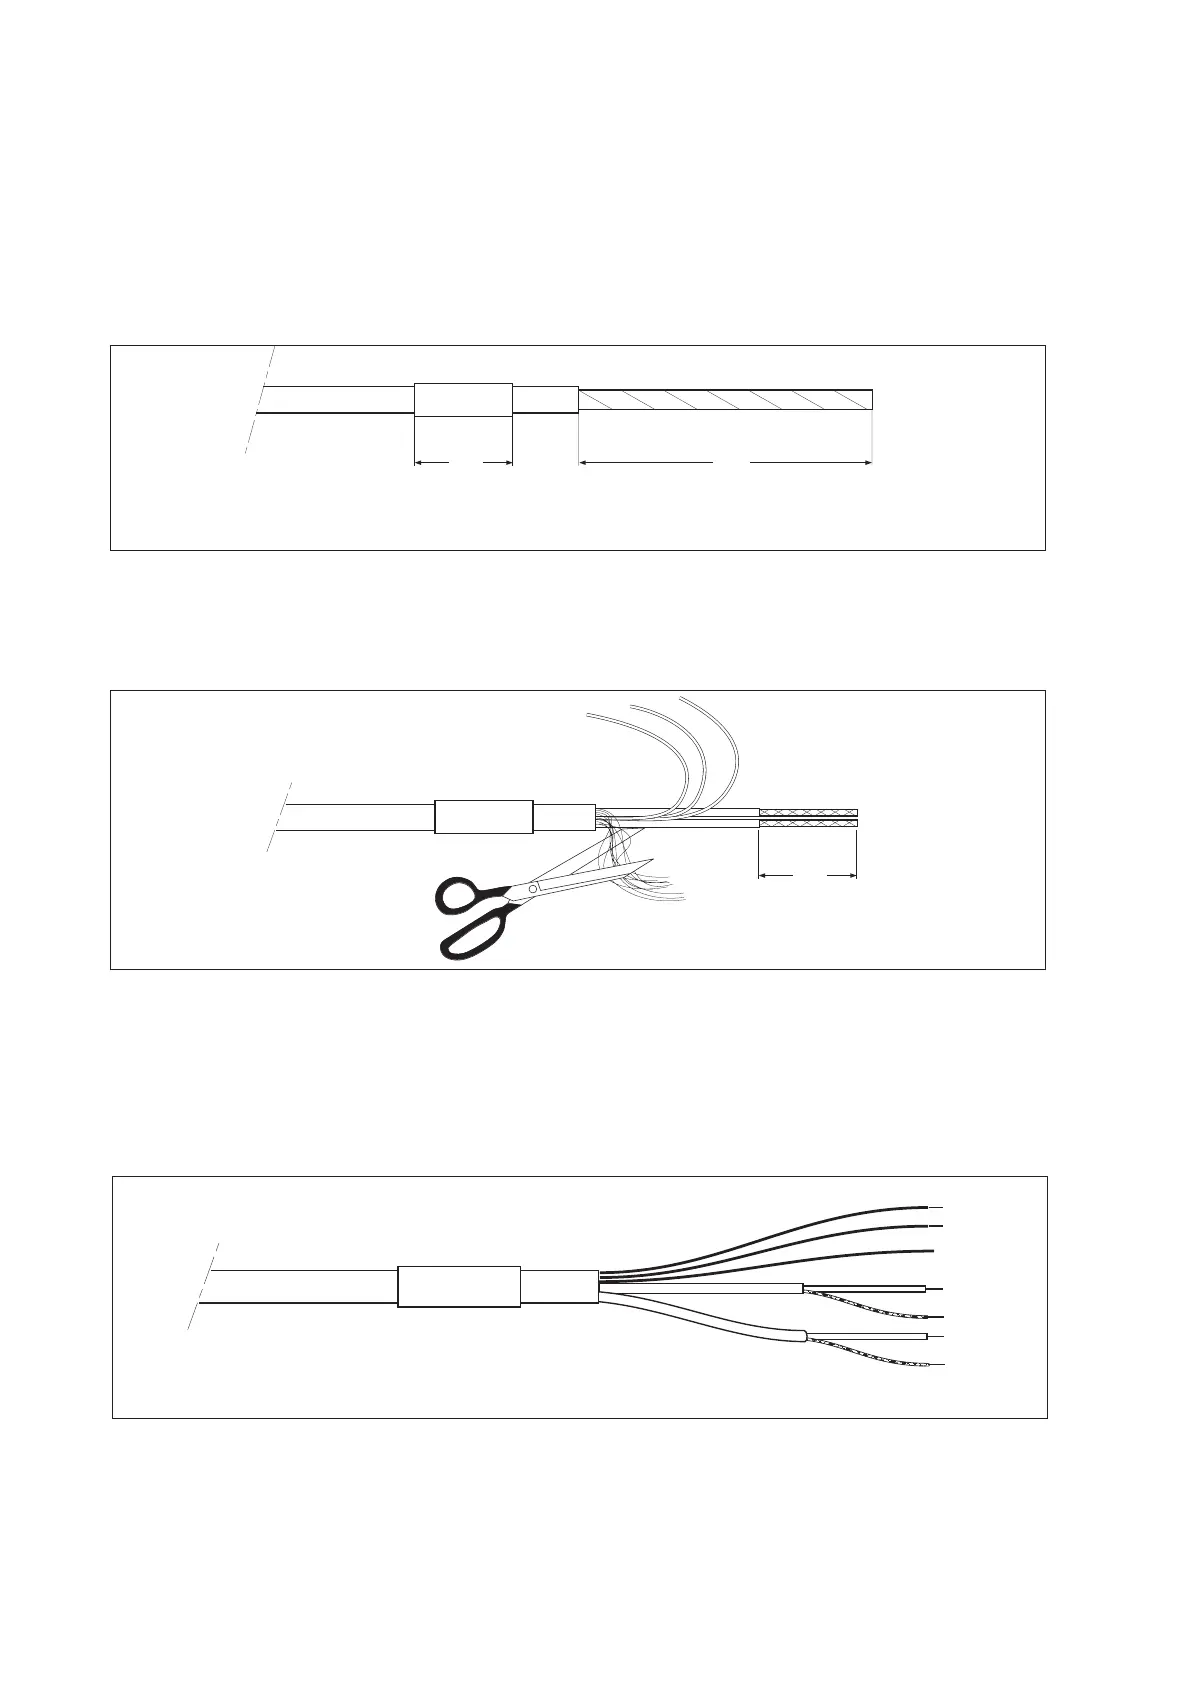
Termination procedure for WF10 cable.
1. Slide 3 cm of heat shrink tube (9 x 1.5) over the cable end to be terminated.
2. Strip 9 cm of the outer (black) insulating material, taking care not to cut or damage internal cores.
3 cm
heat shrink
9 cm
remove insulation
Fig. 3-12a.
3. Remove loose copper screening, and cut off the cotton packing threads as short as possible.
4. Strip insulation from the last 3 cm of the brown, and the white coaxial cores.
3 cm
cotton threads
Fig. 3-12b.
5. Extract the coaxial cores from the braid, and trim off the black (low-noise) screening material as short
as possible.
6. Insulate the overall screen and the 2 coaxial screens with suitable plastic tubing.
7. Strip and terminate all ends with suitable (crimp) terminals and identify with numbers as shown.
11
12
17
15
16
13
14
Fig. 3-12c.
8. Finally shrink the overall heat shrink tube into position.

 Loading...