43
IM 01B08B02-01EN
Installation and Wiring
Installation and Wiring
Mounting Method
Mounting the Instrument Main Unit
Provide an instrumented panel steel sheet of 2.3 to 25 mm thickness.
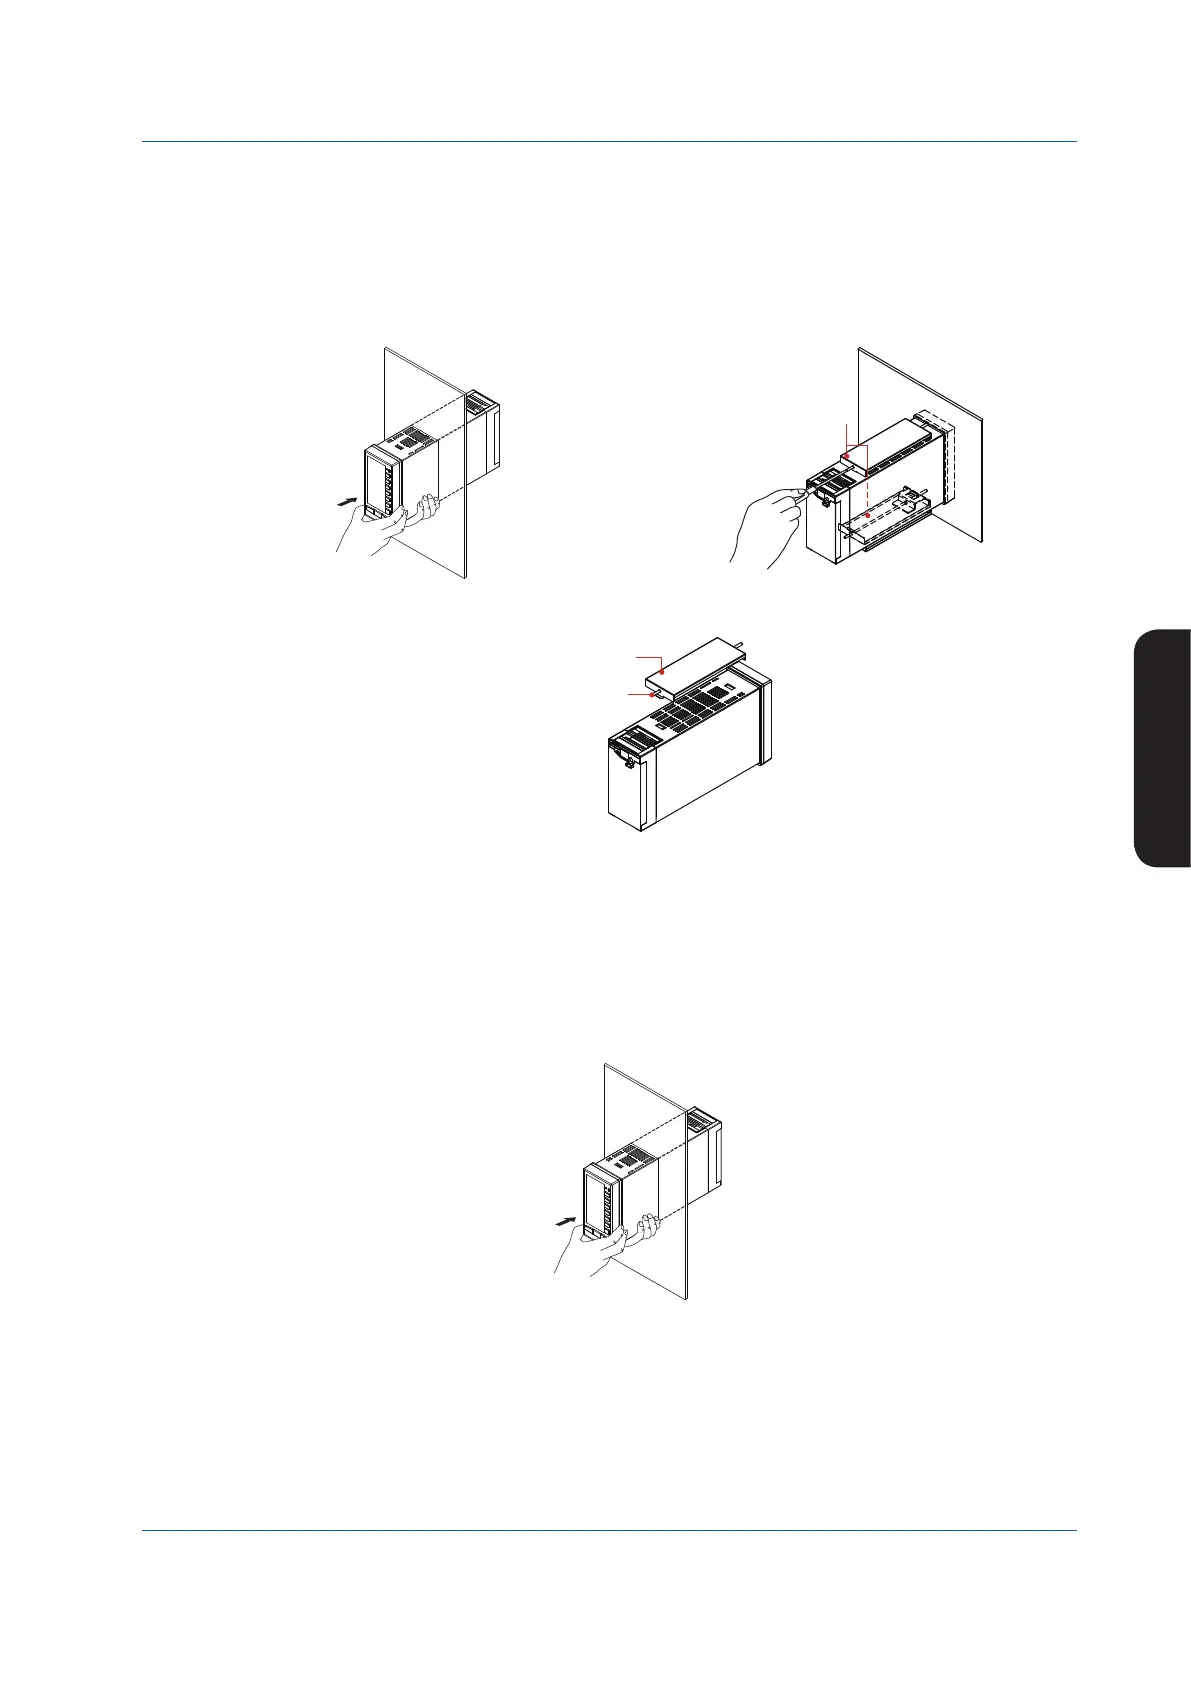
(1) For mounting single unit
1. Using a screwdriver, loosen the screws of the two provided metal clamps in advance.
2. Insert the main unit of the instrument from the front side of the instrumented panel.
3. Install one of the metal clamps on top of the main unit and tighten the screw into the rear face of the panel. Repeat the
procedure with the second clamp at the bottom of the unit.
Figure 9.1
Metal clamps
Figure 9.2
To remove the instrument from the panel, reverse the above procedure.
Metal clamps
Figure 9.3
● Tightenthescrewswithappropriatetighteningtorquewithin0.3-0.6N•m.Otherwiseitmaycausethecasedeformationorthe
bracket damage.
● Ensurethatneithertoolsnorforeignmatterentertheinsideoftheinstrumentthroughtheholesforfittingthemetalclamps.
● Mountingattitude:Upto75degreesabovethehorizontal.Nodownwardtitlingallowed.
(2)Formountingunitsside-by-side
1. According to the arrangement order, mount the other main units side by side in the panel, keeping them in close contact
with each other.
2. Mount the individual controllers as above in item (1).
Figure 9.4
 Loading...