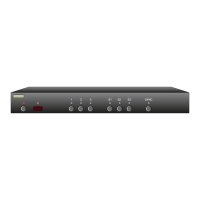
Control Functions
If you ar e us ing t he re ar pa ne l IR ja ck , you m ight want t o disable t he
IR sens or s to prevent us e of the re mo te control.
Or if you h ave a househo ld with you ng curi ou s finge rs that l ik es
play ing w it h buttons, you al so have the c apabili ty of d isablin g the
fro nt pane l switche s an d onl y operating t he MAS7.1 w ith a rem ot e.
To enable / disa bl e the f ro nt p anel sw it ches, and o th er control
funct ions...
Step 1: Enter the Setup Mode
Th e MA S7.1 is p laced i nt o the set up mode by pr es sing an d
holding t he Po wer bu tton for ab ou t 4 secon ds .
Step 2: Enter the Enable / Disable control state
Wh ile in th e set up mode, press 'S 1' to enter t he Enab le /Dis-
able cont rol st at e. The c urrent st at us will b e displ ayed u s-
ing the f ro nt panel LE Ds.
A lit L ED indica te s an opti on is e na bl ed, and a n unlit L ED
indicates d is abled.
Step 3: Enable or Disable control functions
Us e '1' to en able/ di sable t he IR S en sor hardware.
Us e '2' to en able/ di sable t he IR Jac k hardware.
Us e '3' to en able/ di sable t he fro nt pane l buttons.
Us e 'S1' to e nable /d isable IR control.
Us e 'S2' to e nable /d isable 12 V On/Off control.
Note 1: Th e IR Jack a nd 12V On /Of f co nt ro l function s are mutu -
ally exc lu sive (The y us e the s ame jac k! ). En ab li ng 12 V
On/Of f co nt ro l wil l disable t he IR J ac k hardware. En-
abling IR Jack h ardware wi ll di sa ble 12V O n/O ff control.
Note 2: Wh en disa bl ing the I R Jack an d IR Se nsor, t he hard-
wa re i s dis ab led. Wh ereas 'IR Control' en ables /d isables
whether t he MAS7 .1 responds t o IR si gn als received. If
the IR Sensor or IR Jac k are enabl ed , and 'IR Control'
disable d, I R signa ls can st ill be re ad through th e RS- 232
por t, while be ing ign or ed by the M AS 7.1.
Note 3: Disab li ng the fr on t panel b ut to ns do es not di sa ble t he
ability to enter t he Setu p Modes.
•
•
•
•
•
•
•
•
Step 3: Enable or Disable control functions