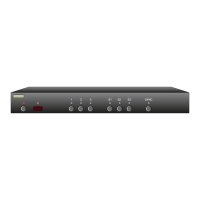
Primary / Secondary Mapping
Th e MA S7.1 ca n be conf ig ured as a s ingle M ul ti- chann el A ud io /
Digital Audio / HDMI s witch, or i t can b e used as two in de pendent
switches, by si mp ly pressi ng the SY NC button.
Wh en the SY NC LED is lit, a ll channe ls of a ud io and HD MI signal s
switch at t he same t ime, when t he SYNC L ED is off, t he sign al paths
can be sw itched in de pende nt ly of e ac h other.
By de fa ul t, wh en the SYNC L ED is o ff, the Prim ar y button s (1 -3) w il l
switch th e 5.1 mul ti - ch annel a udio path s, w hile th e Secon da r y but-
to ns (S1- S3 ) will sw itch th e L & R s te re o audio c ha nnels, th e digital
audio c ha nnel, and t he HDMI c hanne l.
Th e fo llowing s ho ws h ow to cha ng e this de fault b eh av ior, a llowing
yo u to assi gn w hate ve r chann el s you'd lik e to the Prim ar y / Se co nd -
ary button s.
Step 1: Place the MAS7.1 into the Setup Mode
Th e MA S7.1 is p laced i nt o the set up mode by pr es sing an d
holding t he Po wer bu tton for ab ou t 4 secon ds .
Step 2: Enter the Primary / Secondary Mapping Setup Mode
Press th e 'S3' bu tton to e nter t he Primar y / Second ar y Map-
ping Se tup M od e.
Step 3: Select new Primary / Secondary Mappings
A lit L ED indica te s a chann el is m ap pe d to th e Pr im ary
switch, a n unlit L ED indi ca te s it's ma pped to t he Seco nd ar y
switch.
Th e LEDs/ Bu ttons 1,2 ,3 & S1 a re u sed to ma p the M ul ti-
channel Aud io, Stereo Aud io, Digi ta l Au dio and H DMI,
re sp ect iv el y :
' 1' - Multi -ch an nel Audio ( LF,RF,SU B,CE N, LR,RR)
' 2' - Stereo Audio (L ,R)
' 3' - Digital Aud io (Optical a nd Coax)
' S1' - HDMI
Press th e Power bu tt on to save new se ttings an d exi t.
Note: The n ew settin gs are save d in no n-vo latile me mo r y and
are not a ffec ted by a powe r failure.
•
•
•
•
•