Initial Setup...
Make an alog au di o, d ig it al audi o, and H DMI conne ction s as
re qu ired by your pa r ti cular s etup.
If us in g a P C (or oth er seri al controller), c onnec t it to t he
RS-23 2 por t usi ng a stan da rd PC ser ial cab le.
Hard wired IR co nt ro l is al so av ailable u sing th e IR-IN j ack .
Pl ug the po we r module in to the MAS7 .1 , and p lu g the m od -
ule into a st andard A. C. wall recep ta cle. T he standby LE D
will li gh t up.
Selecting an Input...
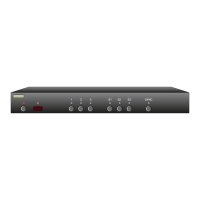
To switch b etween any of the th re e inputs, s im ply press t he
button for th e desired i np ut. I f the MAS 7. 1 is in t he st an db y
mode, it wi ll turn o n. Th e MA S7.1 wi ll then s witch to th e se-
lec te d input, an d the a ssociated L ED s wil l light to in dicate
this.
To place th e MA S7.1 ba ck into the s tandby mo de, press an d
re le ase t he Powe r Tog gle b ut to n. Th e chann el LEDs w il l all
go blan k, an d th e sta nd by L ED will l ight up. Press t he Power
To ggle bu tt on agai n to re -select th e pr ev iously se lec te d
input.
Synchronizing Primary and Secondary Switches...
Wh en the SY NC LED is lit, t he prim ar y and se co nd ary sele c-
tions w il l switch at the sa me time. To allow t he prim ar y and
secondary se lec ti ons to be switched i ndepe nd en tly, press
the SYNC bu tton to tog gl e the S YN C LED.
By de fa ul t, th e prima r y switch cont rols t he 5. 1 audio
setting s.
By de fa ul t, th e secondary sw itch controls t he L & R stereo
channel s, t he digita l audio c ha nnel, and t he HDMI c hanne l.
Yo u can c ha nge the d efault be havior. The c hanne ls con-
tro lled by t he pr im ar y and se co ndary sw it ch es are conf ig u-
ra ble and d escri be d later i n this ma nu al. See t he se ction o n
"Pr imary / Secondary Ma pp ings".
For more i nfor ma tion on u sing th e Pr imary an d Seconda r y
buttons s ee the se cti on : "An Overview o f the MAS 7. 1".
•
•
•
•
•
•
•
•
•
•
•
Selecting an Input: Press numbered buttons to select an input.