Changing Switching Delays
Th e MA S7.1 al lo ws adjust in g the s wi tc hing de lay times, for Mu lti-
channel Aud io, Stereo Aud io, Digi ta l Au dio and H DMI, al l indep en -
dent of e ac h oth er.
To adjust t he Audio / Video s witchin g delays. ..
Step 1: Place the MAS7.1 into the Setup Mode
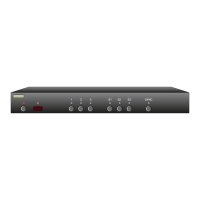
Th e MA S7.1 is p laced i nt o the set up mode by pr es sing an d
holding t he Po wer bu tton for ab ou t 4 secon ds .
Step 2: Enter the Switching Delay Setup Mode
Press th e 'S2' bu tton to e nter t he Switch in g Del ay S etup
Mode.
Th e LEDs in dicate th e mute delay, i f there are n o LEDs li t,
then th er e is no d el ay.
Wh en SYNC L ED is l it , then LE Ds 1, 2 a nd 3 in dicate th e
current H DM I delay, and S 1, S2 a nd S3, in di cate the Di gi tal
Au di o mute de la y.
Wh en SYNC L ED is off, t hen LED s 1, 2 an d 3 indic at e the cur -
re nt Multi- cha nn el Audio de la y, a nd S1 , S2 and S3 , ind ic at e
the Stereo Audi o delay.
Th e delay t im es are represented by t he nu mb er and po si-
tion of t he lit LE Ds, as follows:
N o LEDs li t = 0 sec de la y.
• One lef t jus ti fied LE D = 20ms de lay.
•• Two le ft ju stifi ed L EDs = 50 m s delay.
••• Three le ft ju st ified L ED s = 100ms d elay.
•• Two righ t ju stifi ed LEDs = 200ms d elay.
• One r ig ht justif ie d LED = 500ms d elay.
Step 3: Adjust Switching Delay Times
Th e 'SYNC' bu tton togg le s bet we en the HD MI /Digita l Au di o
delay set ti ngs and t he Mu lt i- c ha nnel/ St ereo A ud io delay
setting s.
Th e '1' a nd 'S1' b ut to ns de crea se delay ti me s, and th e '3'
and 'S3 ' buttons i nc re ase del ay t imes.
Press th e Power bu tt on to save new se ttings an d exi t.
Note: The n ew settin gs are save d in no n-vo latile me mo r y and
are not a ffec ted by a powe r failure.
•
•
•
•
•
•
•
•
•