12000 Pecos Street, Suite 290, Westminster, CO 80234 | www.3xlogic.com | (877) 3XLOGIC
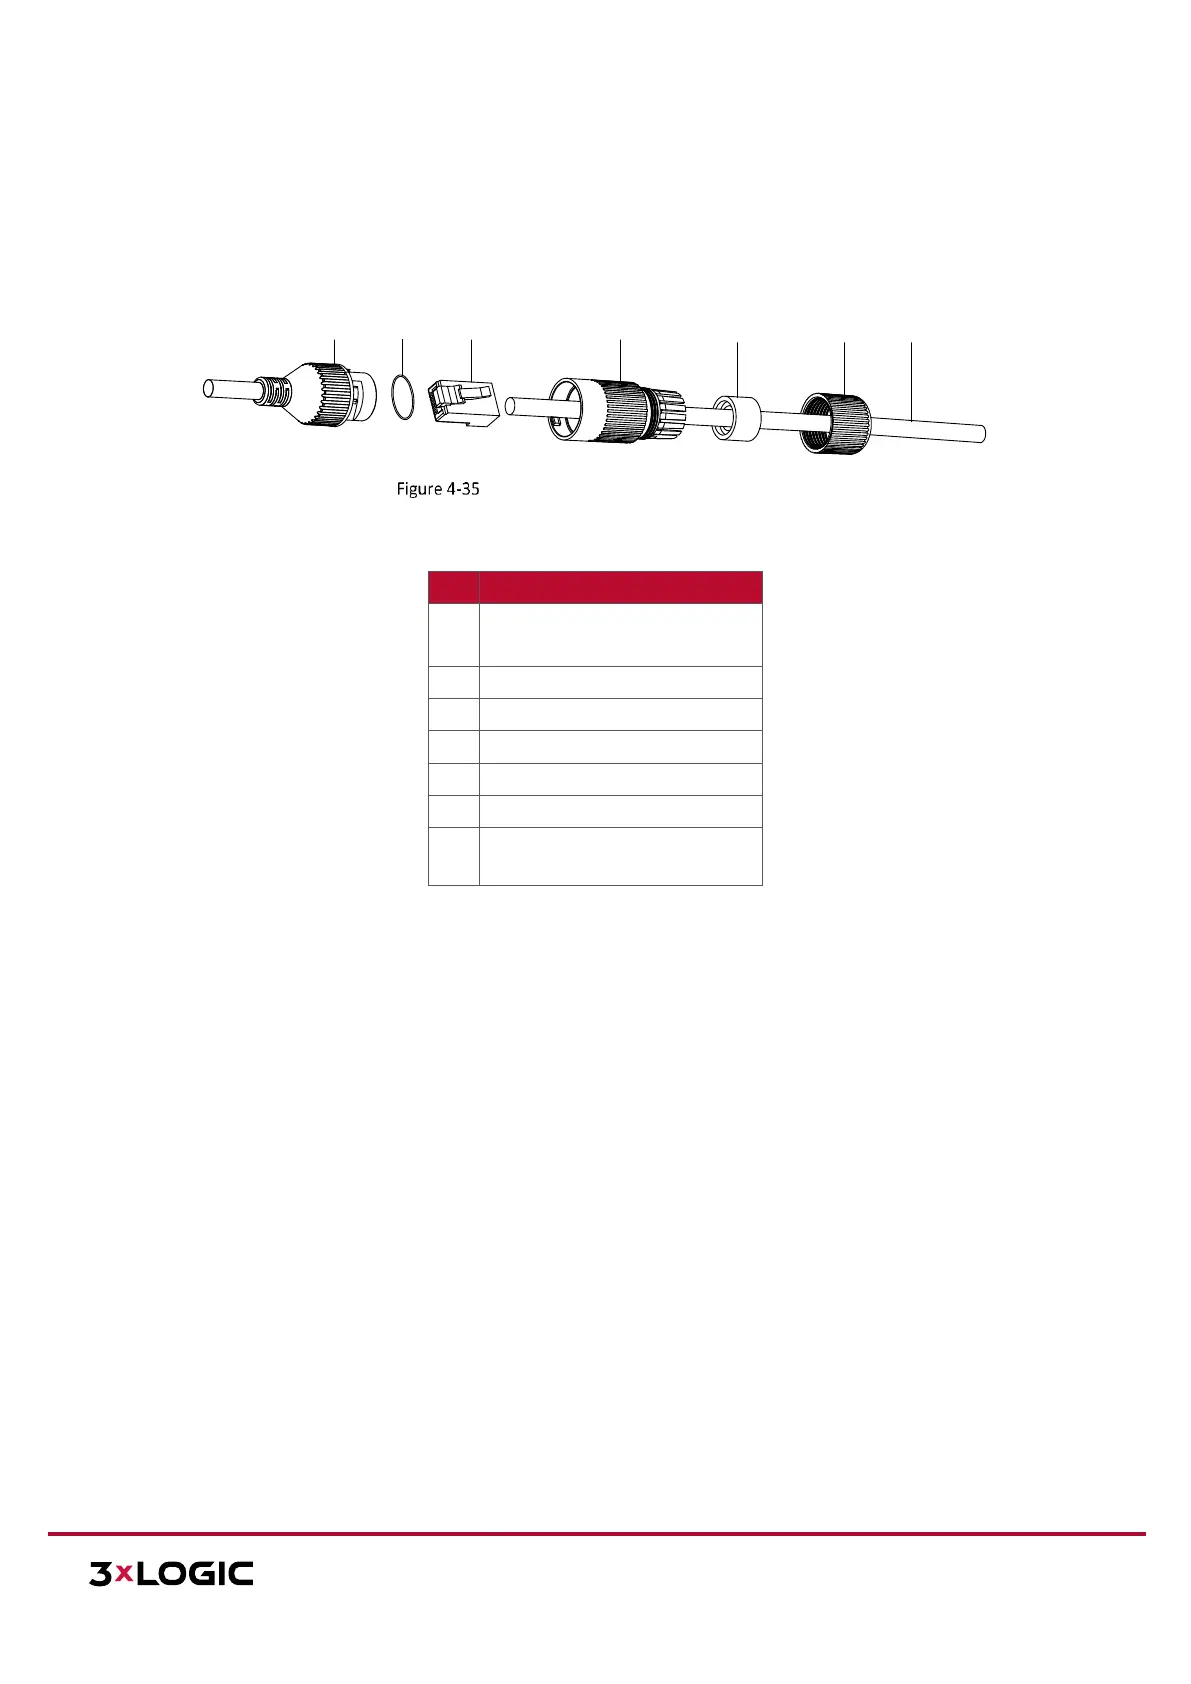
(OPTIONAL) INSTALLATION OF NETWORK CABLE WATER-PROOF JACKET
Purpose:
If the camera is installed outdoors, you can install a waterproofing jacket for the network cable after the
camera is secured to the installation surface.
Steps:
1. Feed the plugless network cable ⑦ through the lock nut ⑥, waterproof rubber gasket ⑤ (the
rubber gasket inset ridge must face the waterproof endcap), and the waterproof endcap ④ in order.
2. Crimp an RJ-45 network plug ③onto the end of the cable, taking care to insert the twisted pairs of
wires in correct order.
3. Place the O-type gasket ② onto the end of the camera’s network interface socket ①.
4. Insert the network plug ③ into the camera’s network interface socket①.
5. Insert the waterproof rubber gasket ⑤ into the waterproof endcap ④, and secure lock nut ⑥ with
the waterproof endcap ④.
6. Align the snap on the waterproof endcap ④ with the notch on the camera’s network interface socket
①, and then secure the waterproof endcap ④ to the camera’s network interface socket ① to finish
installation.
 Loading...