12000 Pecos Street, Suite 290, Westminster, CO 80234 | www.3xlogic.com | (877) 3XLOGIC
a. Route the cables through the junction box and the cable hole if there is a cable hole drilled on the
ceiling.
b. Route the cables through the side outlet of the junction box to the surface of the ceiling if there is
no cable hole drilled on the ceiling.
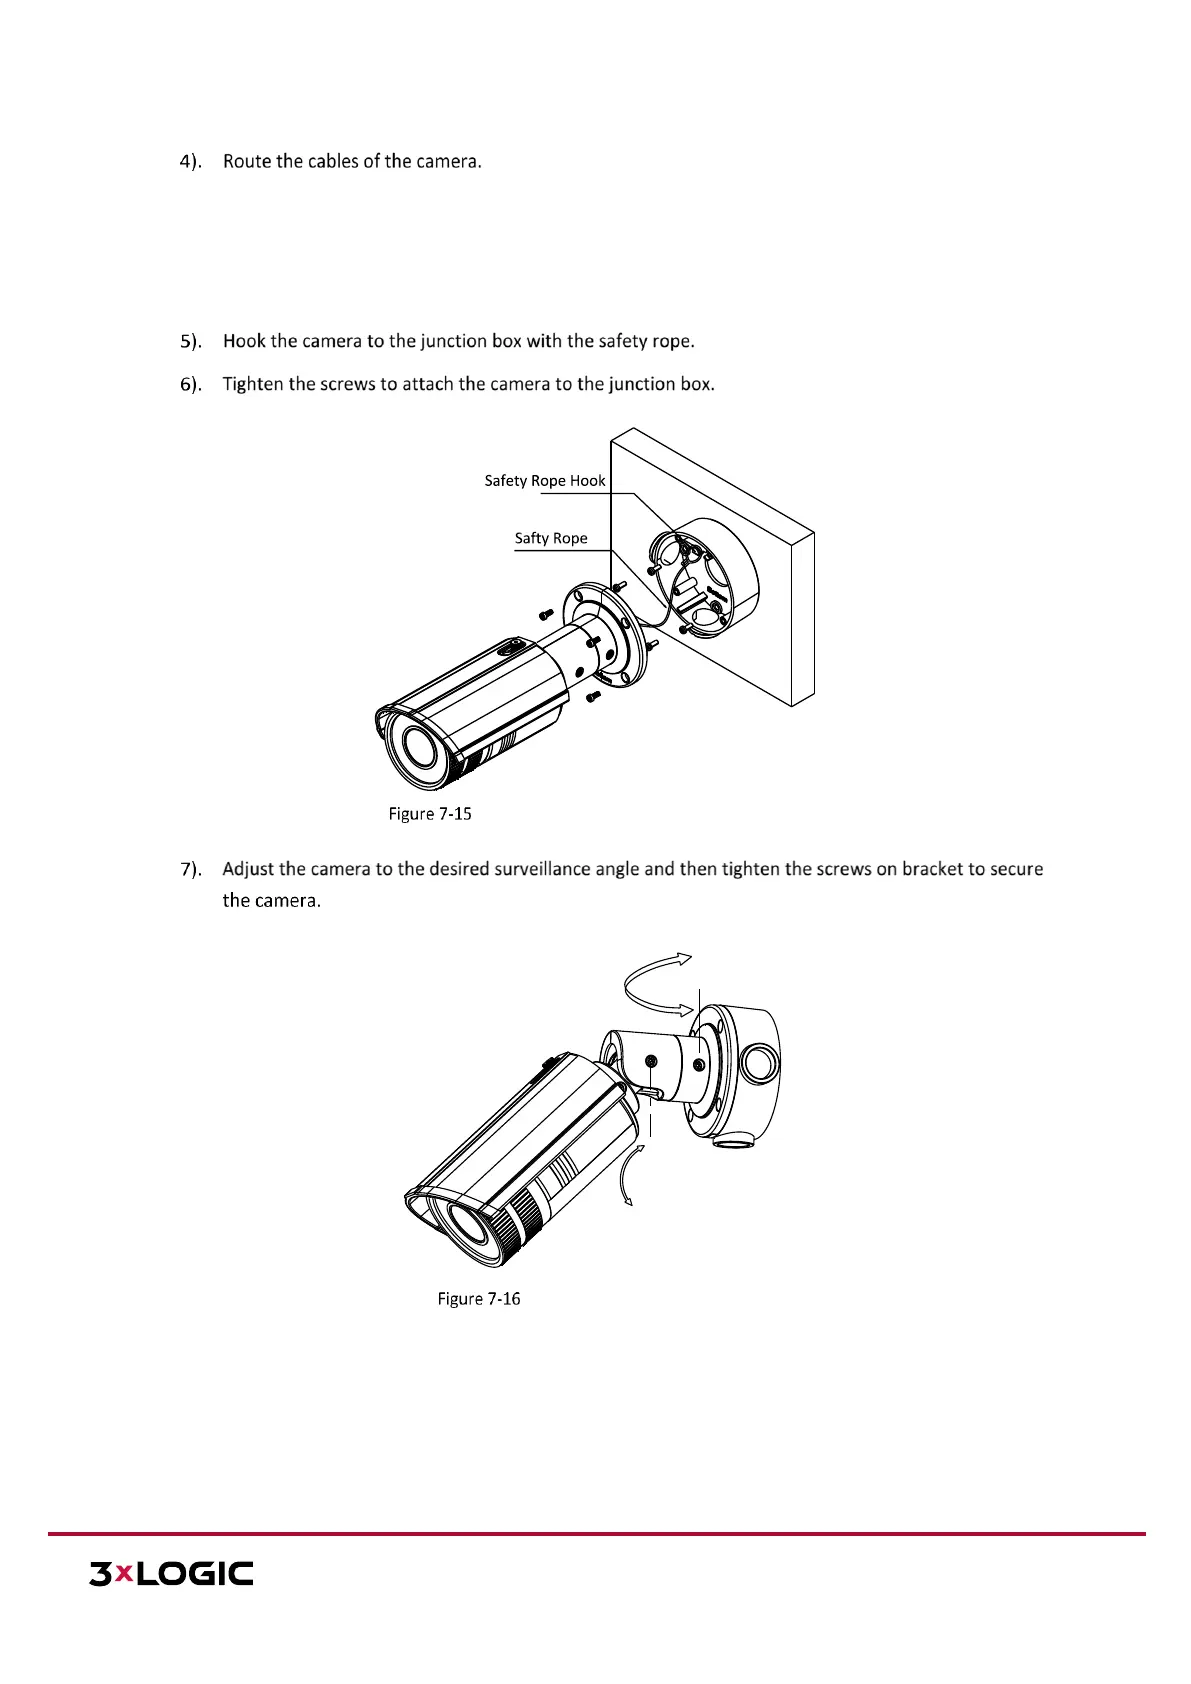
Attach the Camera to the Junction Box
Adjust Monitoring Angle\
NOTE: Please loosen the screws slightly until you can adjust the camera. Do not completely remove the screws
from the bracket.
NOTE: After the monitoring angle is adjusted, you may need to install a water-proof rubber case (purchased
separately) to the foldable position of the bracket if a water-proof application is desired.
 Loading...