Combustion Oxygen Monitor
Endura AZ20 Series Probe 5 Dismantling and Reassembly – Probe
26 IM/AZ20M–EN Rev. B
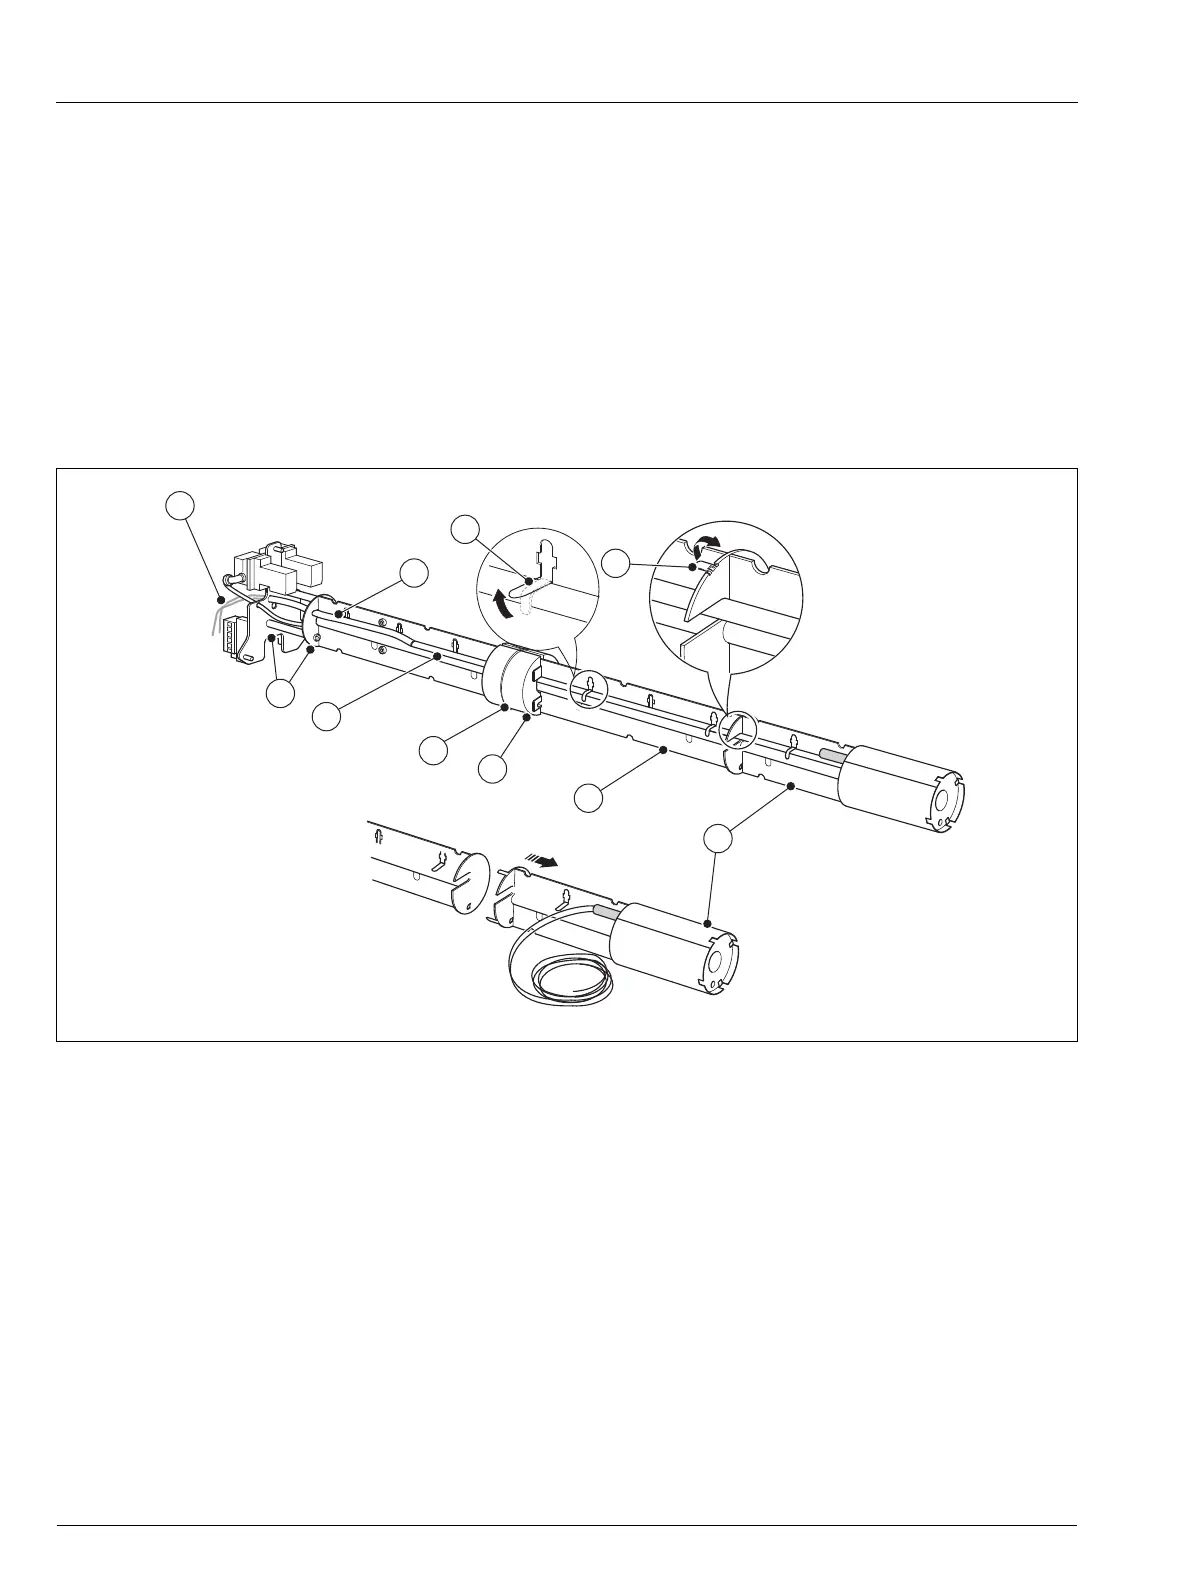
5.9.2 Dismantling the Heater Assembly
Referring to Fig. 5.11:
1. Remove the red tube
A and pull the sleeved heater wires
B through the internal structure mounting plate / end
plate
C.
2. Remove and discard the wire
D holding the 2 thermal
barrier sections
E together and retain the barrier
sections for re-assembly.
3. Fold the insulator retaining tabs F back just enough to
free the insulators along the complete length of the inner
assembly.
4. Remove each insulator
G by sliding it over the heater
wires.
5. Release the heater assembly H from the inner assembly
support column(s) I by folding the 4 tabs J on the
heater assembly end plate back.
6. Separate the heater assembly H from the inner support
sections
I.
7. Discard the heater assembly
H and insulators G.
8. Proceed to Section 5.9.3, page 27 to assemble the new
heater assembly.
Fig. 5.11 Dismantling the Existing Heater Assembly
*0.5 m (1.64 ft.) Probe shown,
1.0 m (3.28 ft.) probes and longer have multiple columns

 Loading...