Combustion Oxygen Monitor
Endura AZ20 Series Probe 5 Dismantling and Reassembly – Probe
28 IM/AZ20M–EN Rev. B
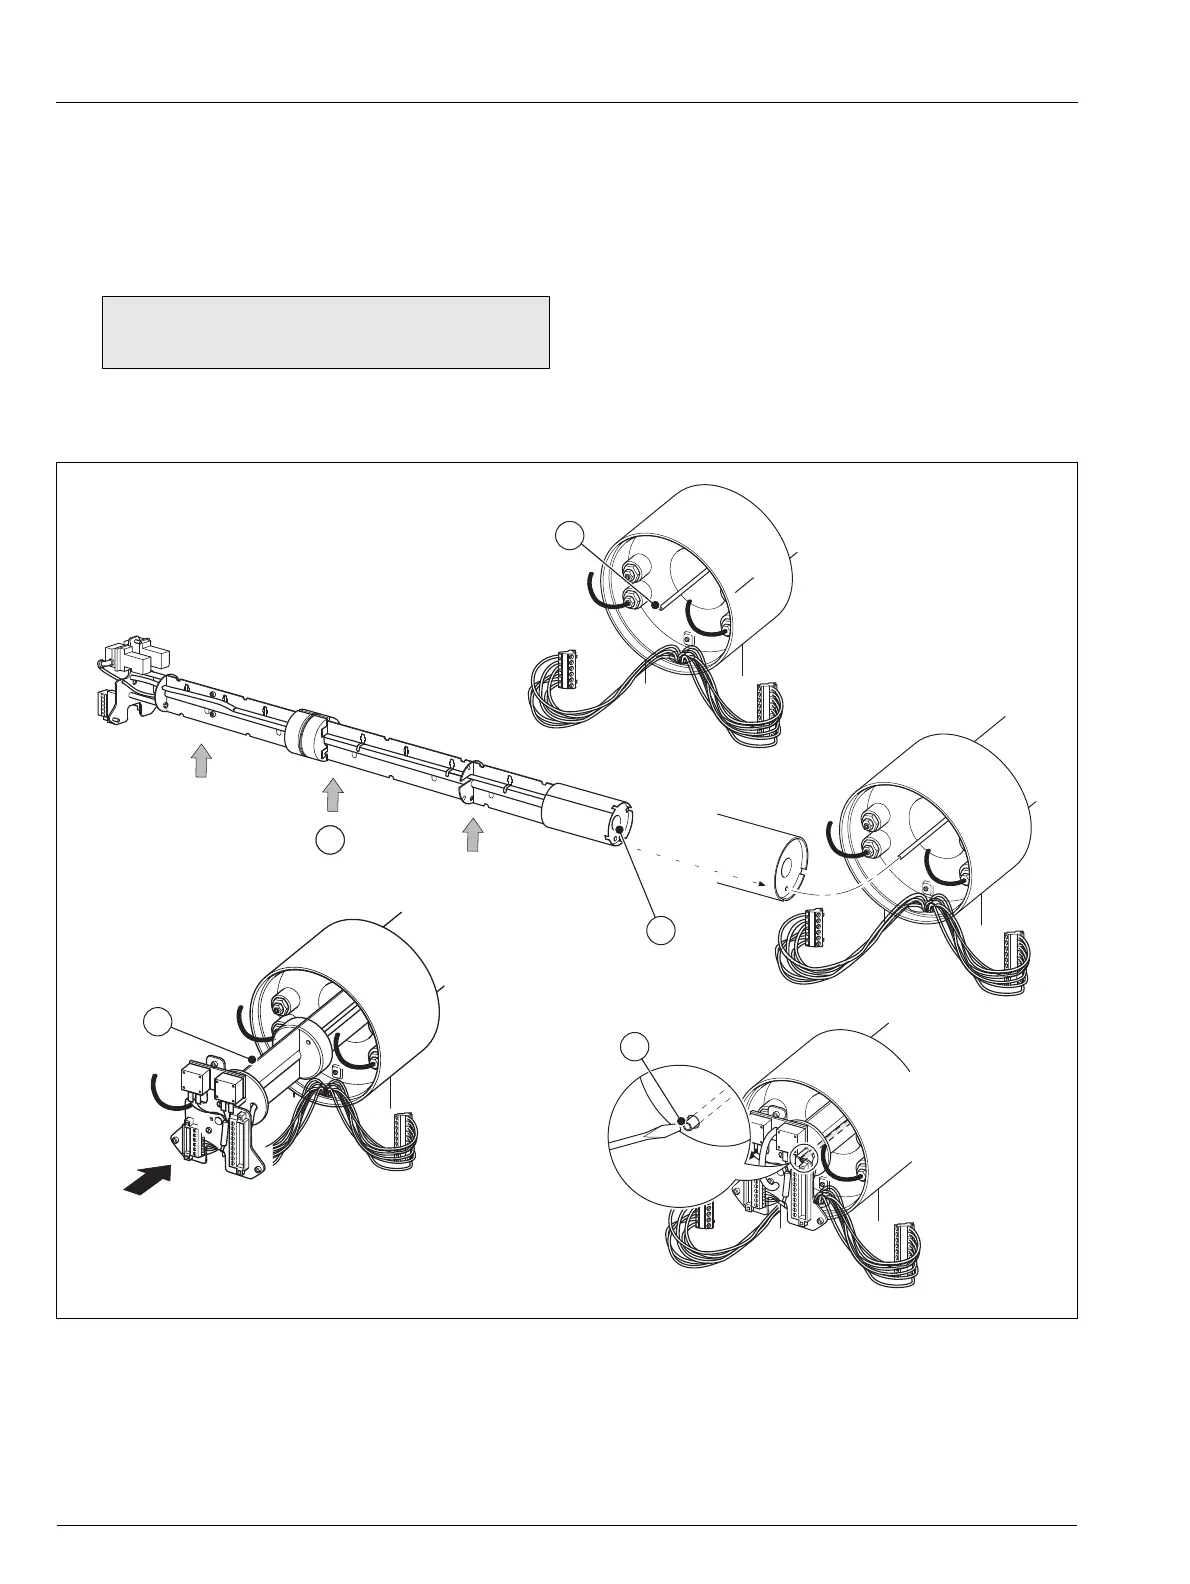
5.9.4 Fitting the New Heater Assembly
Referring to Fig. 5.13:
1. Ensure the test gas tube
A is clean and free of
blockages. If necessary, clear it using an airline.
2. If the cell was removed, replace / renew the cell – refer to
Section 5.7.3, page 18.
3. Ensure the inner assembly B is supported along its entire
length and position the heater test gas hole C over the
test gas tube
A in the probe body.
Keep the assembly straight while positioning the oven in
the probe body and ensure the test gas hole is not
blocked with oven insulation. To clear blockages, use an
air line from the cell end.
4. Carefully slide the inner assembly B into the probe body
until the end of the test gas tube D is visible through the
internal structure mounting plate.
Caution. Do not attempt to replace the inner
assembly unless a cell is already fitted.
Fig. 5.13 Fitting the Inner Assembly into the Probe Body

 Loading...