4 Repair
4.4.3. Replacement of complete lower arm
3HAC026660-001 Revision: C140
© Copyright 2006-2008 ABB. All rights reserved.
Removal, lower arm
The procedure below details how to remove the complete lower arm.
Sealing ring (V-ring) 3HAB 3732-13 Replace if damaged.
Isopropanol Used to clean the mating surfaces.
Locking liquid Loctite 574
Standard toolkit The contents are defined in section
Standard toolkit in the Product
manual, reference information!
Other tools and procedures
may be required. See
references to these
procedures in the step-by-
step instructions below.
These procedures include references
to the tools required.
Equipment Spare part no. Note
Action Note/Illustration
1.
DANGER!
Turn off all electric power, hydraulic and pneumatic
pressure supplies to the robot!
2. Remove the complete upper arm. Detailed in section Removal,
complete upper arm on page 130.
3. Remove the VK-covers.
CAUTION!
Be careful not to damage the cabling and cable
bracket inside the lower arm when removing the
middle VK-cover!
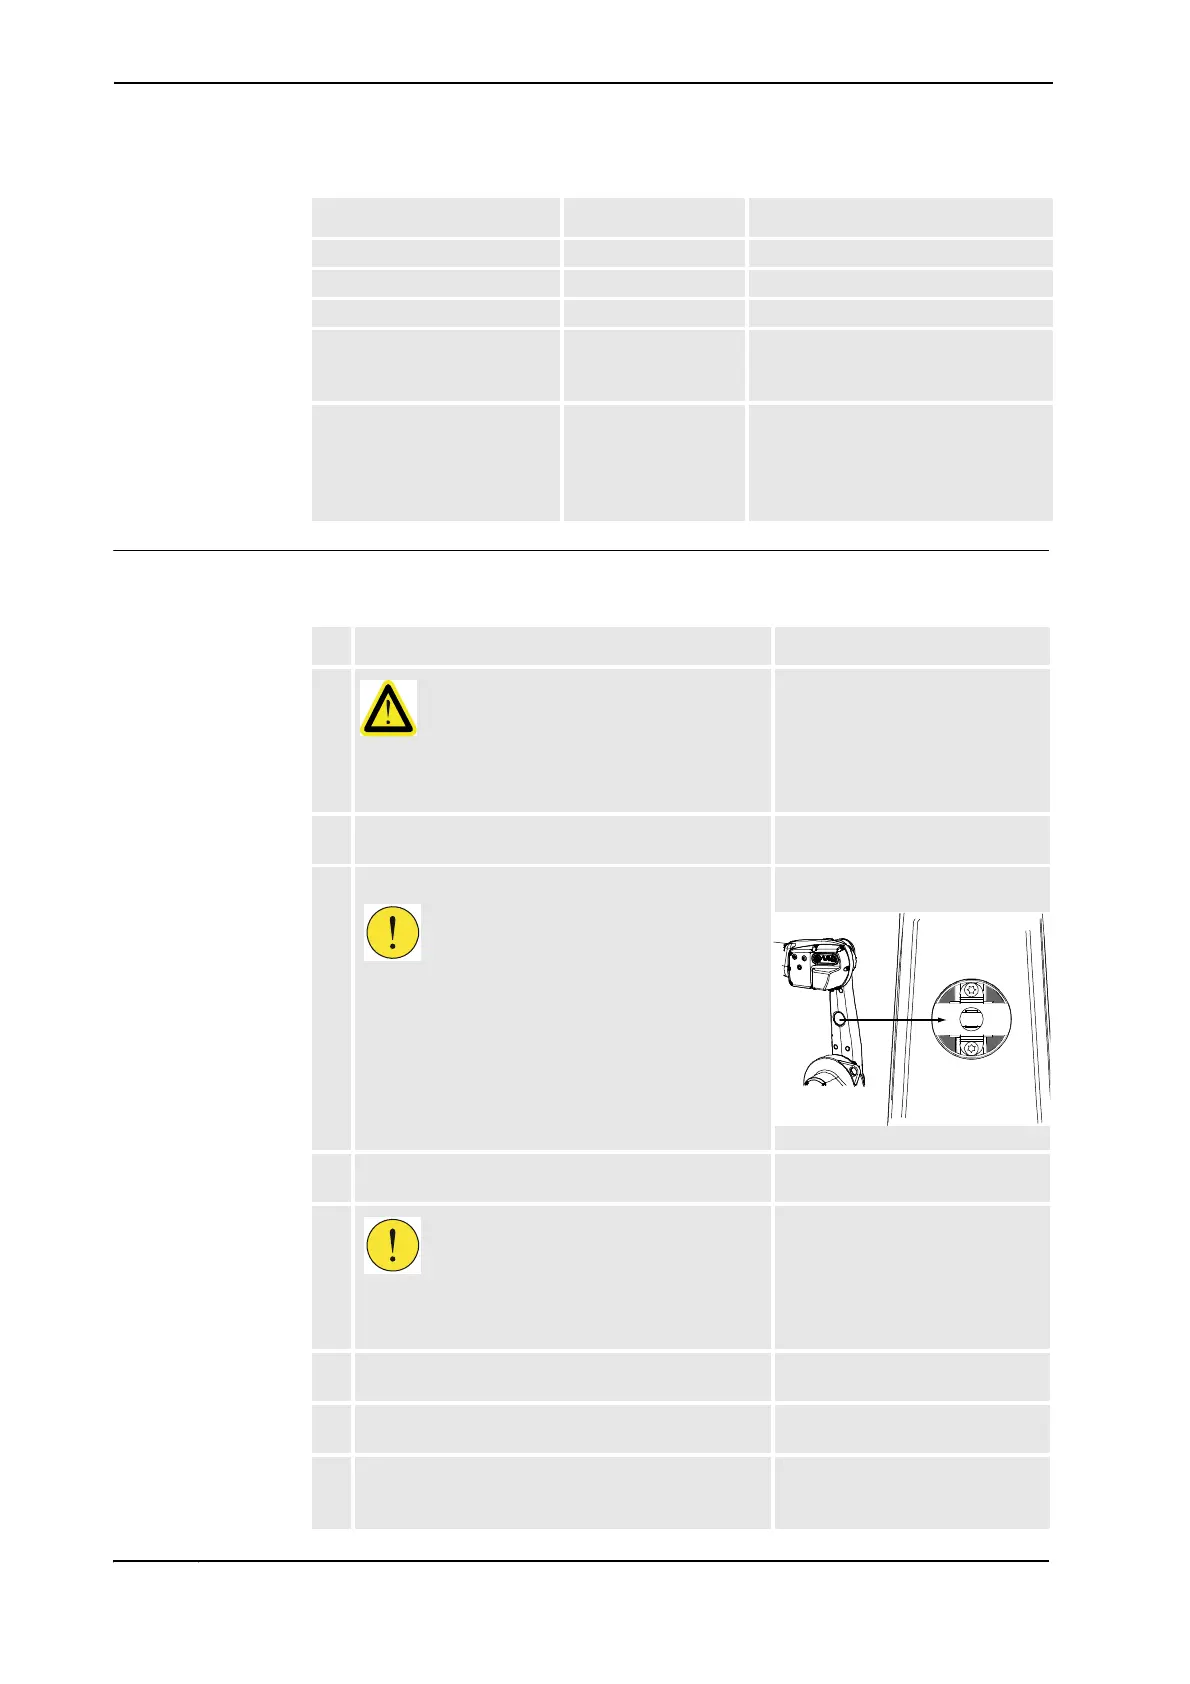
The figure to the right shows the space underneath
the cover. The gray areas are safe for insertion of a
tool that may be inserted with a maximum depth of
20 mm!
Shown in the figure Location of
lower arm on page 139.
xx0400001247
4. Pull down the cabling through the lower arm and pull
it out.
5.
CAUTION!
The lower arm weighs 20 kg! Use a suitable lifting
device to avoid injury to personnel!
6. Fit the lifting device to the lower arm to secure the
weight of the arm.
7. Unscrew the 12 attachment screws and remove the
single washer.
8. Gently pull out the cabling while lifting away the
lower arm. Be careful with the connectors, they are
sensitive to damage!
Continued
Continues on next page

 Loading...


