4 Repair
4.4.3. Replacement of complete lower arm
1413HAC026660-001 Revision: C
© Copyright 2006-2008 ABB. All rights reserved.
Refitting, lower arm
The procedure below details how to refit the complete lower arm.
9. Check the sealing ring. Replace it if damaged. Spare part no. is specified in
Required equipment on page
139.
Action Note/Illustration
Action Note/Illustration
1. Clean the mating surfaces on both the lower arm and
on the frame with isopropanol. Also clean the area
where the sealing ring is fitted.
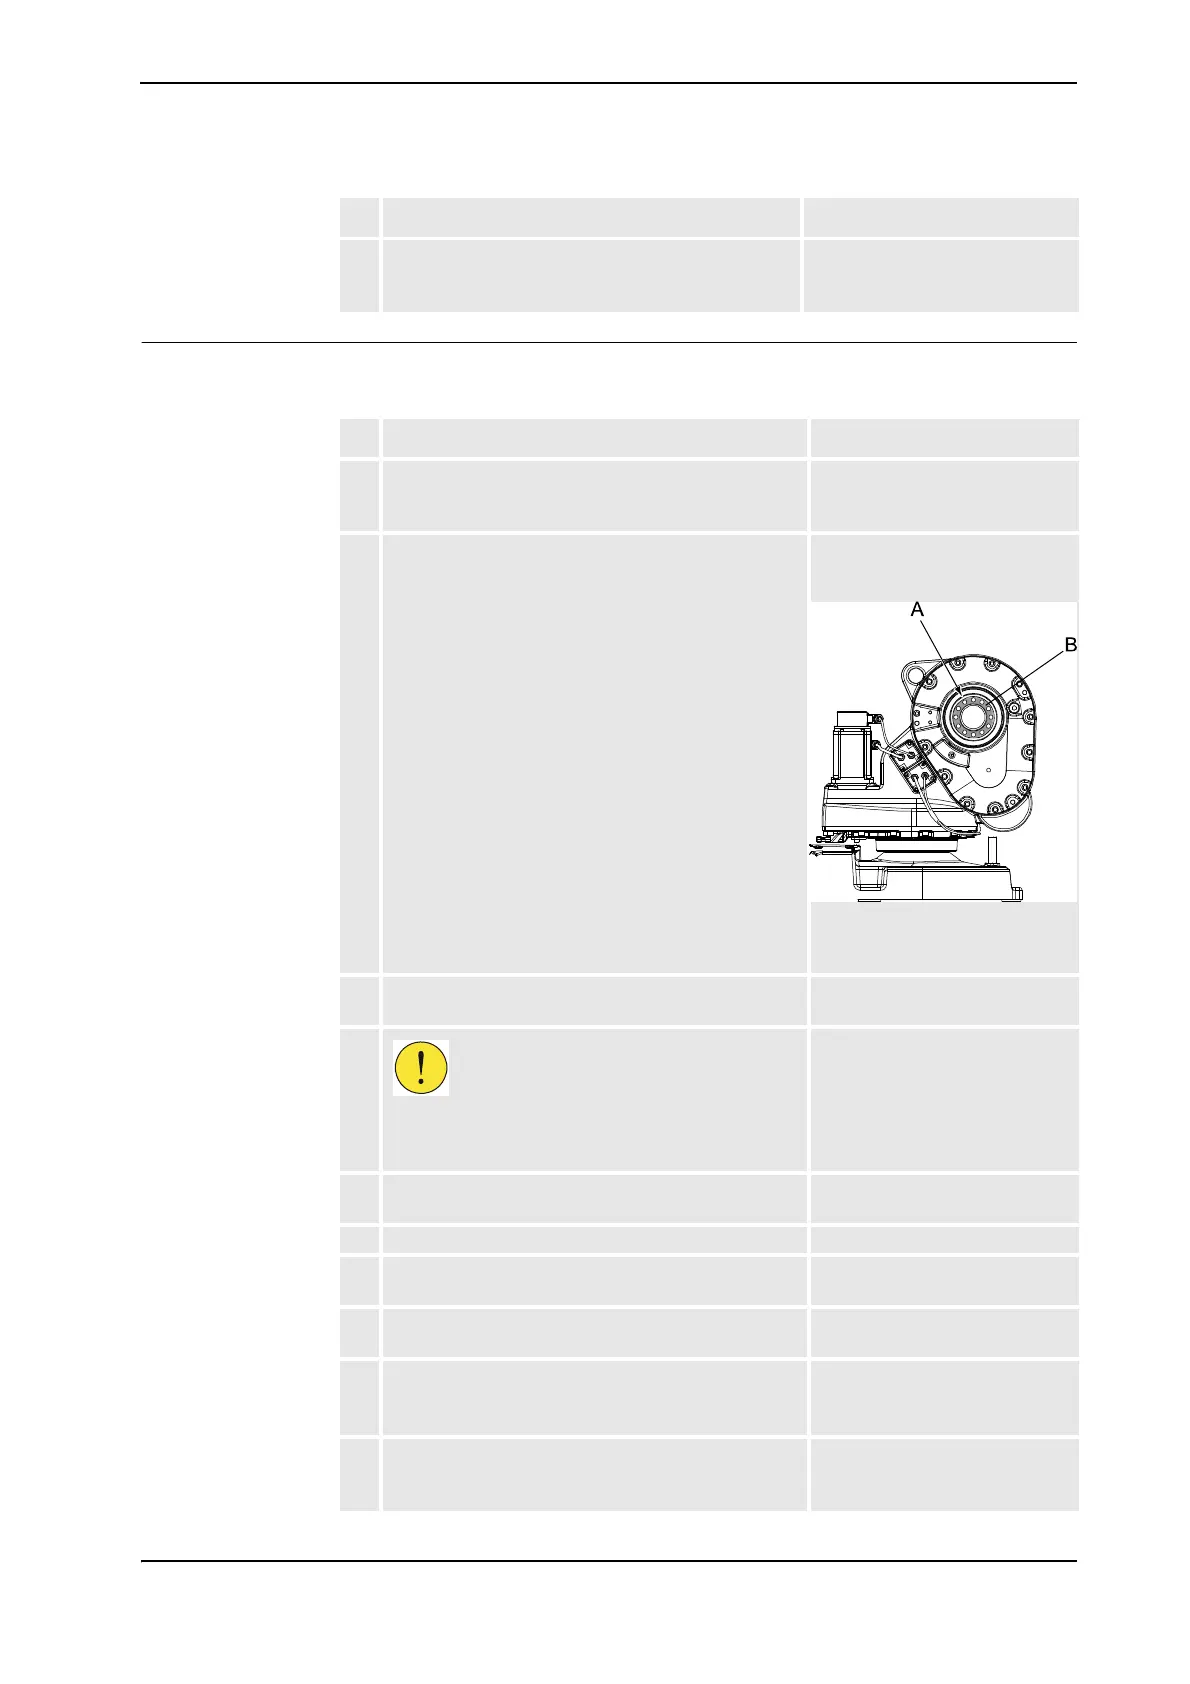
2. Fit the sealing ring properly to the frame. Replace it if
damaged.
Spare part no. is specified in
Required equipment on page
139.
xx0400001245
• A: Sealing ring
• B: Mating surface
3. Lubricate the mating surface on the frame with
Loctite 574.
4.
CAUTION!
The lower arm weighs 20 kg! Use a suitable lifting
device to avoid injury to personnel!
5. Fit the lifting device to the lower arm and lift it into
position.
6. Insert the cabling into the lower arm.
7. Fit the lower arm against the frame, fit the washer
and secure with the 12 attachment screws.
12 pcs; M10 x 40, tightening
torque: 70 Nm.
8. Push the cabling up through the lower arm and place
the cable bracket inside the lower arm correctly.
9. Fit new VK-covers to the lower arm.
Make sure that the cable bracket inside the lower arm
is secured beneath the middle VK-cover.
Spare part no. is specified in
Required equipment on page
139.
10. Refit the upper arm. Detailed in section Refitting,
complete upper arm on page
131.
Continued
Continues on next page

 Loading...


