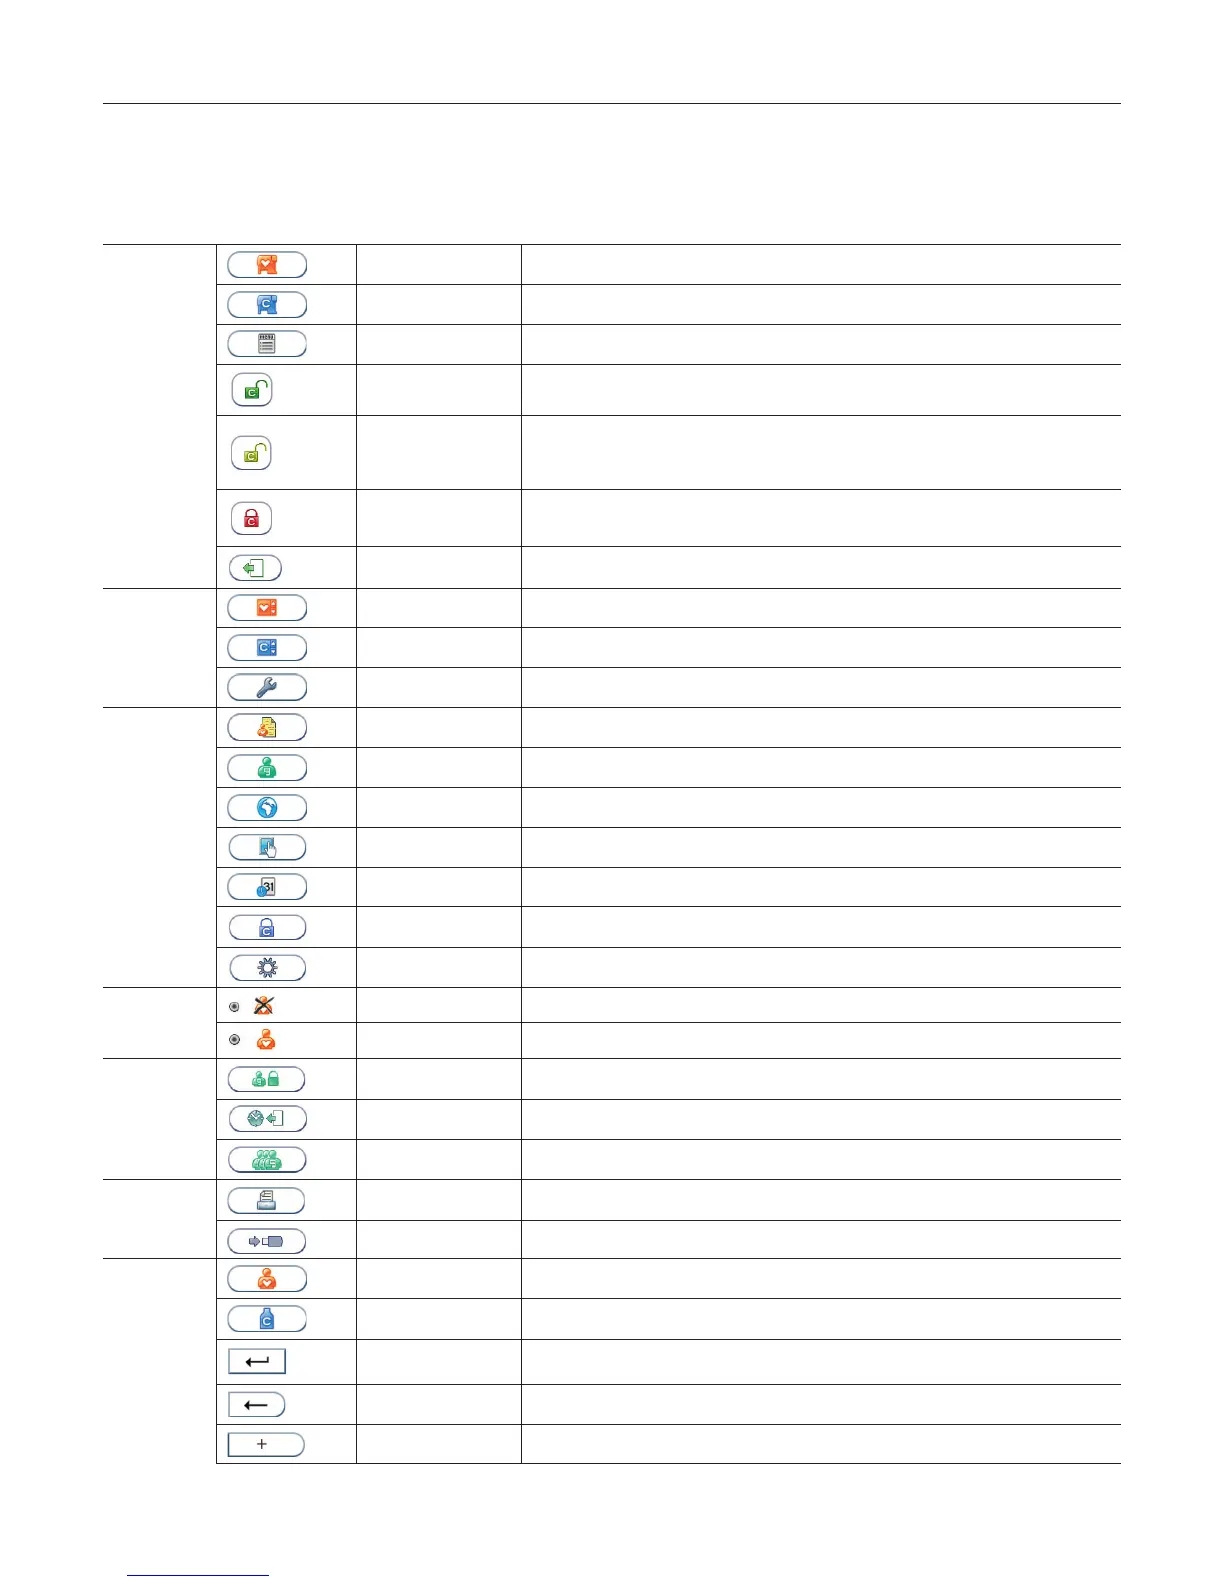
The touch buttons and their function
Touching a button on the screen will activate the function of this button. All the touch buttons that may appear during operation of the Anion 2 Analyzer are
explained below by their function.
Start-up menu
Patient sample mode Select patient sample mode.
Control mode Select control mode.
Main menu Enter Main menu (operator ID, patient records, control records and conguration menu).
QC lockout status
Enabled-unlocked
All controls are within the congured interval. It is possible to run patient tests for all assays.
QC lockout status
Warning-unlocked
All controls are within the congured interval. When one or more of the assays has 10 % or
less of the congured interval remaining the warning icon will be displayed. It is possible to
run patient tests for all assays.
QC lockout status
Expired-locked
One or more controls have expired according to the congured interval. Patient testing on the
expired assay has been locked.
Operator logout
button
Manual operator logout button.
Main menu
Patient records View patient result records. View, print or export patient results.
Control records View control result records. View, print or export control results.
Conguration menu Enter conguration menu (language, patient ID on/off, date/time and screen/volume).
Conguration
menu
Patient ID
conguration menu
Congure patient ID function.
Operator
conguration menu
Congure operator function.
Language setting Enter language conguration.
Screen/Volume menu Congure screen and volume settings (screen contrast, screen adjustment and beeper volume).
Date/Time menu Enter date/time settings (date and time).
QC lockout
conguration menu
Congure QC lockout function.
General settings menu Enter the general settings menu.
Patient ID
conguration
menu
Patient ID disabled Patient ID disabled.
Patient ID enabled Patient ID enabled and required.
Operator
conguration
menu
Operator ID
conguration
Congure operator ID function.
Automatic operator
logout
Congure number of minutes before automatic logout of operator.
Operator list Manage operator list. View, add, edit and delete operators.
Patient and
control records
Print Print result on connected printer.
Result records export Export result records to connected USB ash.
Universial
buttons
Patient ID Enter patient ID.
Control ID Enter control ID.
Enter Enter and return to previous view.
Backspace Delete previous character.
Increase Increase contrast/volume.
Gallery of Icons