EN - 15
CAT2 6 Putting into operation
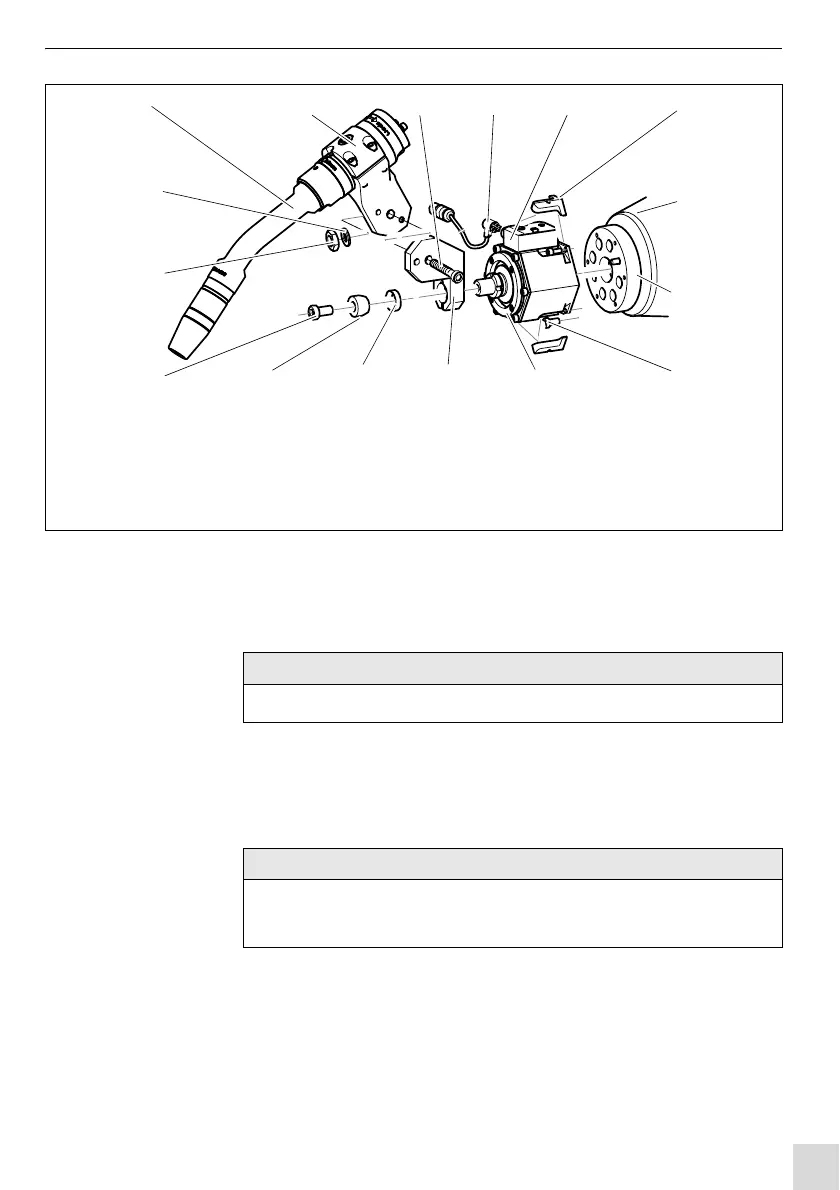
1 Fasten torch mount (2) with dowel screw (3), washer (16) and nut (15) to
the mount (11).
2 Fasten complete torch on torch mount (2).
3 Remove the protection caps (6). Insert an Allen key into the bore and
remove the protection caps (6).
4 Mount CAT2 (10) on the robot flange (8) using four cylinder screws (9).
5 Reinsert the protection caps (6).
The following steps refer to the assembly of CAT2. For further assembly of the
CAT2 HL:
6.1.1 CAT2 HL on page EN-17
1 Torch
2 Torch mount
3 Dowel screw M8
4 Helix cable
5 Connector housing
6 4 protection caps
7 Robot
8 Robot flange
9 4 cylinder screws
10 CAT2
11 Mount
12 Clamping ring
13 Cone clamping element
14 Cylinder screw M8
15 Nut
16 Washer
Fig. 6 Mount CAT2 on the robot
12 4 6
7
9121314
3
16
15
8
1011
5
• The fastening of the torch (1) depends on the respective torch type.
• Ensure correct position of the connector housing.
Fig. 5 Functional diagram on page EN-13