Configuring the Wallbox eMH2 – Set-up via the Charge Point Administration application |
33
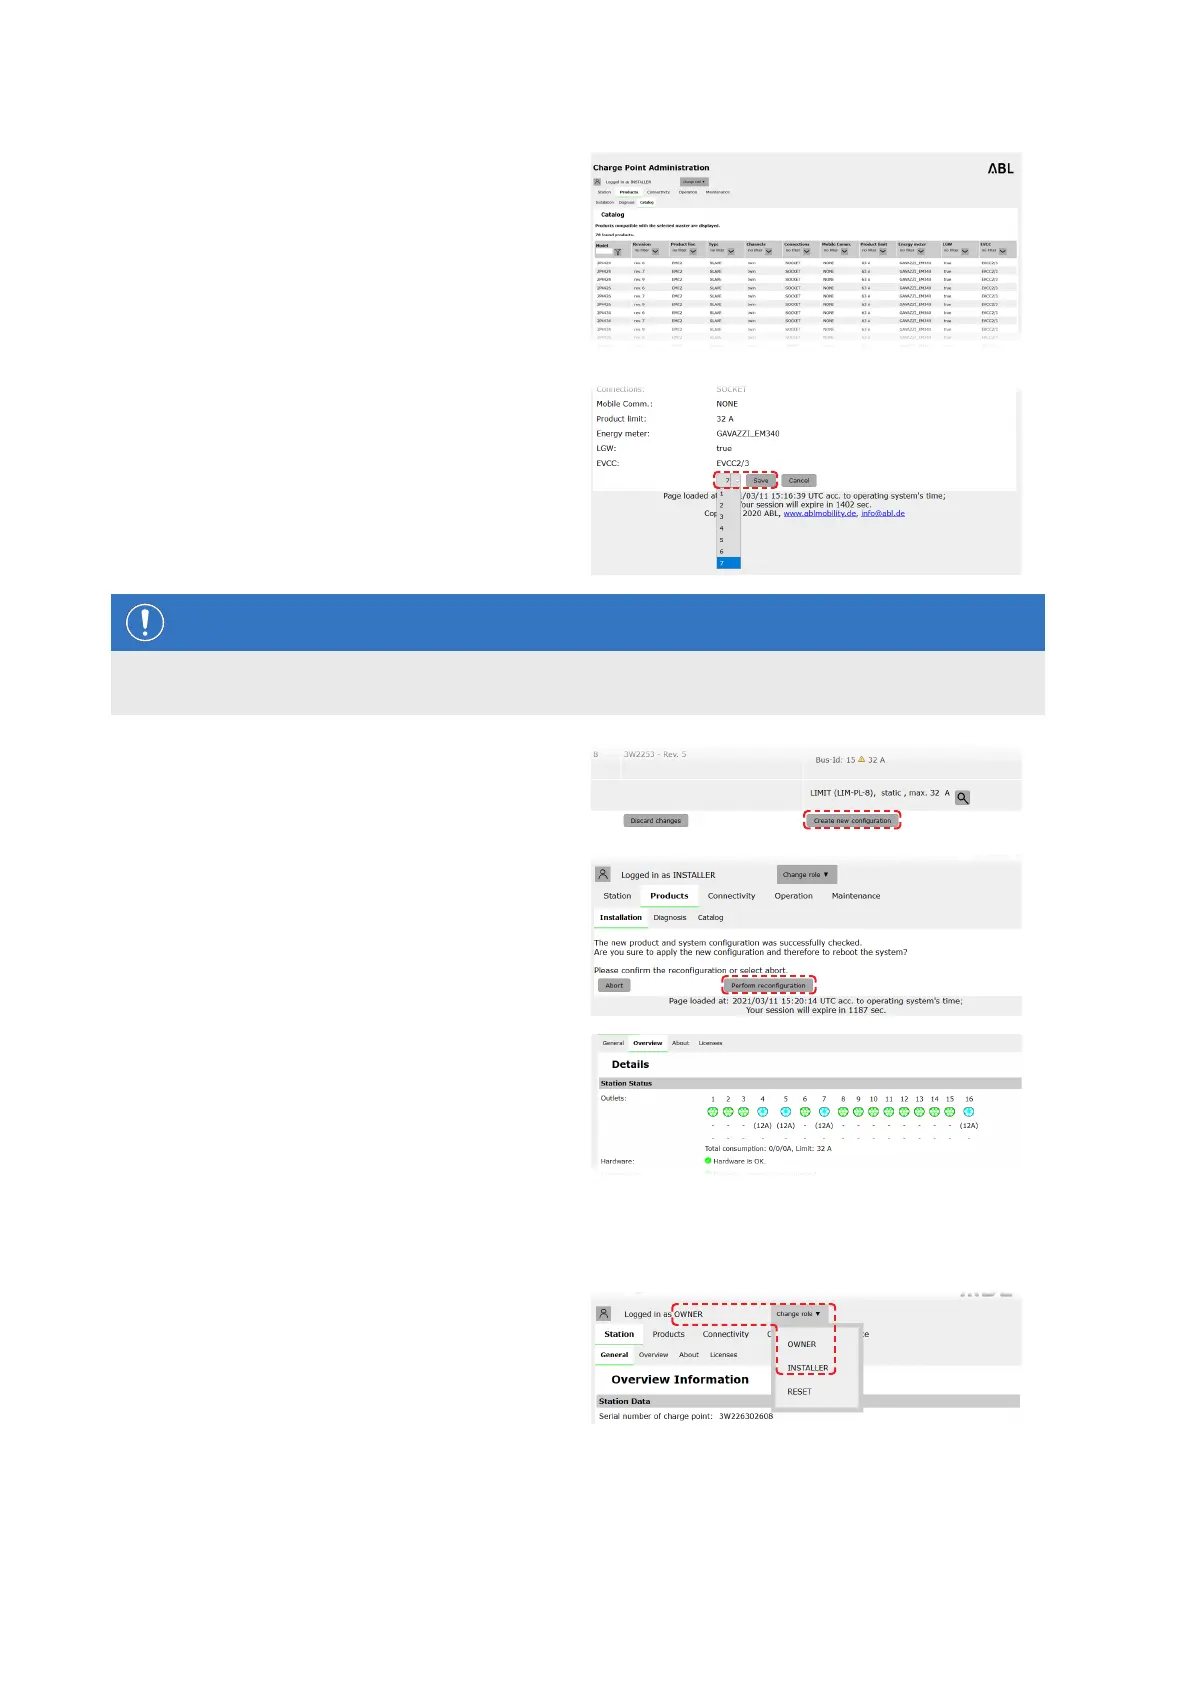
6 Search the product catalogue for the desired
charging station, select the highest revision for
that model and click the Add products button at
the bottom of the screen.
y The selected charging station is now displayed
in a separate overview in the Catalog.
7 Use the selection list at the bottom to enter the de-
sired number and click the Save button.
y These Extender charging stations are then
displayed together with the Controller in the
Products > Installation tab.
y The Cancel button returns you to the Products
> Catalog list without making a selection.
NOTE
Completing the system configuration
Repeat these steps to add all additional Extender charging stations in the system.
8 Navigate to the bottom of the Products > Instal-
lation tab and click the Create new configura-
tion button.
9 Once the current system configuration has been
successfully checked, you can restart the system
with the Perform reconfiguration button.
y After restarting, the entire system is displayed
in the Station > Overview tab.
10 Switch to the Overview > Details tab: this shows
at a glance whether your system is set up correctly.
After you have set up all Extender charging stations for the Controller, you must also define the maximum availa-
ble current for the entire system.
To do so, proceed as follows:
11 Make sure you are still logged into the Charge
Point Administration application in the Installer
role.
y If not, change your role as described in step 4.