takIng Into operatIon and chargIng procedure
18
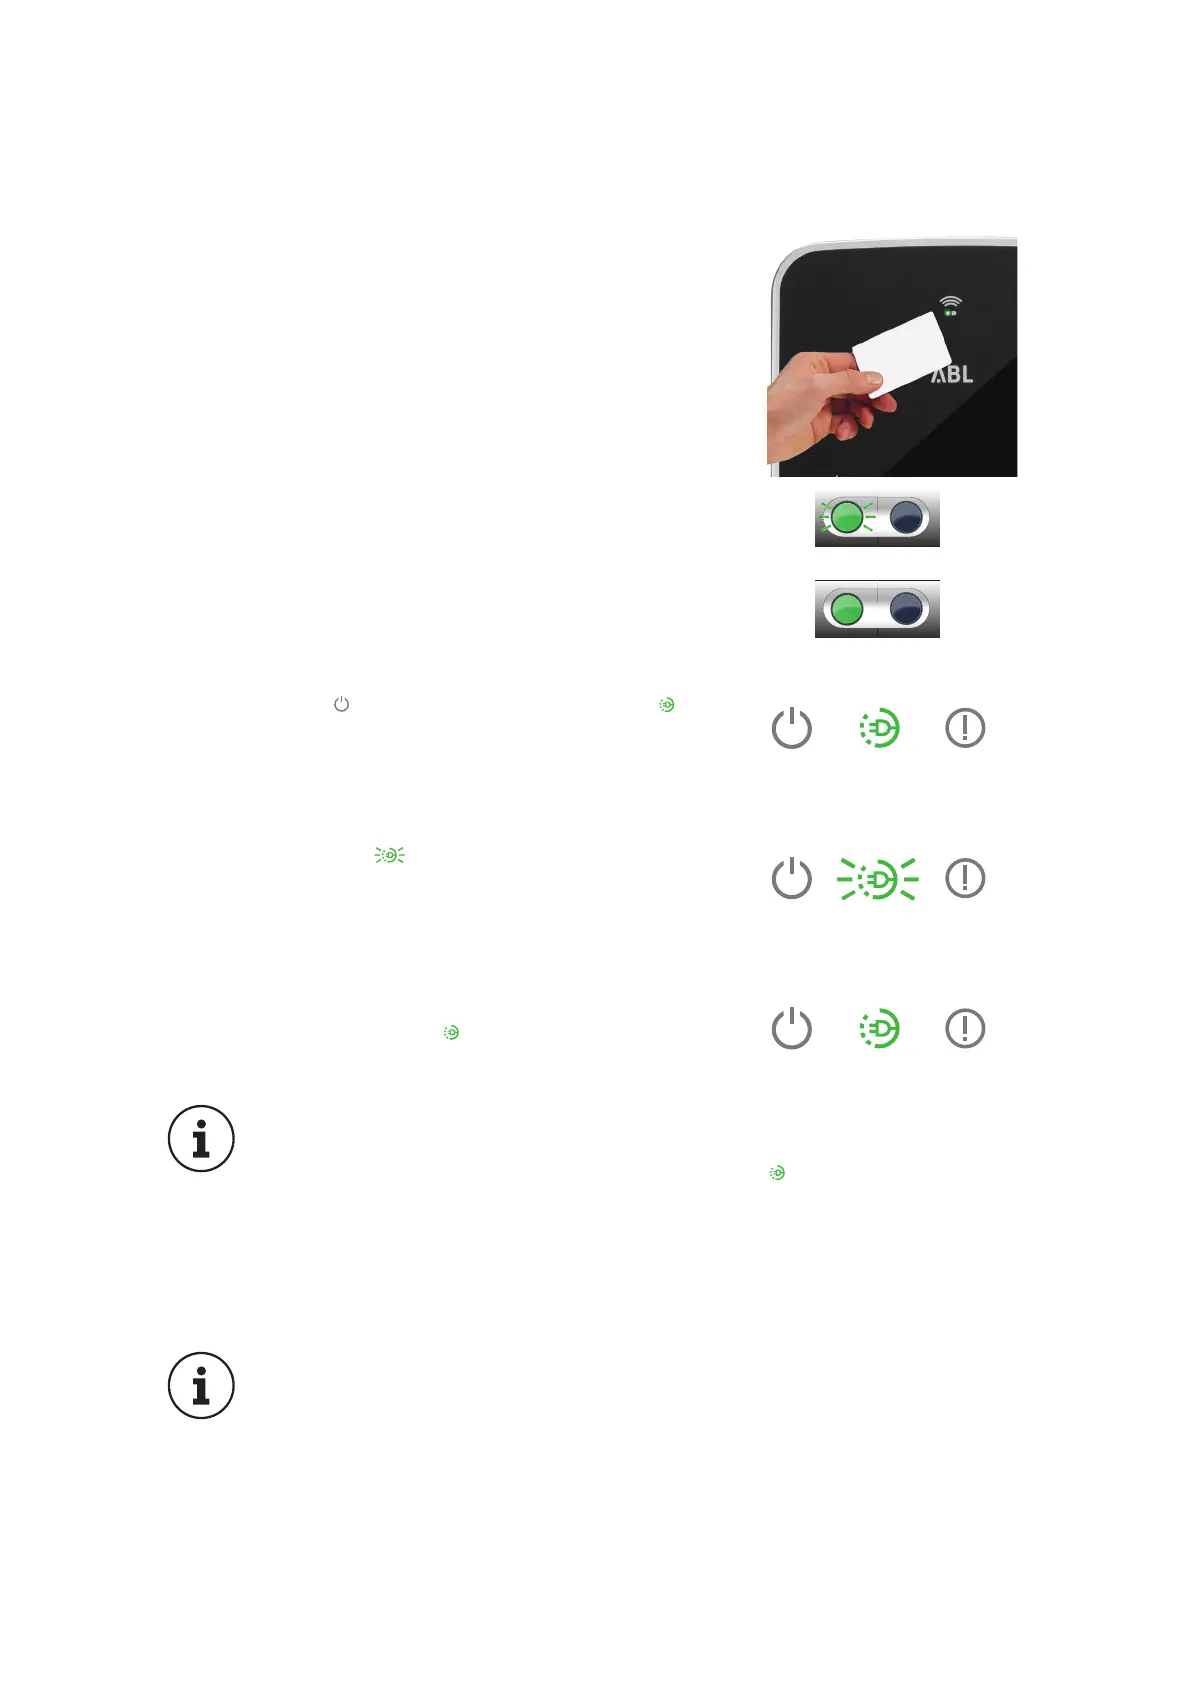
6. If the RFID module has been activated, log in at
the RFID module of the eMH3 using an appropri-
ate access card. To do this, place the card in front
of the RFID icon on the upper part of the housing
cover.
7. The green LED on the RFID module will begin
flashing while the card is checked and will remain
ON for 1 second as soon as login has been ac-
cepted or the card has been rejected.
Green LED flashes, blue LED is OFF
Green LED is ON for one second, blue LED
is OFF
8. The blue LED goes out and the green LED is
continuously ON when the vehicle is connected
and the charging procedure has been unblocked:
In this state, the wallbox is waiting for the vehicle
to initiate the charging procedure.
9. The green LED flashes during the actual
charging procedure. The charging procedure
can be manually interrupted at the vehicle and
is automatically terminated by the vehicle when
charging is complete.
10. When the charging procedure is paused or com-
pleted, the green LED is again continuously
ON.
PLEASE NOTE:
In principle, the charging procedure is always terminated by the vehicle,
not by the wallbox. An illuminated green LED indicates, on the basis
of communication with the vehicle, that the charging procedure has been
either paused or completed: Distinguishing these two operating states is
only possible by checking the battery charge indicator inside the vehicle.
Should the vehicle not be fully charged after a sufficiently long charging
process, please contact your local service partner for the vehicle.
PLEASE NOTE:
Should a malfunction occur during or after the charging process, this will
be indicated by the LEDs on top of the housing. The following chapter
describes how you can identify operational states and errors, and which
measures will become necessary.
After the charging procedure has been completed, please remove the cable from the
vehicle socket and store it properly, ready for the next charging procedure.