Step Procedure
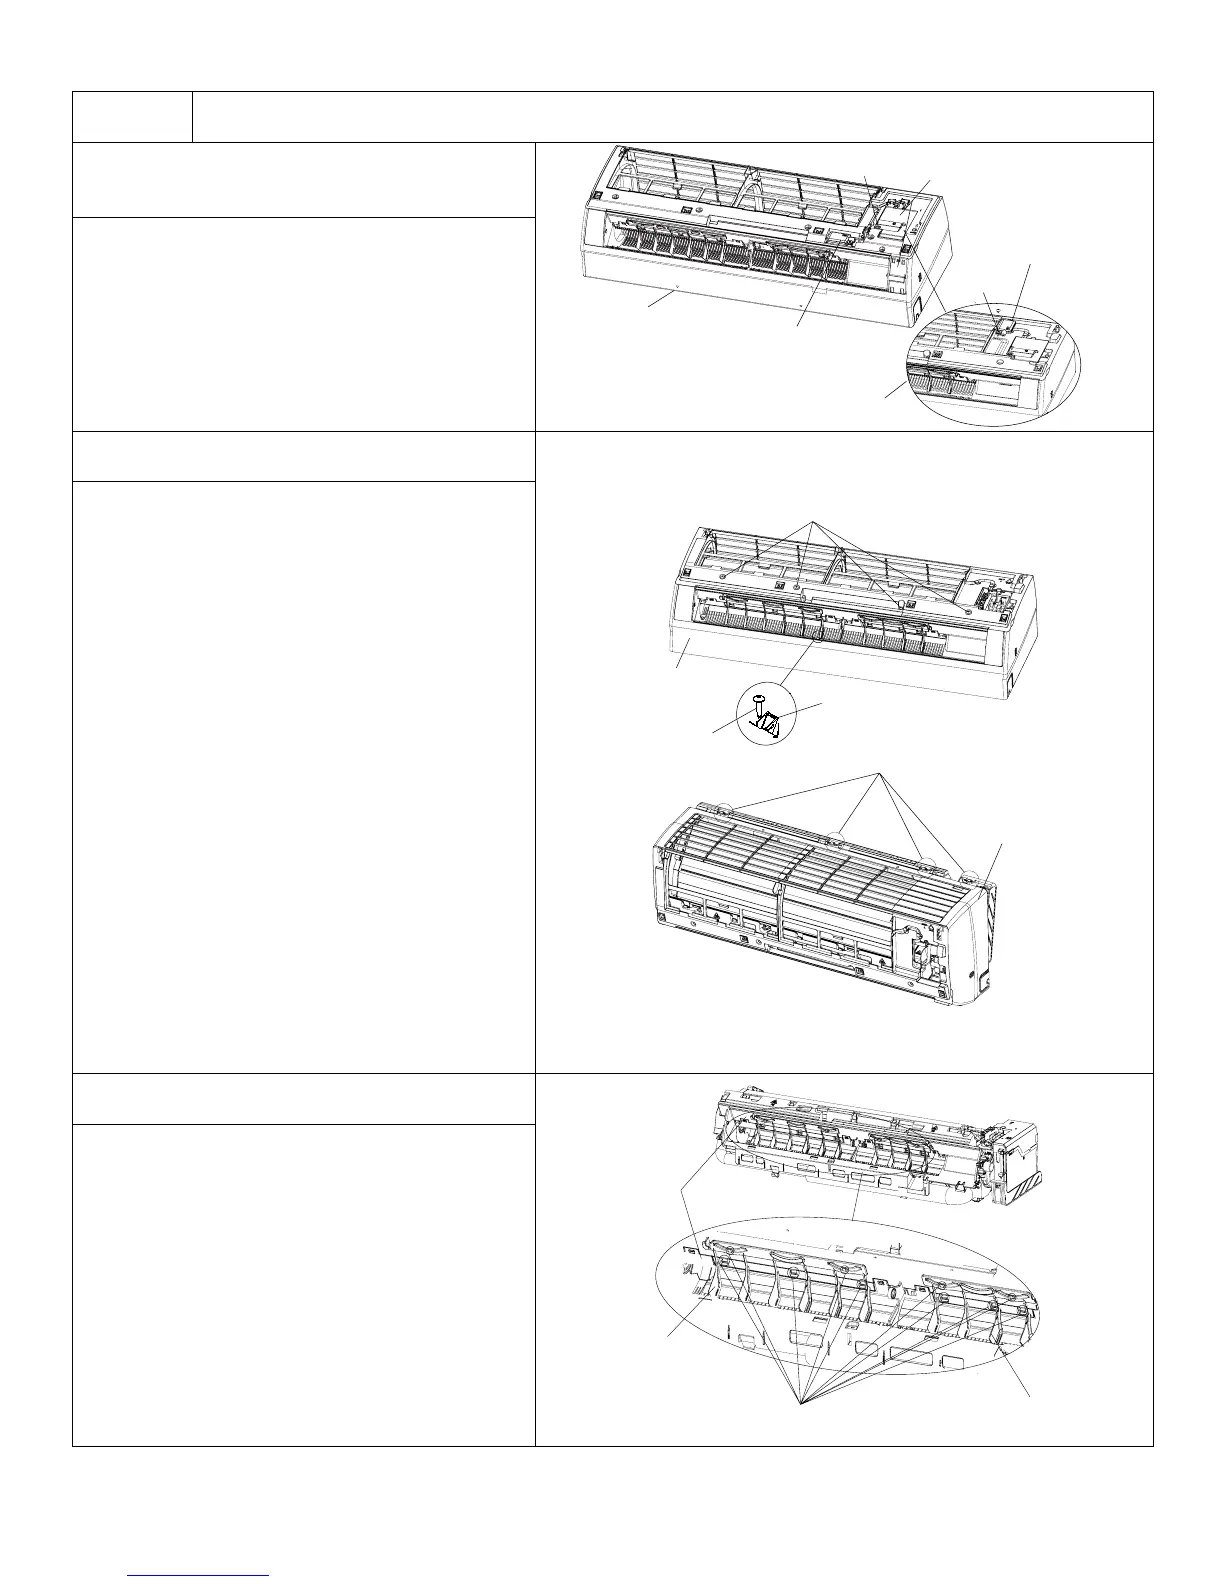
4. Remove electric box cover 2 and detecting
plate(WIFI)
Remove screws on electric box cover 2 and
detecting plate(WIFI), then remove electric
box cover 2 and detecting plate(WIFI).
Note:the position of detection board(WIFI)
may be different for different models.
5. Remove front case sub-assy
Remove screws from the front case.
Note:
1. Open screw caps before removing screws
around the air outlet.
2. The quantity of screws fixing the front
case sub-assy is different for different
models.
3. Loosen connection clasps between front
case sub-assy and bottom case. Lift up
front case sub-assy and remove it.
6. Remove Vertical Louver
Loosen the connection clasps between
vertical louver and bottom case to remove
vertical louver.
128
Installation and Maintenance
Service Manual
a
b
ProcedureStep
Remove the screws xing front case.
Note:
1.Open the screw caps before removing
the screws around the air outlet.
2.The quantity of screws fixing the front
case sub-assy is different for different
models.
Loosen the connection clasps between
vertical louver and bottom case to remove
vertical louver.
Loosen the connection clasps between
front case sub-assy and bottom case. Lift
up the front case sub-assy and take it out.
Electric box cover2
Detecting plate
for 12K
for 09K
Detecting plate
Screw
Screw
5. Remove front case sub-assy
6. Remove vertical louver
Front case
sub-assy
Front case
sub-assy
Clasp
Screw caps
Screws
Screw
Vertical
louver
Vertical
louver
Clasps
Bottom
case
4. Remove detecting plate and electric box cover 2
Remove the screw fixing electric box
cover 2 and then remove the electric box
cover 2.
Remove the screw fixing detecting plate
and then remove the detecting plate.
Note:The position of detection board(WIFI)
may be different for -different models.