77
Cross button, push RIGHT or LEFT, UP or DOWN to switch between the list of age intervals,
the 'Ok' button, and the 'Cancel' button.
Cross button, push CENTRE button to save the selected interval, then choose 'Ok' or
'Cancel'. (NOTE: if the date of birth has been already inserted via the long left press, then
the age interval is automatically set).
The current value selected is saved and the is visualized in the status bar at the bottom of
the display.
When the patient date of birth is inserted via the active keyboard mode, the age selection
range is automatically set.
IMPORTANT NOTE: you can always check the current age interval just looking at the centre
bottom of the instrument's display, and note that during the first seconds of the measurement
the selected age selection is enlighten by means of a red circle in the bottom centre of the
display.
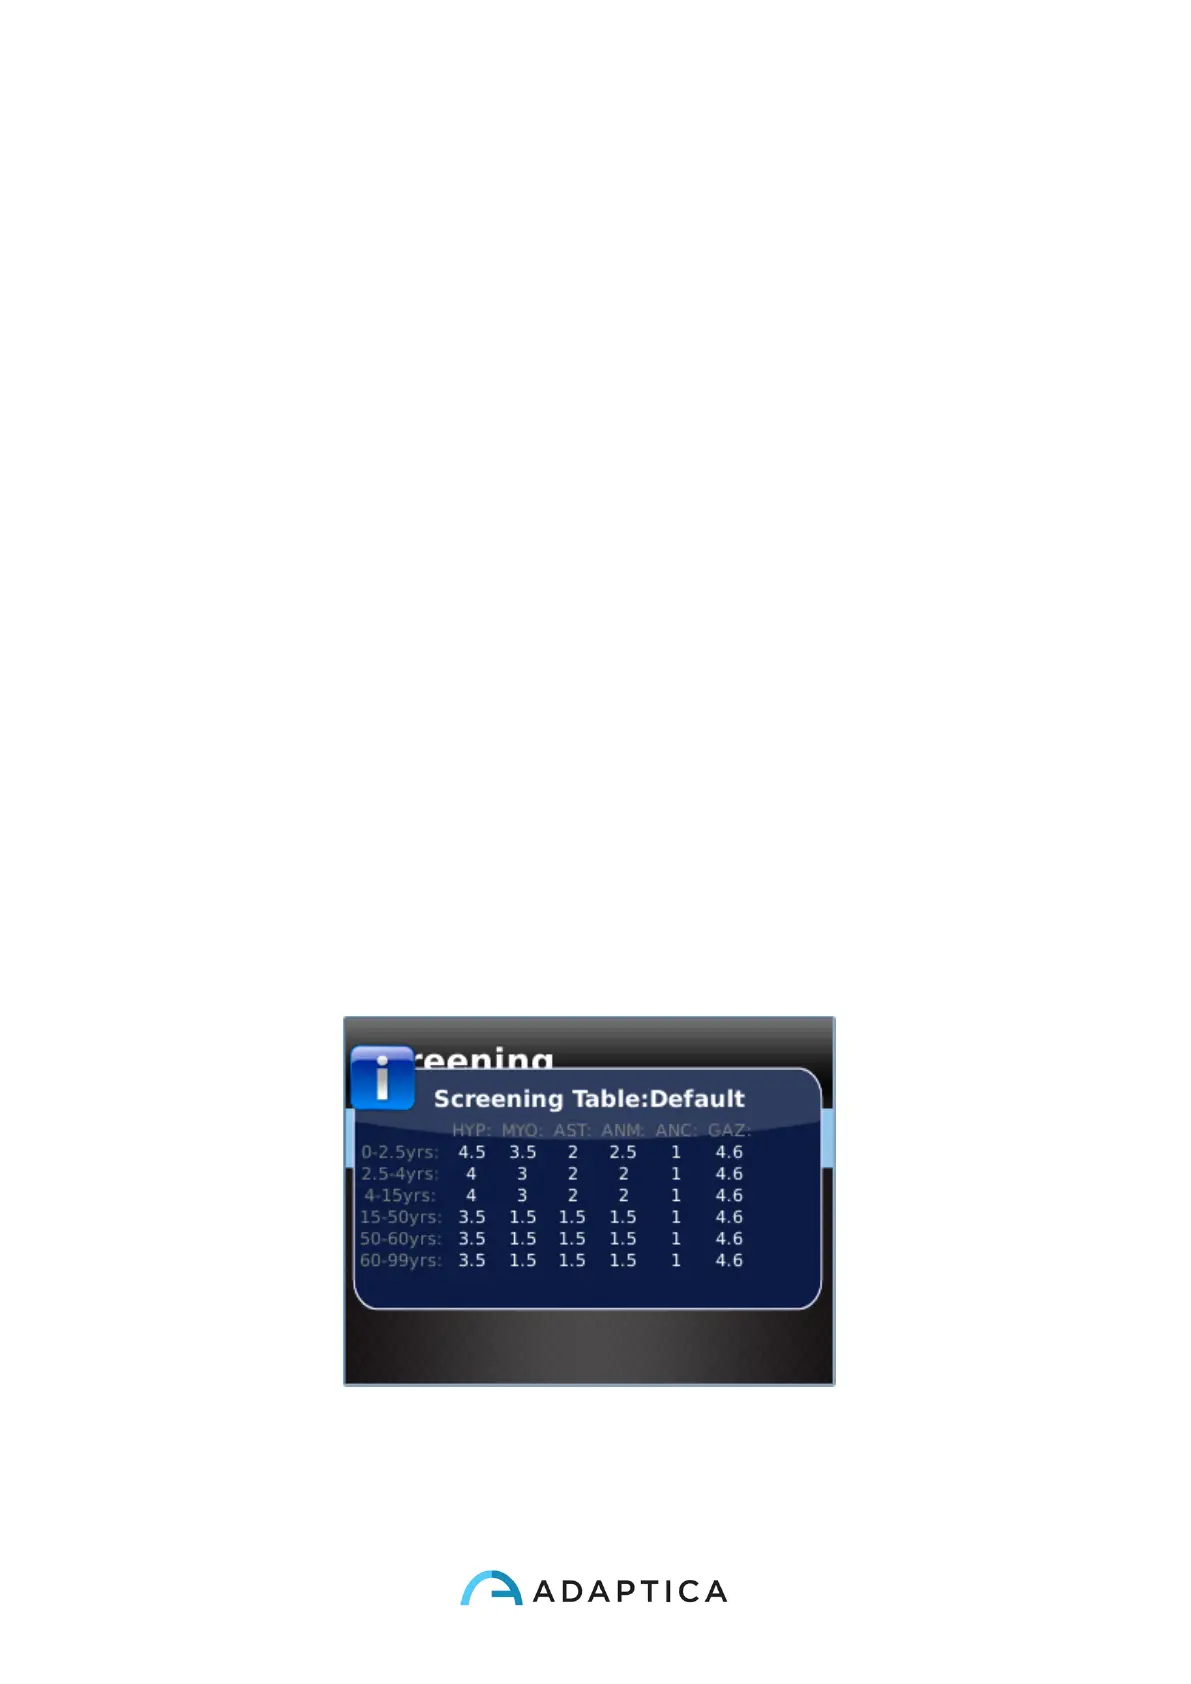
10.23 Screening Table
Visualization
To display the Screening Table, select 'Show Current Table' from the menu
Measurement>Screening, the current table, either default (based on AAPOS guidelines) or
custom (defined by the user), is displayed. The screening table is the set of thresholds that
are used by the 2WIN to determine if a patient is inside or outside the guideline for amblyopia
detection screenings.