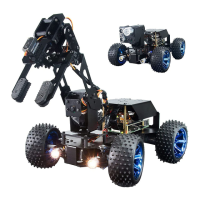
Step3: Click Write to
write the system
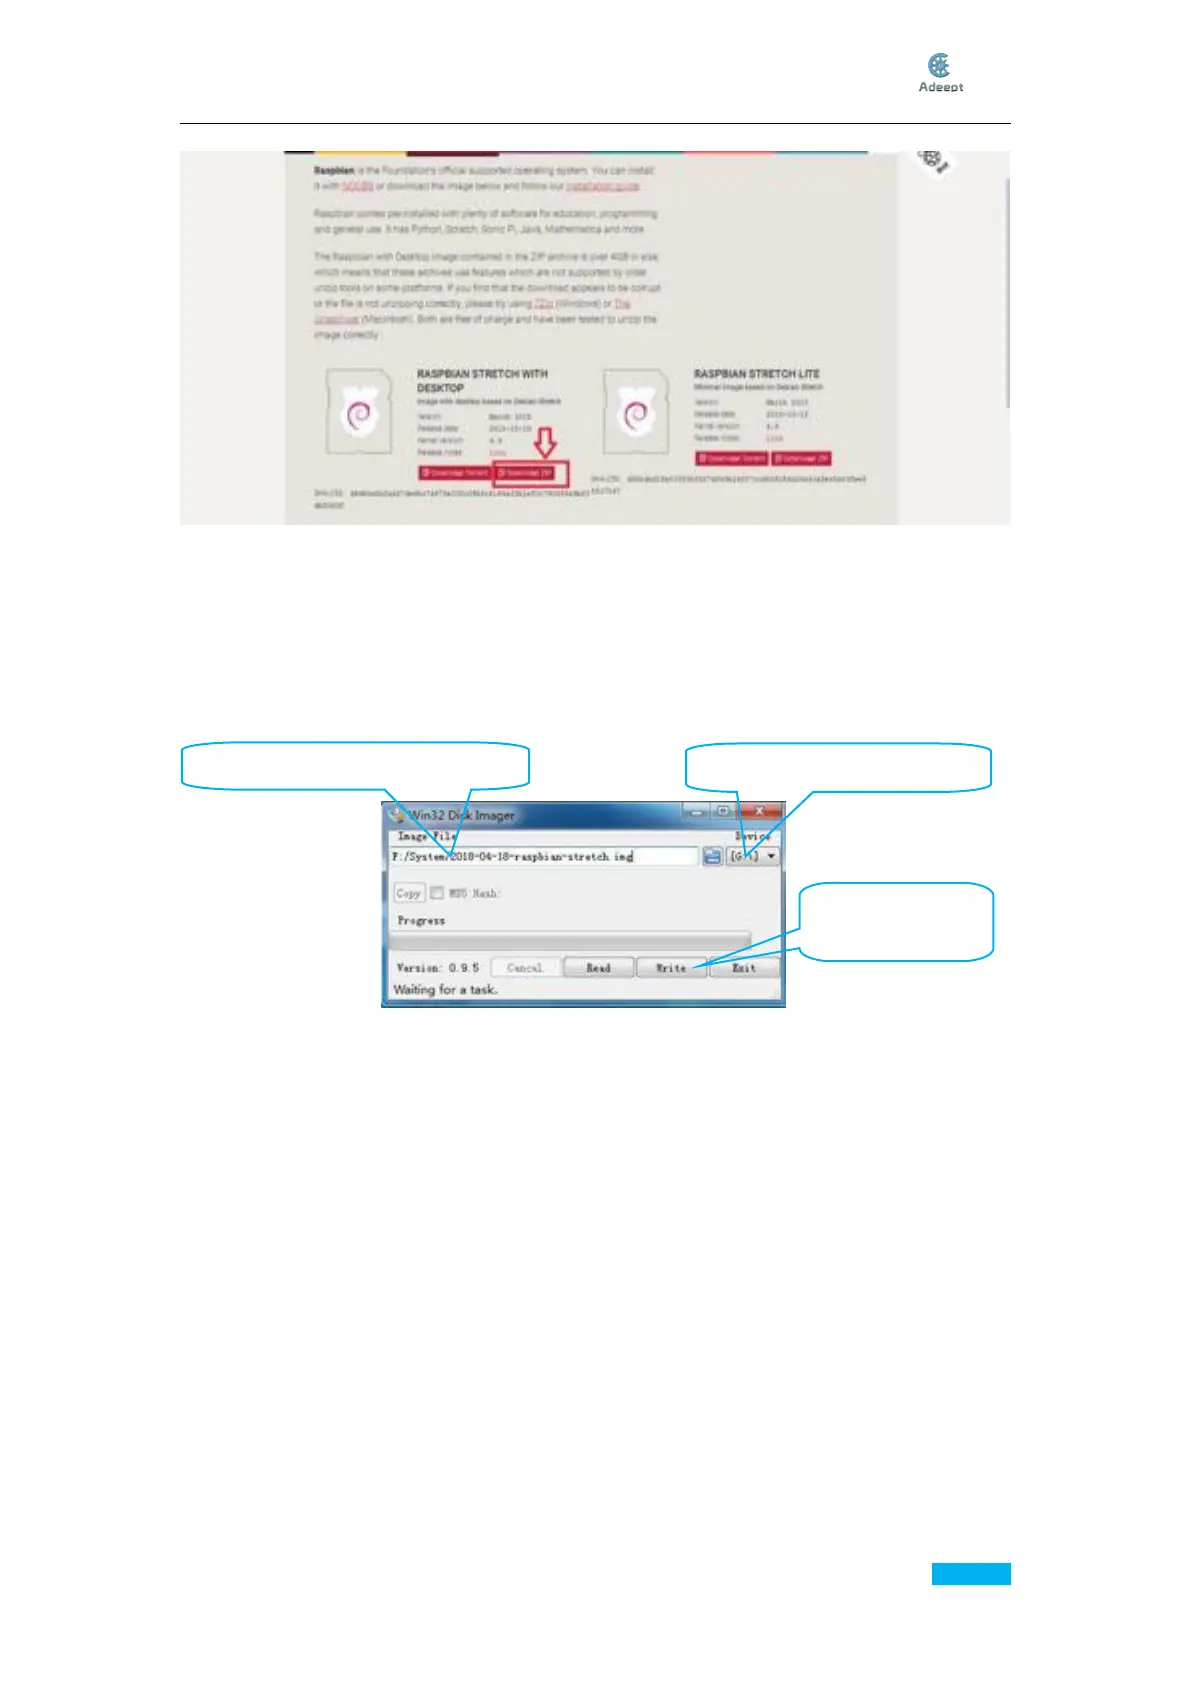
After it's downloaded, unzip it for later SD card system creation.
Write Raspberry Pi Operating System to SD Card
First, insert the SD card into the card reader and connect it to the USB port of the
computer.
Click open the Win32 Disk Imager and choose the path of the SD card (here it's Disk G).
Click open the .img file extracted previously, and click Write.
Display the Filename Extension
For some operations, you may need to change the filename extension (suffix). In some
Windows systems, they are hidden by default and you need to makethesetting.Youmay
search on the Internet by yourself for how to display the filename extension (suffix) in your
own system.
For example, in Windows 7, you may go to My Computer ->Organization ->Folder and
Search->View,andunchecktheHide extensions for known file types.
Enable SHH and Setup WiFi
Keep the SD card connected with the computer. Open the root directory of the card and
create a file named ssh without any suffixes.
Under the root directory of the SD card, create a file wpa_supplicant.txt and write the
following contents into the file:
country=US
ctrl_interface=DIR=/var/run/wpa_supplicant GROUP=netdev
update_config=1
Step1: Choose the right path
Step2: Open the extracted “.img”