Using Help | Contents | Index Back 211
Adobe Illustrator Help Using Transparency, Gradients, and Patterns
Using Help | Contents | Index Back 211
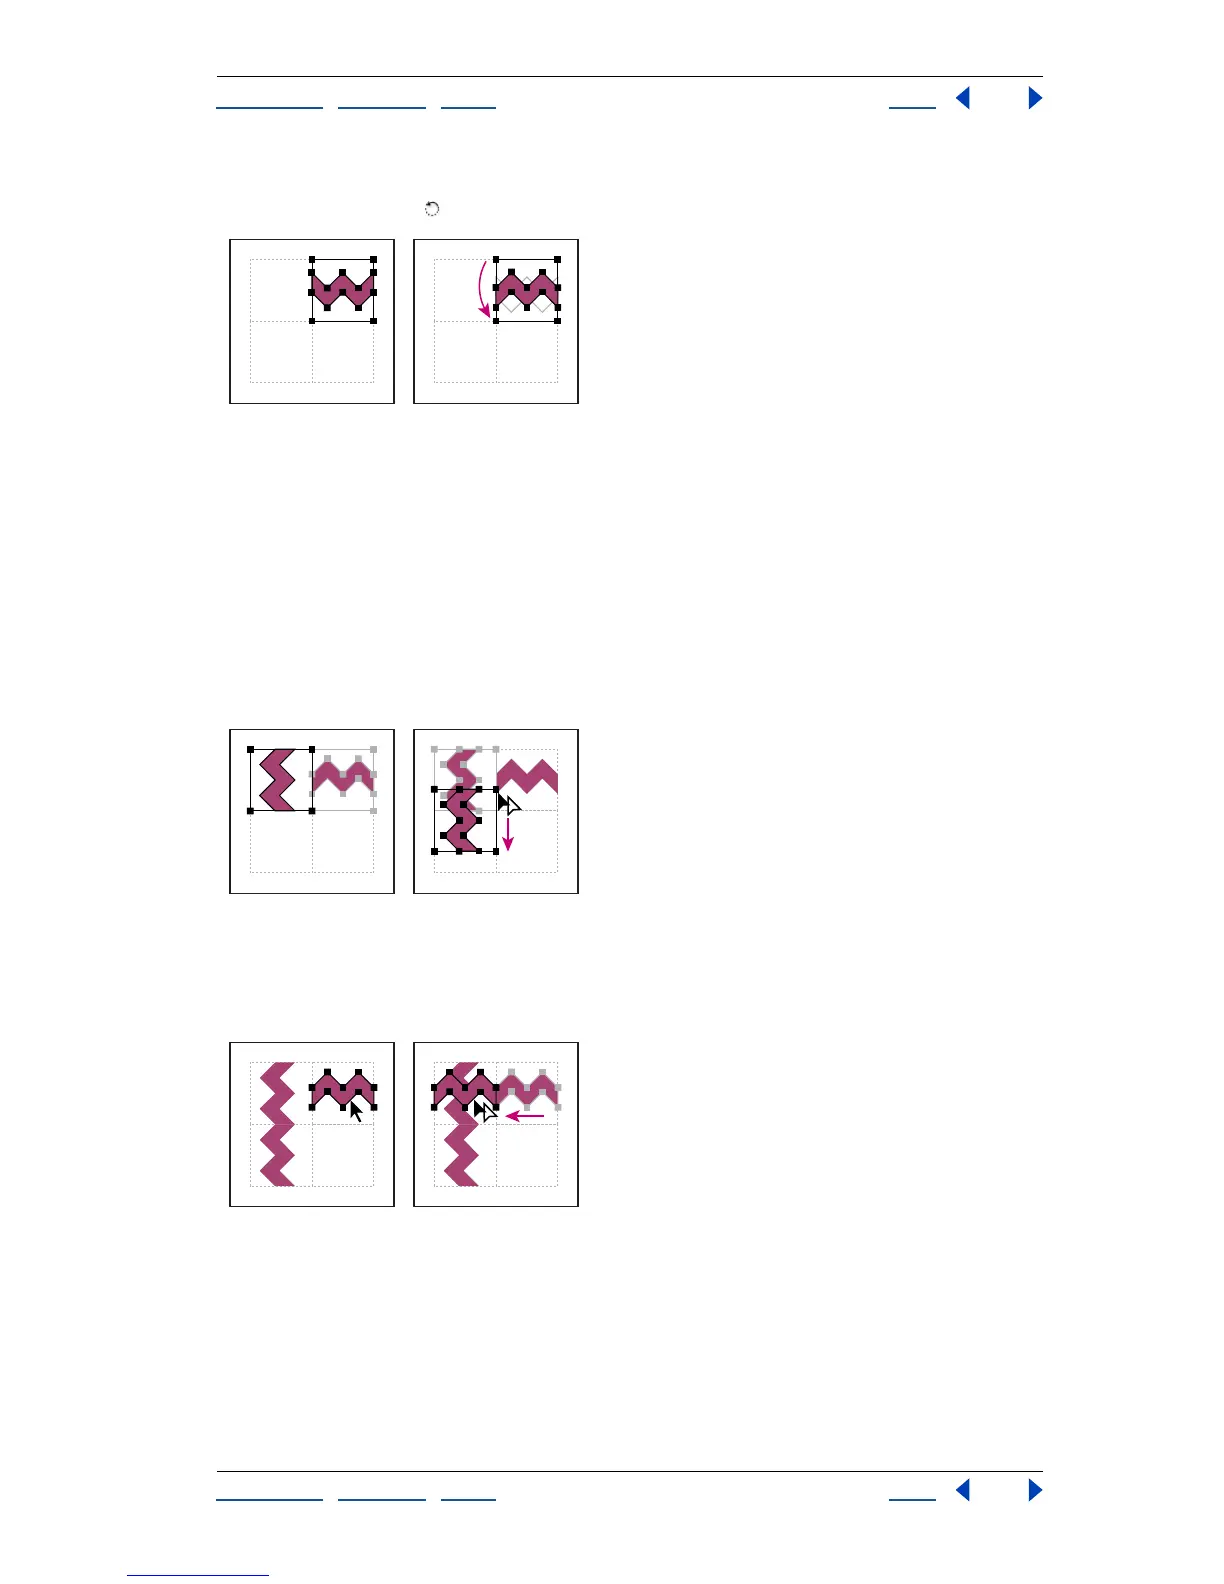
4 Select the tile and the bounding box.
5 Use the rotate tool to rotate the tile and its bounding box 180 degrees.
Pasted tile (left) and tile rotated 180º (right)
6 Using the rotate tool, Alt+Shift (Windows) or Option+Shift (Mac OS) the lower left
corner of the bounding box. Enter a value of 90 degrees, and click Copy to create a copy
flush left of the first tile. This tile becomes the corner tile.
7 Using the selection tool, drag the left tile down by the top right anchor point, pressing
Alt+Shift (Windows) or Option+Shift (Mac OS) to make a copy and constrain the move so
that you create a third tile beneath the second. When the copy’s upper right anchor point
snaps to the corner tile’s lower right anchor point, release the mouse button and Alt+Shift
(Windows) or Option+Shift (Mac OS).
You use the third copy for alignment.
Rotate 90º and copy left tile (left). Then Alt-drag/Option-drag corner tile to make copy
beneath it (right).
8 Select the artwork in the right tile. Drag it to the left, pressing Alt+Shift (Windows) or
Option+Shift (Mac OS) so that the artwork overlaps that in the corner tile.
Copy (left) and move upper right tile over corner tile (right).