41 ADAM-6100PN Series User Manual
Chapter 4 System Configuration Guide
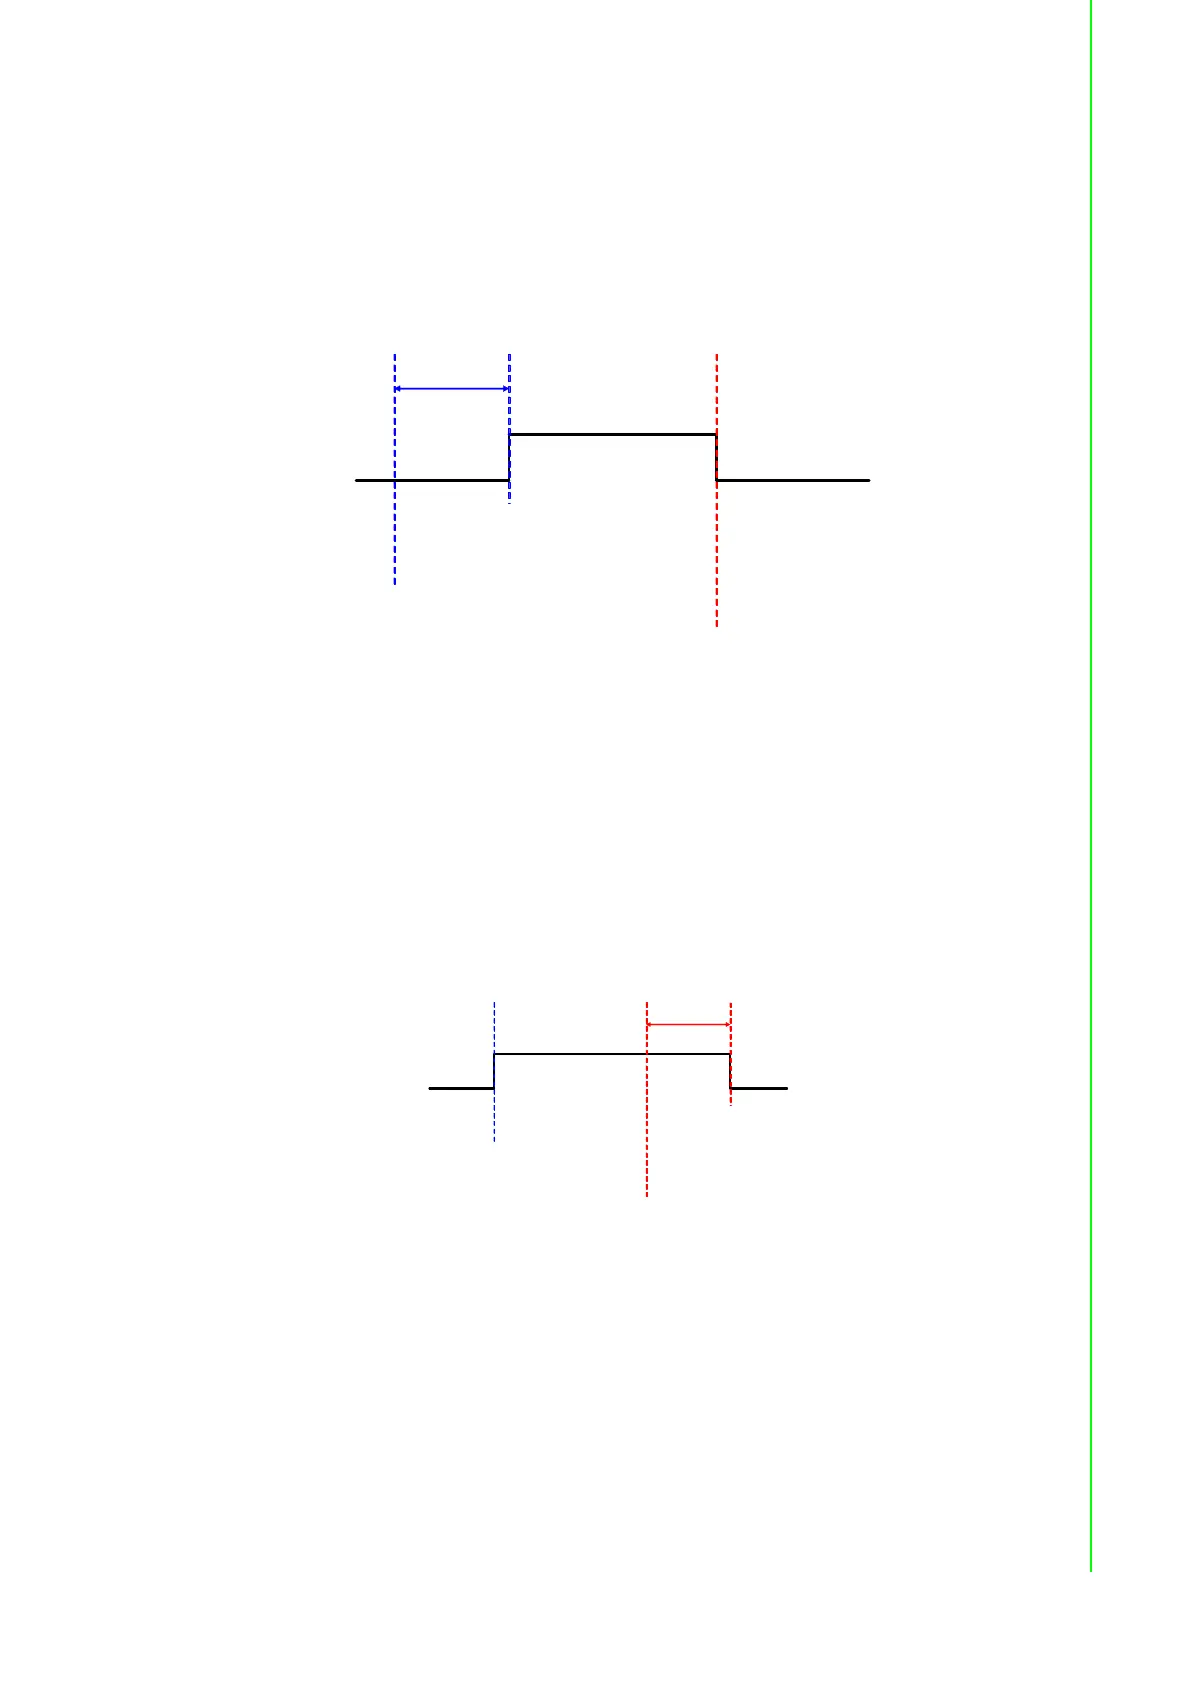
3. Low to High Delay
When you choose Low to High delay mode, it is almost the same as choosing the DO
mode. The only difference is that there will be certain time delay when the output
value changes from logic low to logic high. Refer to Figure 5.16 below for its process.
You can define the delay time by entering its value into the Delay time text box in the
Setting area. After you complete the setting, click the Apply button. Then you can
control the digital output value by the DO button and see its current value by the DO
status LED display at the bottom of the Status Display area.
Figure 4.15 Low to High Delay Output Mode
4. High to Low Delay
When you choose High to Low delay mode, it is almost the same as choosing the DO
mode. The only difference is that there will be certain time delay when the output
value changes from logic high to logic low. Refer to Figure 5.17 below for its process.
You can define the delay time by entering its value into the Delay time text box in the
Setting area. After you complete the setting, click the Apply button. Then you can
control the digital output value by the DO button and see its current value by the DO
status LED display at the bottom of the Status Display area.
Figure 4.16 Low to High Delay Output Mode
At the moment that you write logic high
to the digital output channel
At the moment that you write logic low
to the digital output channel
Delay Time
At the moment that you write logic
high to the digital output channel
At the moment that you write logic low
to the digital output channel
Delay Time