40 1200 Series Quarternary Pump User Manual
3 Installing the Pump
Connecting Modules and Control Software
Connecting an Agilent 1200 Series Vacuum Degasser
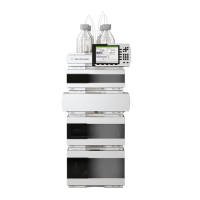
1 Place the vacuum degaser in the stack of modules as shown in Figure 5 on
page 33.
2 Ensure the power switch on the front of the vacuum degasser is OFF
(switch stands out).
3 Plug an APG cable into the APG remote connector at the rear of the module.
4 Connect the APG cable to the APG remote connector of the pump, see
Figure 6 on page 34.
5 Press in the power switches to turn on the vacuum degasser.
Connecting control software and/or control modules
1 Ensure the power switches on the front of the modules in the stack are OFF
(switches stand out).
2 Plug a GPIB cable into the GPIB connector at one of the modules, preferably
at the detector (MUST for the DAD).
3 Connect the GPIB cable to the Agilent control software in use.
4 Plug a CAN cable into the CAN connector of the control module.
5 Connect the CAN cable to the CAN connector of one of the modules.
6 Press in the power switches to turn on the modules.
The AUX output allows the user to monitor the vacuum level in the degasser chamber.
Do not connect the Agilent control software or the control module with the vacuum
degasser.
The Agilent control software (e.g. ChemStation, EZChrom, OL, etc.) can also be connected
to the system through a LAN cable, which requires the installation of a LAN-board. For
more information about connecting the control module or Agilent control software refer to
the respective user manual. For connecting the Agilent 1200 Series equipment to
non-Agilent 1200 Series equipment, see “Introduction to the Quaternary Pump” on page 8.

 Loading...