Exercise 1 – Develop an acquisition method
Task 4. Determine product ion masses
24 Agilent 6400 Series Triple Quad LC/MS Familiarization Guide
Task 4. Determine product ion masses
In this part of the method development, we will use three collision energies to
determine the best fragment ions to use for the eventual Multiple Reaction
Monitoring (MRMs) acquisition.
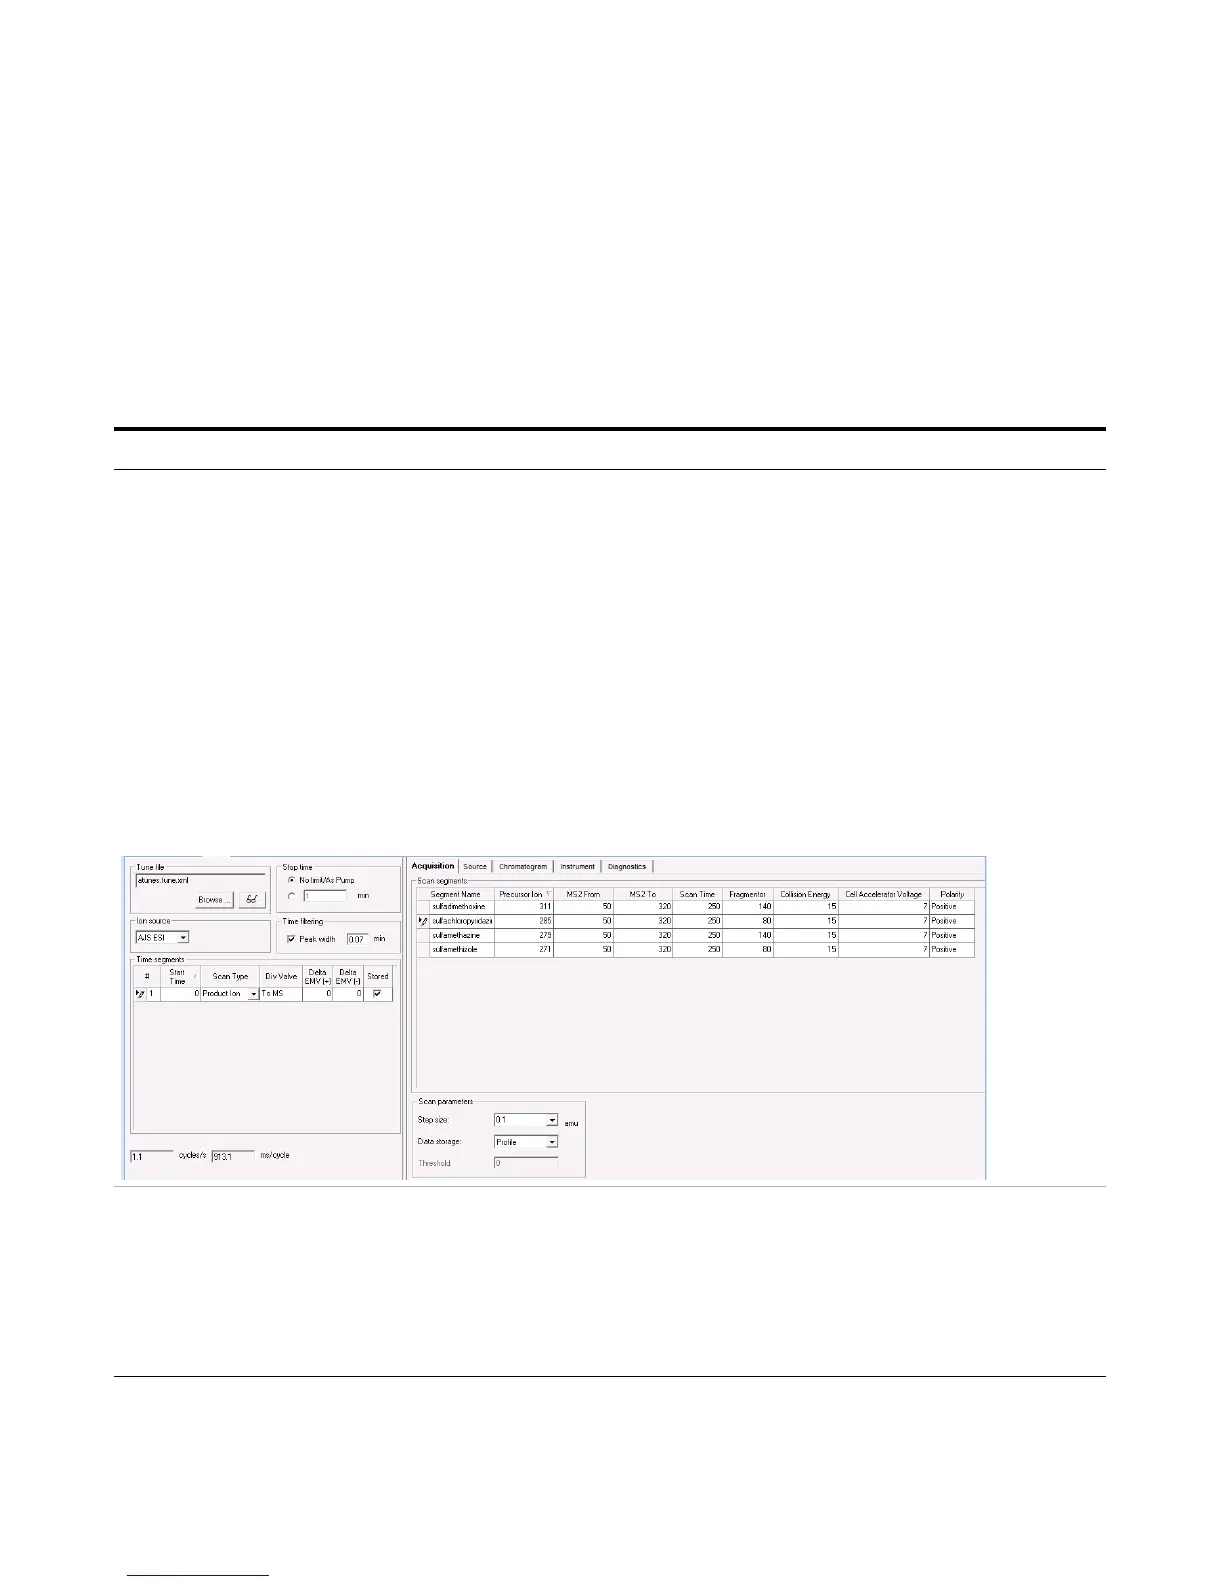
Steps Detailed Instructions Comments
1 Set up three product ion
acquisition methods and acquire
data.
• Use the MS parameters in the
example below, but change the
Fragmentor voltage to the
optimum voltage you determined
in the previous task.
• Save methods as iiiSulfamix
PI_xx.m, where iii are your
initials and xx is the collision
energy.
a Click the QQQ tab in the Method
Editor pane.
b Select
Product Ion in the Scan Type
combo box to scan each precursor ion
for all its product ions.
c Enter all MS parameters as listed in
the example below, making sure the
Collision Energy is set to
15 and the
Fragmentor voltage is set to the
optimum voltage determined in Task 3.
d Save the method as iiiSulfamix
PI_15.m.
e Repeat step c and step d for collision
energies of 30 and 45.
• When you change the Scan Type in
the Time Segments table, the Scan
segments table is reset. If you want
to copy the Scan segments to the
new Scan segments table,
highlight all of the lines in the Scan
segments table and then right-click
the Scan segments table and click
Copy. After you select a new Scan
Type, right-click the Scan segments
table and click Paste from
Clipboard.
• You cannot copy and paste the
Scan segments table between all
Scan Types.
2 Set up and run the worklist
(optional).
• Specify the data files as
iiiSulfamix PI_xx.d, where iii
are your initials and xx is the
collision energy.
a Click the Worklist tab.
b Add three samples to the worklist for
collision energies 15, 30 and 45.
c Mark the check box to the left of the
Sample Name for each sample you are
adding.
d Click Worklist > Run.
• This step is optional because you
can determine the product ion
masses from the data files shipped
with the system.
• Use the instructions in Step 2 of
Task 3 to set up the worklist.
 Loading...