Marker 1 was chosen b ecause it is selected as the delta marker
reference. Tochange reference markers, select
NNNNNNNNNNNNNNNNNNNNNNNNNNNNNNNNNNNNNNNNN
Delta Mkr Ref
.
Select
NNNNNNNN
M2
as the reference. Watch the displaychange to indicate:
--> DELTA MKR (3-2) : 1200.000000 MHz
You can choose any of the ve markers as a reference, but when delta
marker is on, if the reference marker has a frequency value higher
than the last active marker, the dierence b etween the frequencies is
negative and is displayed as suchby the swept signal generator. The
CRT display continues to intensify the dierence between the two
markers.
When delta marker is showing in the active entry area, the ENTRY
area is active. Rotate the rotary knob and watch the frequency
dierence change. The last active marker (in this case, marker 3)
changes frequency value, not the reference marker.
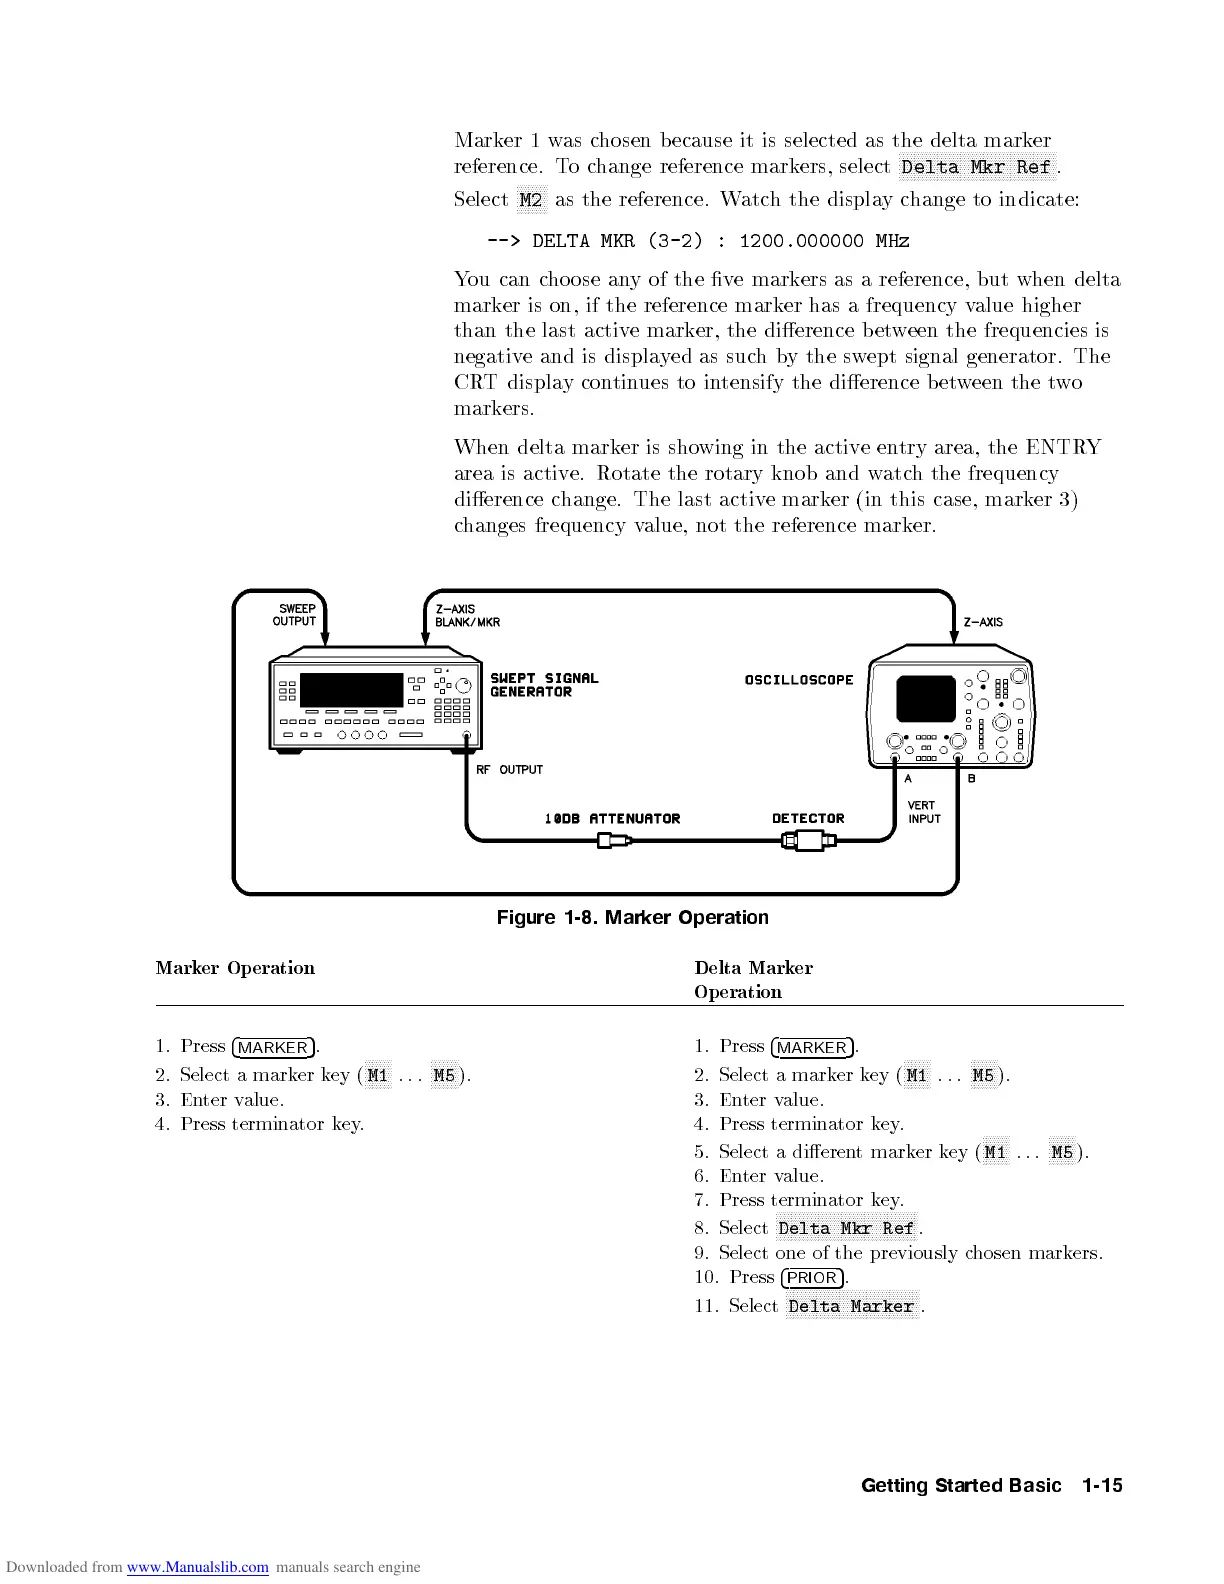
Figure 1-8. Marker Operation
Marker Operation Delta Marker
Operation
1. Press
4
MARKER
5
. 1. Press
4
MARKER
5
.
2. Select a marker key (
NNNNNNN
M1
...
NNNNNNN
M5
). 2. Select a marker key (
NNNNNNN
M1
...
NNNNNNN
M5
).
3. Enter value. 3. Enter value.
4. Press terminator key. 4. Press terminator key.
5. Select a dierent marker key (
NNNNNNN
M1
...
NNNNNNN
M5
).
6. Enter value.
7. Press terminator key.
8. Select
NNNNNNNNNNNNNNNNNNNNNNNNNNNNNNNNNNNNN
Delta Mkr Ref
.
9. Select one of the previously chosen markers.
10. Press
4
PRIOR
5
.
11. Select
NNNNNNNNNNNNNNNNNNNNNNNNNNNNNNNNNNN
Delta Marker
.
Getting Started Basic 1-15