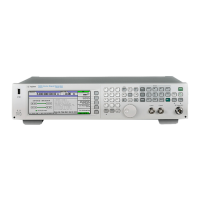
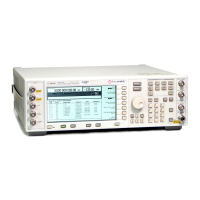
Do you have a question about the Agilent Technologies N5161A and is the answer not in the manual?
Provides warranty terms and conditions for the document.
Outlines terms for hardware and software licensing.
Details U.S. Government restricted rights for software and technical data.
Explains CAUTION and WARNING notices used in the document.
Covers initial warnings and preparation before troubleshooting.
Details protection from electrostatic discharge and handling components.
Information on how and what to provide when contacting Agilent for support.
Instructions for returning the instrument for service.
Describes the main power supply unit and its operation.
Details the baseband generator assembly for digital modulation.
Explains the RF assembly combining reference, synthesizer, and output circuits.
Describes the 10 MHz VCTCXO oscillator and its output signals.
Details the ALC loop for maintaining leveled output power.
Describes the A3 RF assembly for N5183A, covering frequency range and features.
Describes the 10 MHz VCTCXO oscillator and its output signals.
Describes the open-loop operation of the Automatic Leveling Control.
Explains the power search mode for modulation.
Details the attenuator option for extending power range.
Explains frequency generation above 3.2 GHz using doublers.
Provides information about the signal generator's display.
Lists available documentation like Installation Guide, User's Guide, etc.
Covers initial warnings and preparation before troubleshooting.
Details protection from electrostatic discharge and handling components.
Information on how and what to provide when contacting Agilent for support.
Instructions for returning the instrument for service.
Provides instructions on how to perform a complete self-test.
Guides on interpreting self-test failures and identifying faulty assemblies.
Instructions for accessing the instrument via a web browser.
Describes the sequence of operations during instrument startup.
Specific troubleshooting steps for self-test failure 1105.
General procedures for troubleshooting individual instrument assemblies.
Steps to troubleshoot the A2 Vector Module.
Specific troubleshooting for the A3 RF assembly.
Troubleshooting steps for the A4 Internal Memory Card.
Troubleshooting the A6 DC-AC Inverter Interface Board.
Troubleshooting the A7 Micro Deck for N5183A.
Troubleshooting using LEDs on the A7 Micro Deck.
Troubleshooting the A9 Interface Board.
Troubleshooting steps for no or unleveled output power.
Troubleshooting low or no output power below 3.2 GHz.
Checking output signals from A3 RF Assembly below 3.2 GHz.
Checking attenuator output signals above 3.2 GHz.
Verifying ALC operation below 3.2 GHz.
Troubleshooting issues with pulse modulation.
Steps to take if the LCD display is dark or inoperative.
Troubleshooting steps when the signal generator does not power on.
Troubleshooting when all front panel LEDs are not functioning.
Troubleshooting non-functional front panel keys.
Troubleshooting steps for a non-functional RPG knob.
Troubleshooting steps if the screen saver is not functioning.
Procedure for accessing boot time diagnostics mode on specific models.
Handling exceptions like auto-reboot and ERROR LED blinking.
Information on error messages and where to find more details.
Steps to troubleshoot phase lock loop unlock messages.
Troubleshooting specific Frac-N loop unlock issues.
Troubleshooting steps for a 515 reference missing message.
Troubleshooting steps for PCI Bridge FPGA DCM unlocked message.
Troubleshooting steps for RF Analog FPGA DCM unlocked message.
Troubleshooting steps for issues in the RF path.
Troubleshooting the 6 GHz electronic attenuator.
Troubleshooting harmonic spurious signals.
Procedure to verify harmonic performance at the RF output.
Troubleshooting non-harmonic spurious signals.
Locating faulty assemblies based on manual performance test failures.
Troubleshooting specific adjustment failures for N5183A.
Locating faulty assemblies based on automated performance test failures.
Troubleshooting digital modulation quality issues.
Troubleshooting DCFM carrier offset.
Troubleshooting amplitude switching speed.
Steps to order replacement parts.
Information on ordering parts quickly via the support website.
Procedures for returning defective assemblies.
Lists available frequency and hardware options for the signal generators.
Shows front panel assemblies for N5161A/62A models.
Shows front panel assemblies for N5181A/82A/83A models.
Illustrates the location of assemblies when viewed from the top.
Illustrates the location of assemblies when viewed from the bottom.
Illustrates cable connections when viewed from the top.
Illustrates cable connections when viewed from the bottom.
Lists part numbers for hardware and other instrument parts.
Illustrates and lists parts for the front panel view.
Illustrates rear panel views for different models.
Illustrates and lists parts for the main chassis and inside covers.
Lists parts for the outer instrument cover and associated items.
Lists part numbers for miscellaneous items.
Lists part numbers for ESD protective supplies.
Defines reference designators, abbreviations, and option numbers used in parts.
Covers important precautions and firmware requirements before assembly replacement.
Outlines post-replacement procedures and required performance tests.
Lists all replaceable assemblies with their corresponding page numbers.
Provides removal and replacement procedures for the outer cover.
Provides removal and replacement procedures for the inner bottom cover.
Provides removal and replacement procedures for the front panel.
Provides removal and replacement procedures for the USB board.
Provides removal and replacement procedures for the A6 DC-AC Inverter Interface Board.
Provides removal and replacement procedures for the A9 Interface Board.
Provides removal and replacement procedures for the Key Pad.
Provides removal and replacement procedures for the rear panel of N5161A/81A.
Provides removal and replacement procedures for the rear panel of N5162A/82A.
Provides removal and replacement procedures for the rear panel of N5183A.
Provides removal and replacement procedures for A2 Vector Module with specific options.
Provides removal and replacement procedures for A2 Vector Module without specific options.
Provides removal and replacement procedures for A3 RF Assembly with various options.
Provides removal and replacement procedures for A3 RF Assembly with specific options.
Provides removal and replacement procedures for A3 RF Assembly for N5183A.
Provides removal and replacement procedures for the A3BT1 Battery.
Provides removal and replacement procedures for the A5 CPU.
Provides removal and replacement procedures for A7 Micro-Deck standard N5183A.
Provides removal and replacement procedures for A7 Micro-Deck Option 1EM N5183A.
Provides removal and replacement procedures for RF Connector on N5183A.
Provides removal and replacement procedures for B1 through B4 Fans.
Covers essential procedures after assembly replacement and before verification.
Provides an overview of hardware assembly installation and removal softkeys.
Outlines the high-level process for replacing an assembly.
Details service procedures, firmware upgrades, and backup/restore steps.
Lists recommended manual performance verification tests after repair.
Steps to take if a manual performance test fails.
Procedure for performing I/Q calibration on specific models.
Instructions for running the complete self-test diagnostics.
How to view detailed results of self-tests.
Procedure to verify frequency accuracy relative to the timebase.
Steps for using a frequency counter for accuracy tests.
Steps for using a spectrum analyzer for accuracy tests.
Specific procedure for testing output power on N5161A/81A models.
Specific procedure for testing output power on N5162A/82A models.
Table showing leveled output power limits across frequencies.
Continued table of leveled output power limits across frequencies.
Lists automated tests to confirm warranted specifications.
Table detailing automated performance verification tests by model.
Continued table detailing automated performance verification tests.
Overview of procedures to verify signal generator electrical performance.
Provides general safety guidelines applicable to signal generators.
Information on the proper disposal of lithium batteries.
Contact information for product maintenance and customer assistance.
Certifies product specifications met at shipment and calibration traceability.
Explains how to use this chapter to document changes in N518xA signal generators.
Details changes and firmware releases from September 2009.
Details changes and firmware releases from January 2009.
Details changes and firmware releases from August 2008.
| Brand | Agilent Technologies |
|---|---|
| Model | N5161A |
| Category | Portable Generator |
| Language | English |


 Loading...