96
Order online at www
.agilent.com/chem/store
1. Gather the required supplies and tools.
2. Assemble the ferrules and 1/8 in. brass Swagelok nut on the column.
3. Score the column using a glass scribing tool. The score must be square to ensure
a clean break.
4. Break off the column end by supporting it against the column cutter opposite the scribe.
Inspect the end with a magnifying loupe to make certain that there are no burrs or
jagged edges.
5. Wipe the column walls with a tissue dampened with isopropanol to remove fingerprints
and dust.
6. Insert the column into the detector until it bottoms.
7. Slide the column nut and ferrules up the column to the detector and finger tighten the nut.
8. Pull out 1 mm of column. Tighten the nut an additional 1/4 turn with a wrench or until
the column does not move.
• Front ferrule
• Back ferrule
• Column nut
• Column cutter
• 7/16 in. wrench
• Lab tissue
• Lint-free gloves
What you need:
• The oven and/or inlet may be hot
enough to cause burns. If either is hot,
wear heat-resistant gloves to protect
your hands.
• Wear safety glasses to protect your
eyes from flying particles while
handling, cutting or installing glass or
fused silica capillary columns. Use
care in handling these columns to
prevent puncture wounds.
• Wear clean, lint-free gloves to prevent
contamination of parts with dirt and
skin oils.
Warnings & Caution
Installing a Capillary Column in the TCD
TCD Ferrules
Column ID (mm) Back Ferrules Front Ferrules,
10/pk
0.53 5182-3477 5182-9673
0.32 5182-3477 5182-9676
0.25 / 0.2 / 0.1 5182-3477 5182-9677
No hole 5182-3477 5182-9679
TCD Back Ferrule for 1/8in detector fitting 10/pk 5180-4103
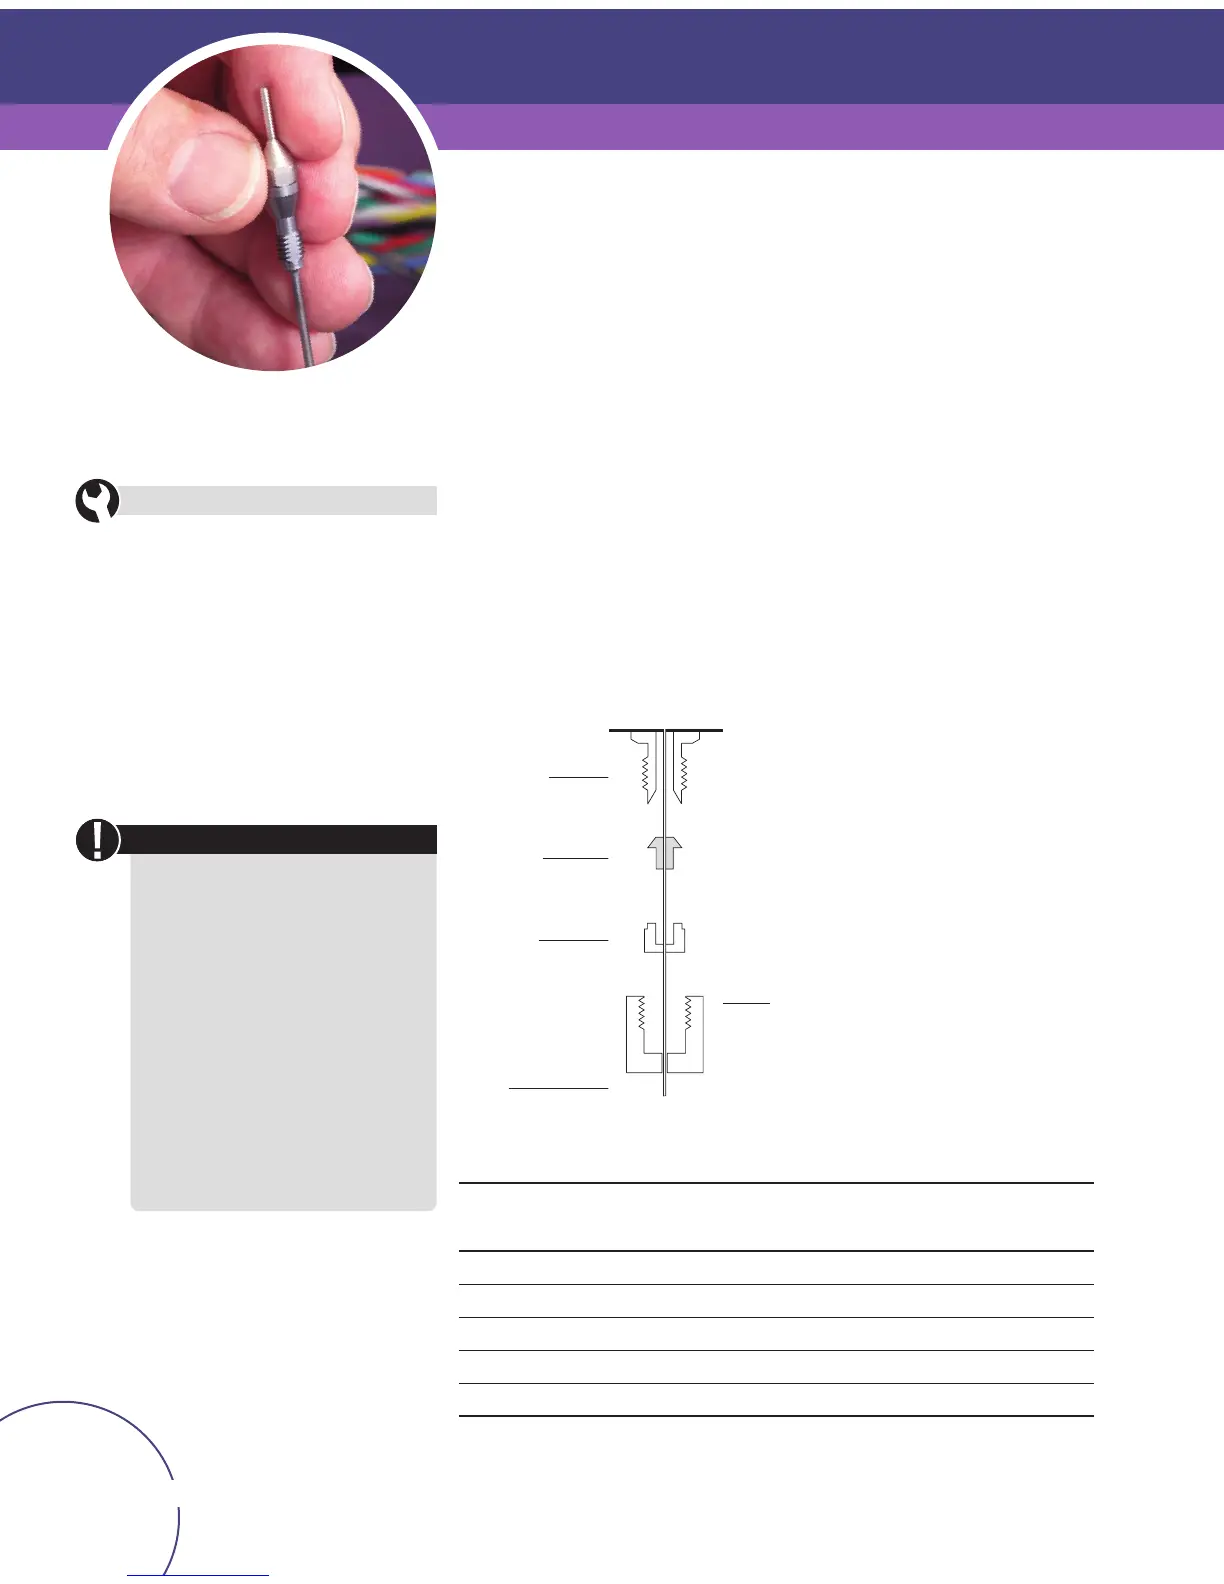
Detector fitting
Front ferrule
Back ferrule
Column
Column nut 1/8-inch brass

 Loading...


