EasyManuals Logo

Agilent Technologies PSA Series Installation Note

Agilent Technologies PSA Series
44 pages
To Next Page IconTo Next Page
To Previous Page IconTo Previous Page
Page #17 background imageLoading...
Page #17 background image
Installation Note E4440-90613 17
Installation Procedure
10.Remove the Front End Driver being careful to avoid damaging the ribbon cables.
11.Remove the Synthesizer assembly after removing the rigid cable and the two
retaining screws.
12.Remove the Reference assembly.
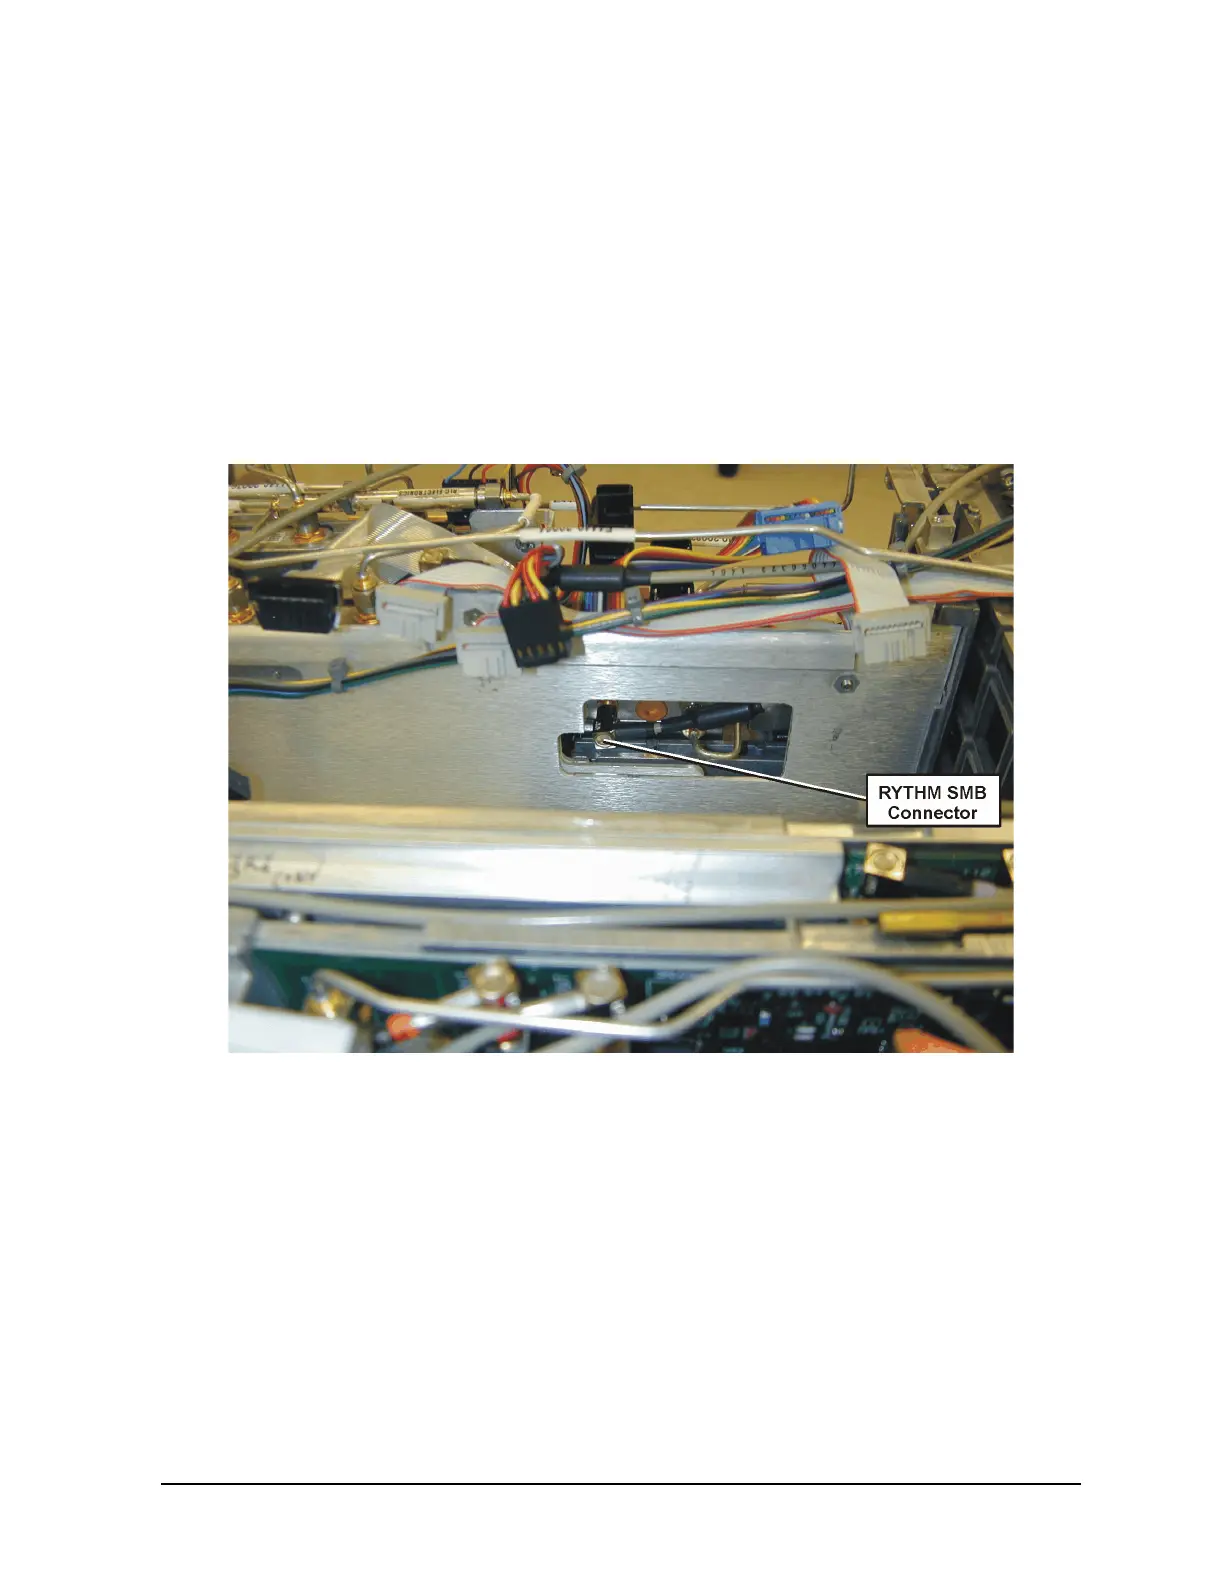
13.Locate cable W17, (RYTHM highband output to 3rd Converter J1) and take note of
the cable routing. Refer to Figure 10. Using needle nose pliers, carefully grab the
body of the cable SMB connector and gently rock the SMB connector free of the
RYTHM. Discard this cable.
Figure 10 W17 Location

Other manuals for Agilent Technologies PSA Series

Questions and Answers:

Question and Answer IconNeed help?

Do you have a question about the Agilent Technologies PSA Series and is the answer not in the manual?

Agilent Technologies PSA Series Specifications

General IconGeneral
BrandAgilent Technologies
ModelPSA Series
CategoryMeasuring Instruments
LanguageEnglish

Related product manuals