Page 25
[[PROgRaMMing MEnU
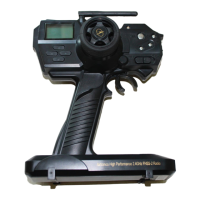
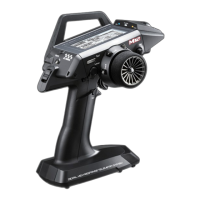
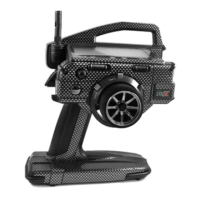
AUX-Point setting range is -100 to 100. The default setting for Point 1 is -100, for Point 2 is -60,
for Point 3 is -20, for Point 4 is 20, for Point 5 is 60, and for Point 6 is 100.
3) Press the +/INC or DEC/- keys to choose the Point value for the currently displayed Point.
4) Repeat steps 2 and 3 to choose the Point value for each of the desired Points.
1) To Activate and use the Point Auxiliary function, move the Auxiliary Lever to the ON position (pushed UP.)
2) Press the Right MENU key to cycle Forward through the programmed Point Auxiliary positions and press the Left MENU key
to cycle Backward through the programmed Point Auxiliary positions. The Auxiliary Channel 3 servo will move the specied
Point positions as you cycle through the different Points.
TRM Switch
2) Press the Right or Left MENU keys to scroll to the specic Point you would like to change the
Point value for. The default Point values will be displayed.
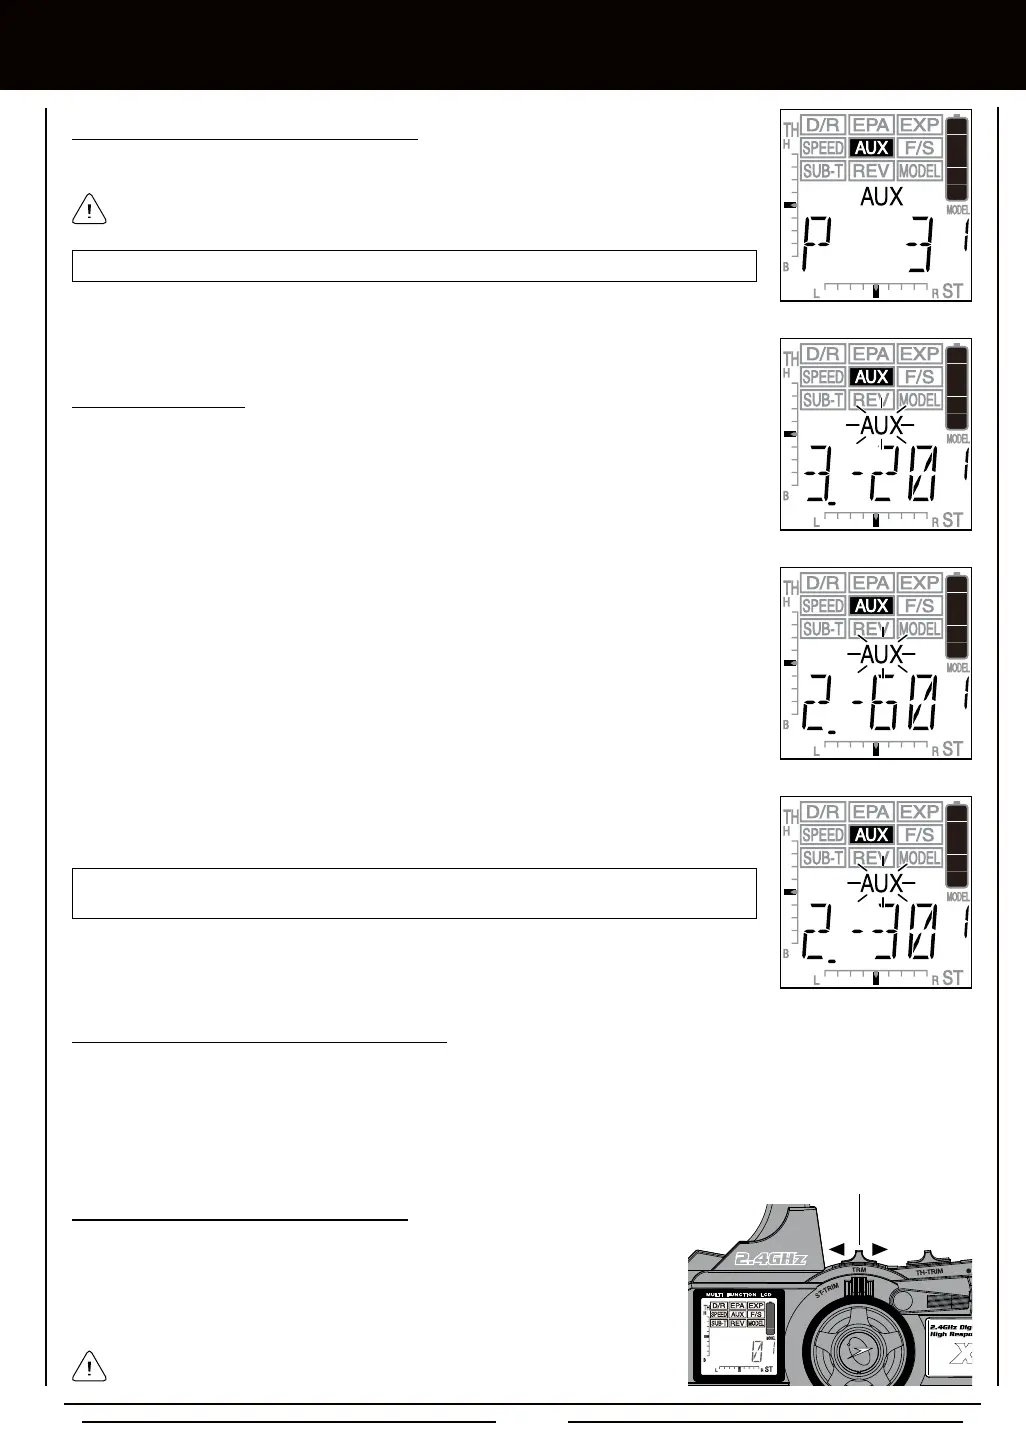
AUX-P setting range is 2 to 6. The default setting is 6.
2) Press the +/INC or DEC/- keys to choose the number of Points you would like to program.
You cannot choose fewer than 2 Points.
1) Move the Auxiliary Lever to the ON position (pushed UP). The last dened Point, along with
it's current Point value will be displayed, and AUX will ash in the Programming Window. In
addition, the Power Indicator Light will ash rapidly.
1) The TRM switch can be programmed to control the Point Auxiliary function. This
allows you to cycle through the Point positions easily during use. Press the
TRM switch forward to cycle Backward through the programmed Point positions
and press the TRM switch backward to cycle Forward through the programmed
Point positions. For more information, see page 41.
The Auxiliary Lever can be left in the OFF position (pushed DOWN), if you
use the TRM switch to control the Point Auxiliary function.