4.4 Storage and transport of the battery packs removed from the wheel
Never subject the battery pack to humidity (water, rain water, snow, etc.)!
Information regarding storage:
The battery pack removed from the wheel should always be stored upright as shown in
•
the graphic illustration and inaccessible to children.
Charge the battery pack before long-term storage and check the charge status every 3
•
months.
Store the battery pack at a cool and dry location where it is protected from damage
•
and unauthorized access.
Information regarding transport:
The battery pack should be transported in the original package (therefore keep the •
carton).
The battery pack may remain in the wheel with all types of transport except air trans-
•
port. This must be clarified with the respective airline when transporting the battery
pack by plane (see note in Chapter 4.3).
Contact your specialist dealer or the Alber Service Center for clarification prior to
•
shipping or transporting a damaged battery pack.
Instructions in case of damages or defect of the battery pack
If the battery pack is damaged or defective, it must be set apart and inspected. Please
contact your specialist dealer and discuss the further procedure regarding return ship-
ment and repair with him.
A defective/damaged battery pack must not to be used or opened to prevent damage or
personal injury.
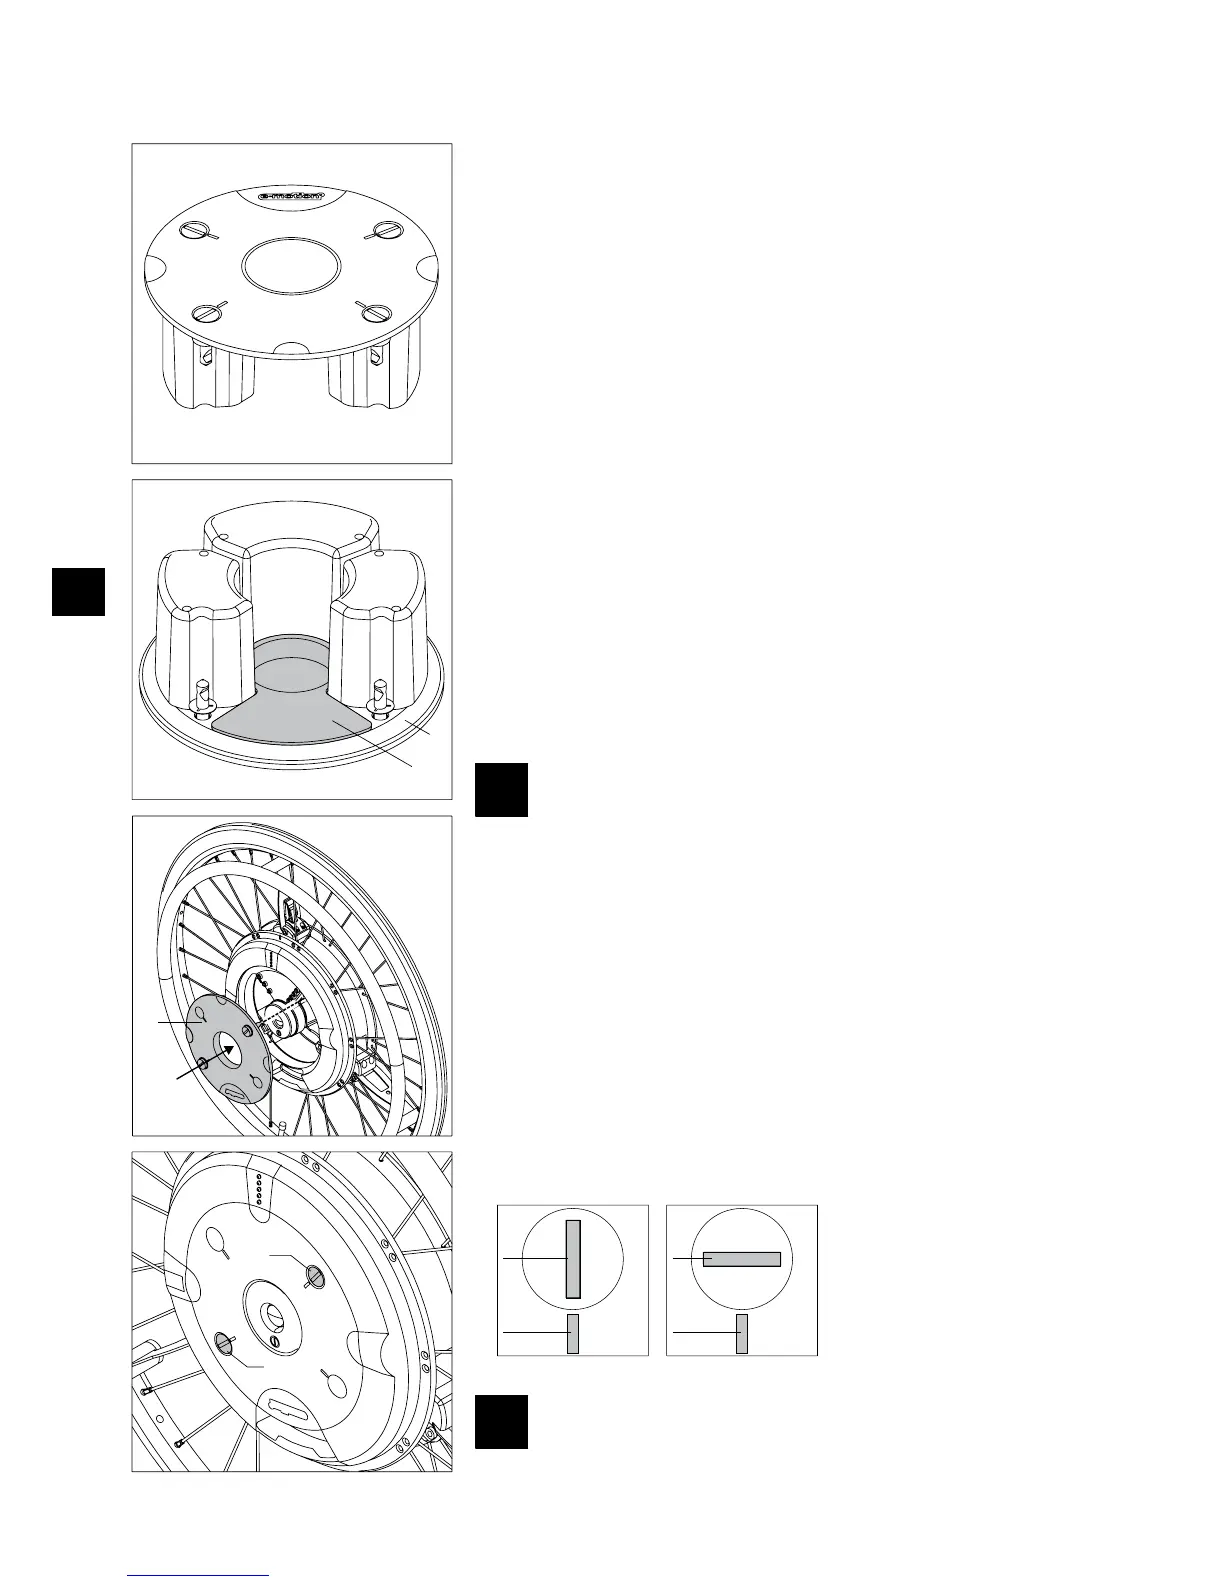
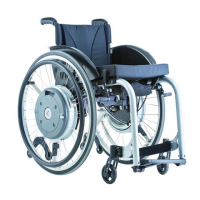
The battery pack [12] removed from the wheel must only be stored
or transported with the protective cover [13] in place. Transport or
storage without the protective cover in place [13] is not permitted
to prevent damage or personal injury.
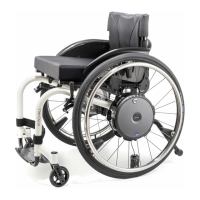
4.5 Protection of the wheel with the battery pack removed
After you have removed the battery pack and secured it as described in Chapter 4.3, you
must next protect the wheel against dirt and damage as follows:
Remove the cover [18] and push it slightly into the wheel hub in place of the battery
•
pack as shown in the graphic illustration.
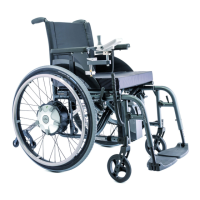
Insert a coin into the slot [32] of one of the two locking pins [19].
•
Push the locking pin [19] inside and rotate it by 90 degrees. •
Repeat the procedure with the second locking pin [19]. •
The cover [18] has only been correctly inserted into the wheel hub if it does not pro- •
trude beyond it at any point.
The cover [18] is only correctly secured in the wheel hub if its marks [33] and the
•
slots [32] of the locking pins [19] are properly aligned (refer to the following graphic
illustration).
A=Locking pin locked
B=Locking pin released
Protect the wheel immediately after removing the battery pack. Nei-
ther humidity nor foreign objects (e.g. metal shavings, small nails
or other conducting metals) may enter the wheel hub.