Chapter 4
ALESIS ML-9600 REFERENCE MANUAL 11
4.4B RECORDING A TRACK
Before you can begin recording, you need to create a new Track by pressing the New Track button.
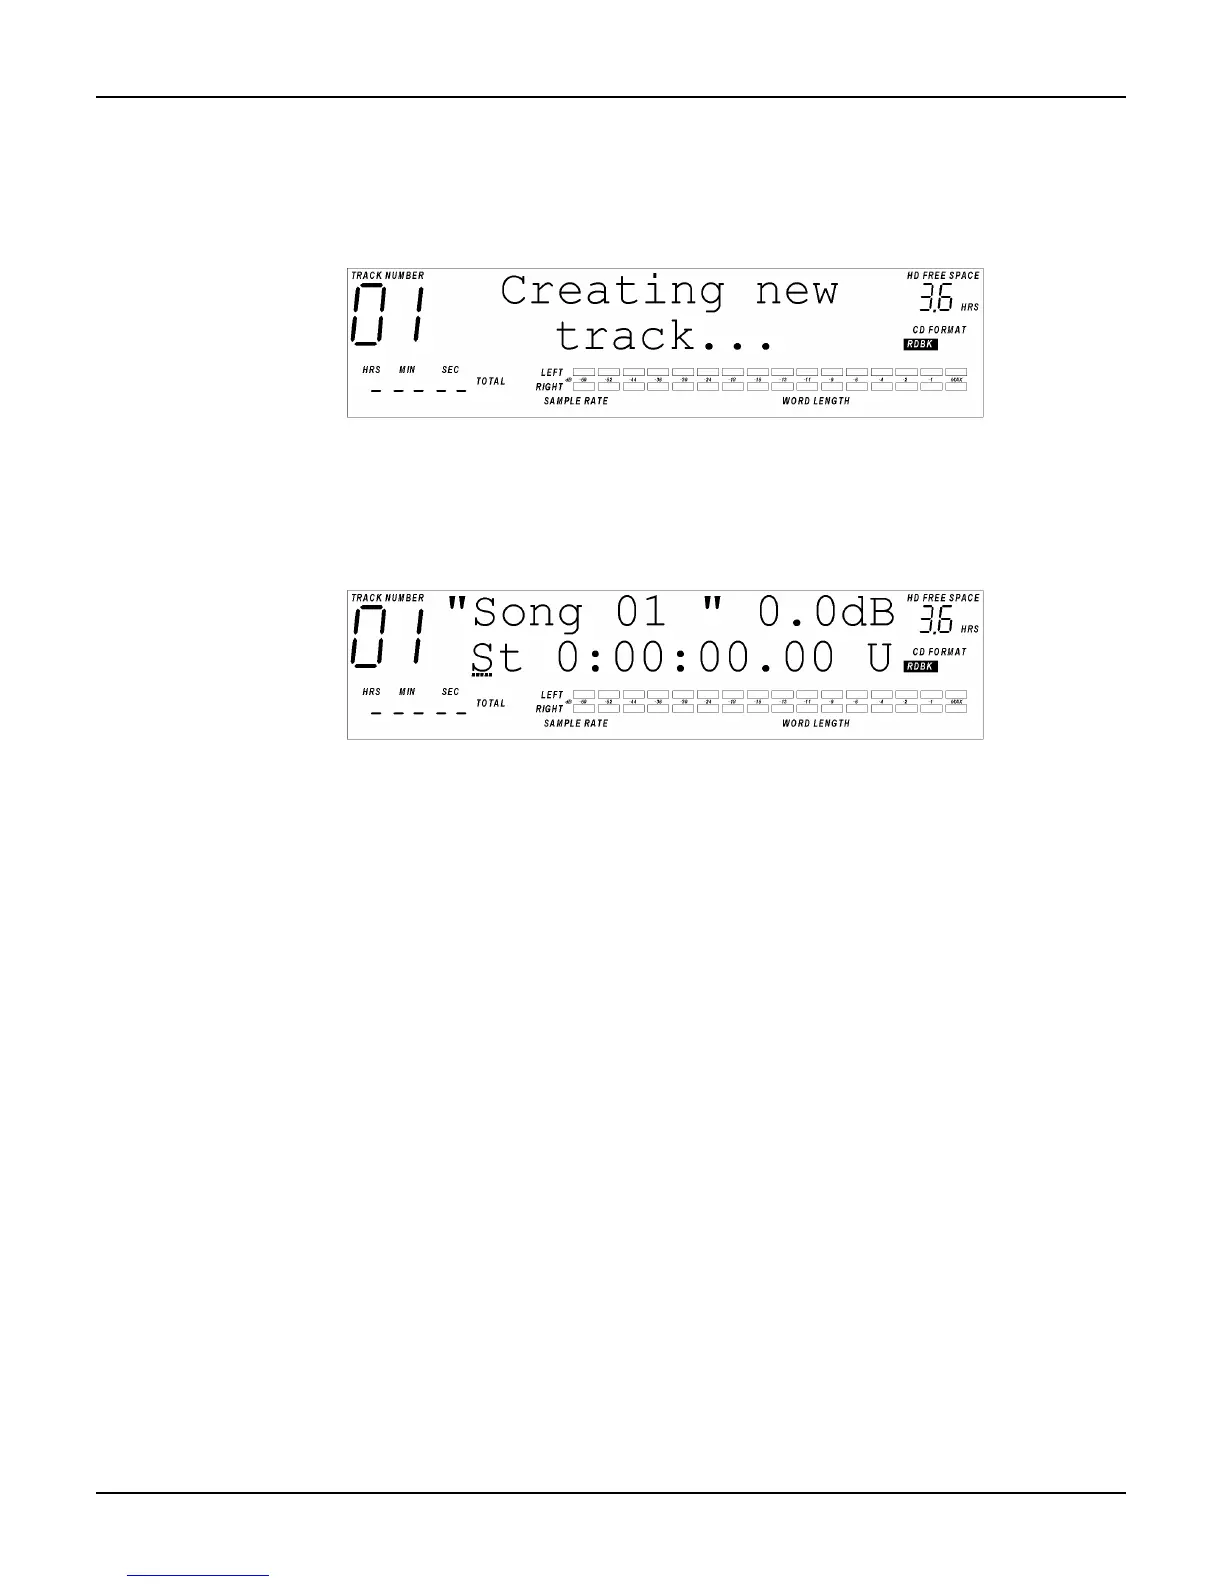
This will create an entry in the playlist that you can then record audio into. Figures 4.4.2 and 4.4.3 show
what will be displayed after the New Track button is pressed.
Figure 4.4.2
New Track "Popup"
This will be displayed briefly while a new Track is being prepared. Figure 4.4.3 shows what will be
displayed after the "popup" goes away.
Figure 4.4.3
Empty Track
Pressing RECORD once will place the Track in “record ready” mode, with the sample rate, word
length, and input source determined by the state of the SAMPLE RATE, WORD LENGTH, and
INPUT SOURCE buttons. Additionally, the audio outputs will mirror the audio inputs; i.e. the unit
will be in “input” mode. After the unit is in record ready mode, a single press of the PLAY button will
begin recording to the Track. To terminate the recording , press STOP while the unit is recording. To
pause the recording, press PLAY/PAUSE while the unit is recording; press PLAY/PAUSE to resume
recording.
In this scenario, the playlist now has one Track in it. Once the Track has been recorded to the hard
drive, the ML-9600 will treat it much as it would a CD Track; the SCAN, SKIP, PLAY/PAUSE, and
STOP buttons all function much as they would for a CD.
4.4C THE DISPLAY
In playlist edit mode, the first line of the 2X16 alphanumeric display always shows the current Track
name and Track gain expressed in dB. The Track gain is adjustable from –18dB to +18 dB in 0.1dB
increments up to +/-10dB, after which it is adjusted in 1dB increments. To read more about Track gain,
see Chapter 5: Digital Signal Processing.
In Figure 4.4.2, the second line of the 2X16 display shows the Track’s Start Time in hours, minutes,
seconds, and hundredths of a second (sometimes referred to as ABS or absolute time), and a write
protect indication (either P for Protected or U for Unprotected). Moving the cursor underneath the "St"
field and using the UP/YES and DOWN/NO keys will change the second line of the 2X16 display,
indicating the Track’s End Time (relative to the beginning of the playlist), the Track Length, and the
Track Fade-in and Fade-out parameters. More on these screens a little later.
 Loading...