12
Editing Kits
You can edit several different areas of a kit: the instruments assigned to each layer, the effects applied to
the kit, the settings for each trigger, and more.
Assigning Instruments
To assign an instrument in a kit:
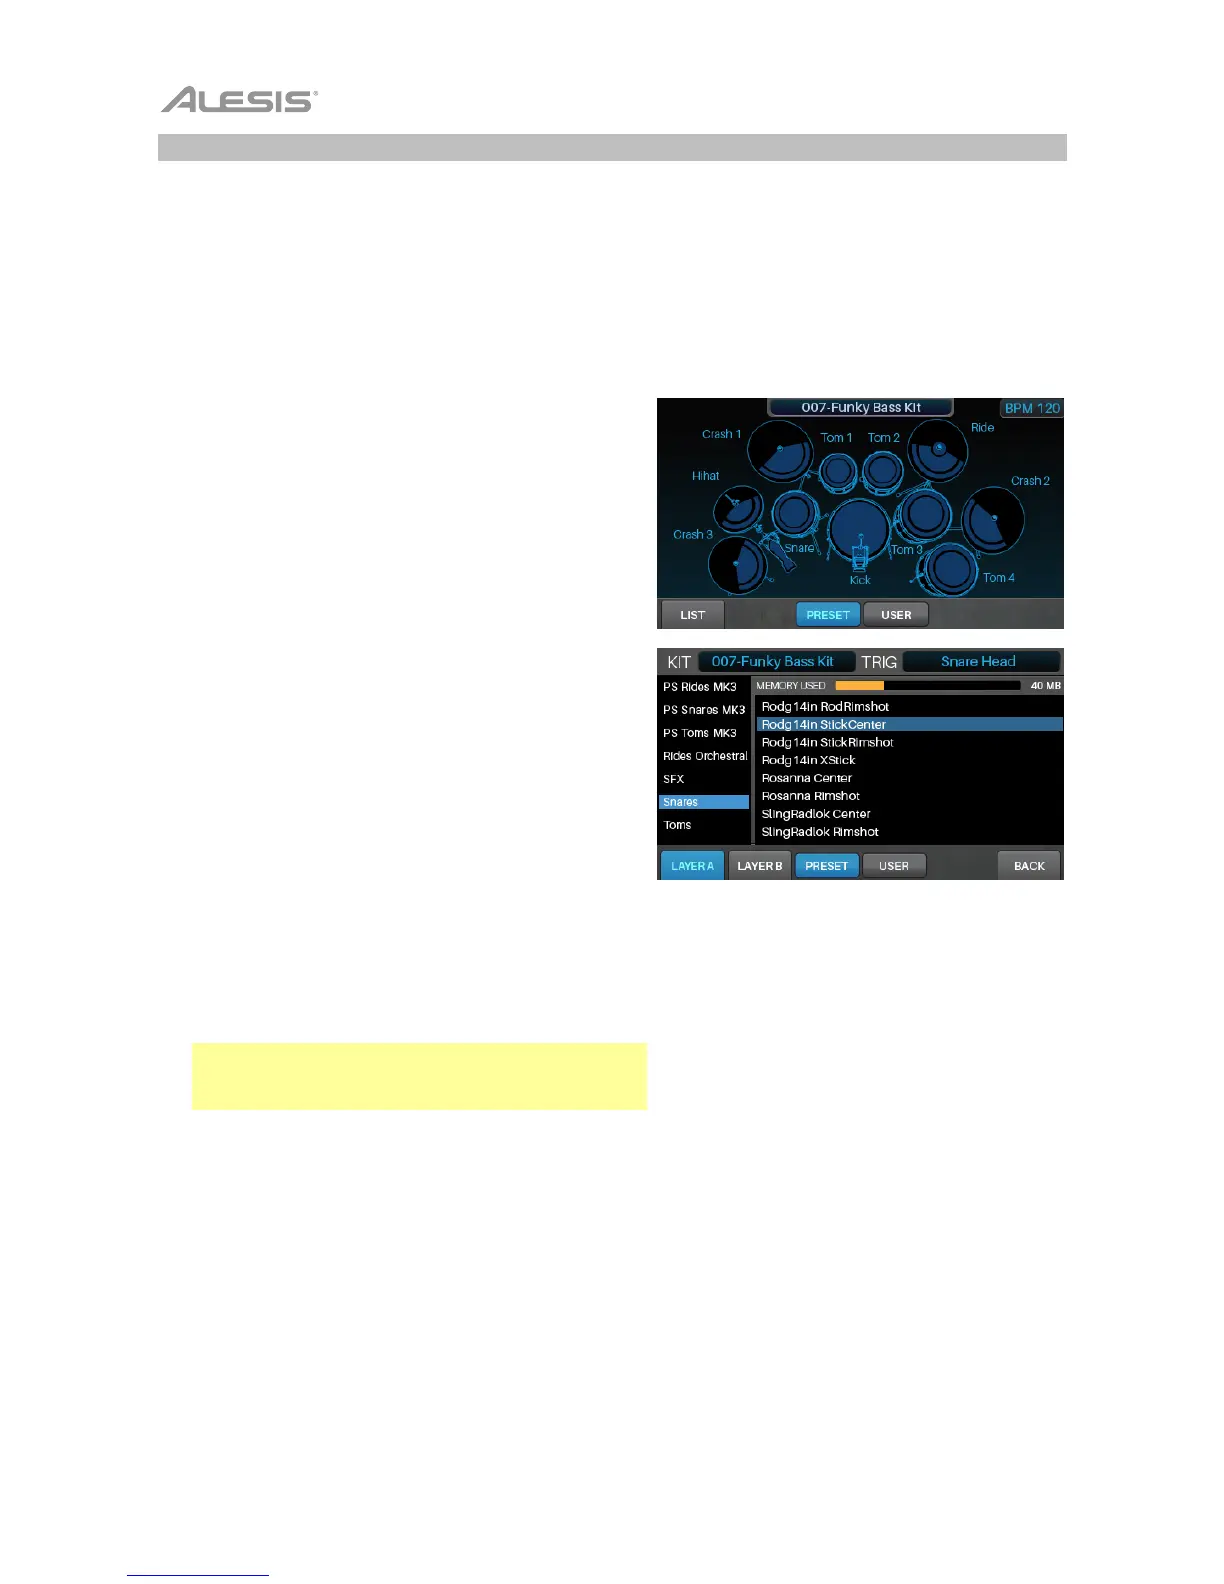
1. Press Kit to show the Kit menu, and select a kit.
2. After selecting a kit, select a trigger: If the Note Chase
button is off, press it so it turns on, and then strike the
desired zone of the trigger (drum or cymbal pad).
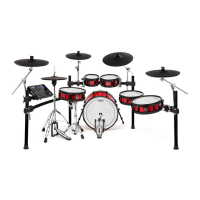
3. Press Voice and then press F4/Inst.
4. Press F1/Layer A or F2/Layer B to select the desired
layer (your Strike module can layer two separate
instruments on one trigger zone).
5. Press F3/Preset to select an instrument from the
Strike module’s internal instrument library or F4/User
to select an instrument from your SD card (if you’ve
saved samples in Sample Edit Mode, they’ll be on
your SD card).
6. Use the cursors to select the left panel—the
instrument categories. Turn the data dial to scroll
through the list and select one.
7. Use the cursors to select the right panel—the
instruments in that category. Turn the data dial to
scroll through the list to select one.
To assign other instruments, use the cursors to
select the Trig field in the upper-right corner, and
turn the data dial to select the desired zone of a
trigger. Alternatively, if Note Chase is on, strike the
desired zone of the trigger. Repeat Steps 4–5 to
assign a new instrument.
Important: Each kit can use up to 200 MB worth of
samples. The Memory Used meter indicates how
much space you are using of that total capacity.