Steps
1. Align the graphics card with the slot on the system board.
2. Place the card into the x16/x8 slot and press down firmly until the graphics card snaps into place.
3. Place the card into the x8 slot and press down firmly until the graphics card snaps into place.
4. Connect the power cables to the graphics card.
5. Slide the tab on the graphics-card bracket into the slot on the chassis and snap it into place.
6. Replace the graphics bridge that connects the graphics cards.
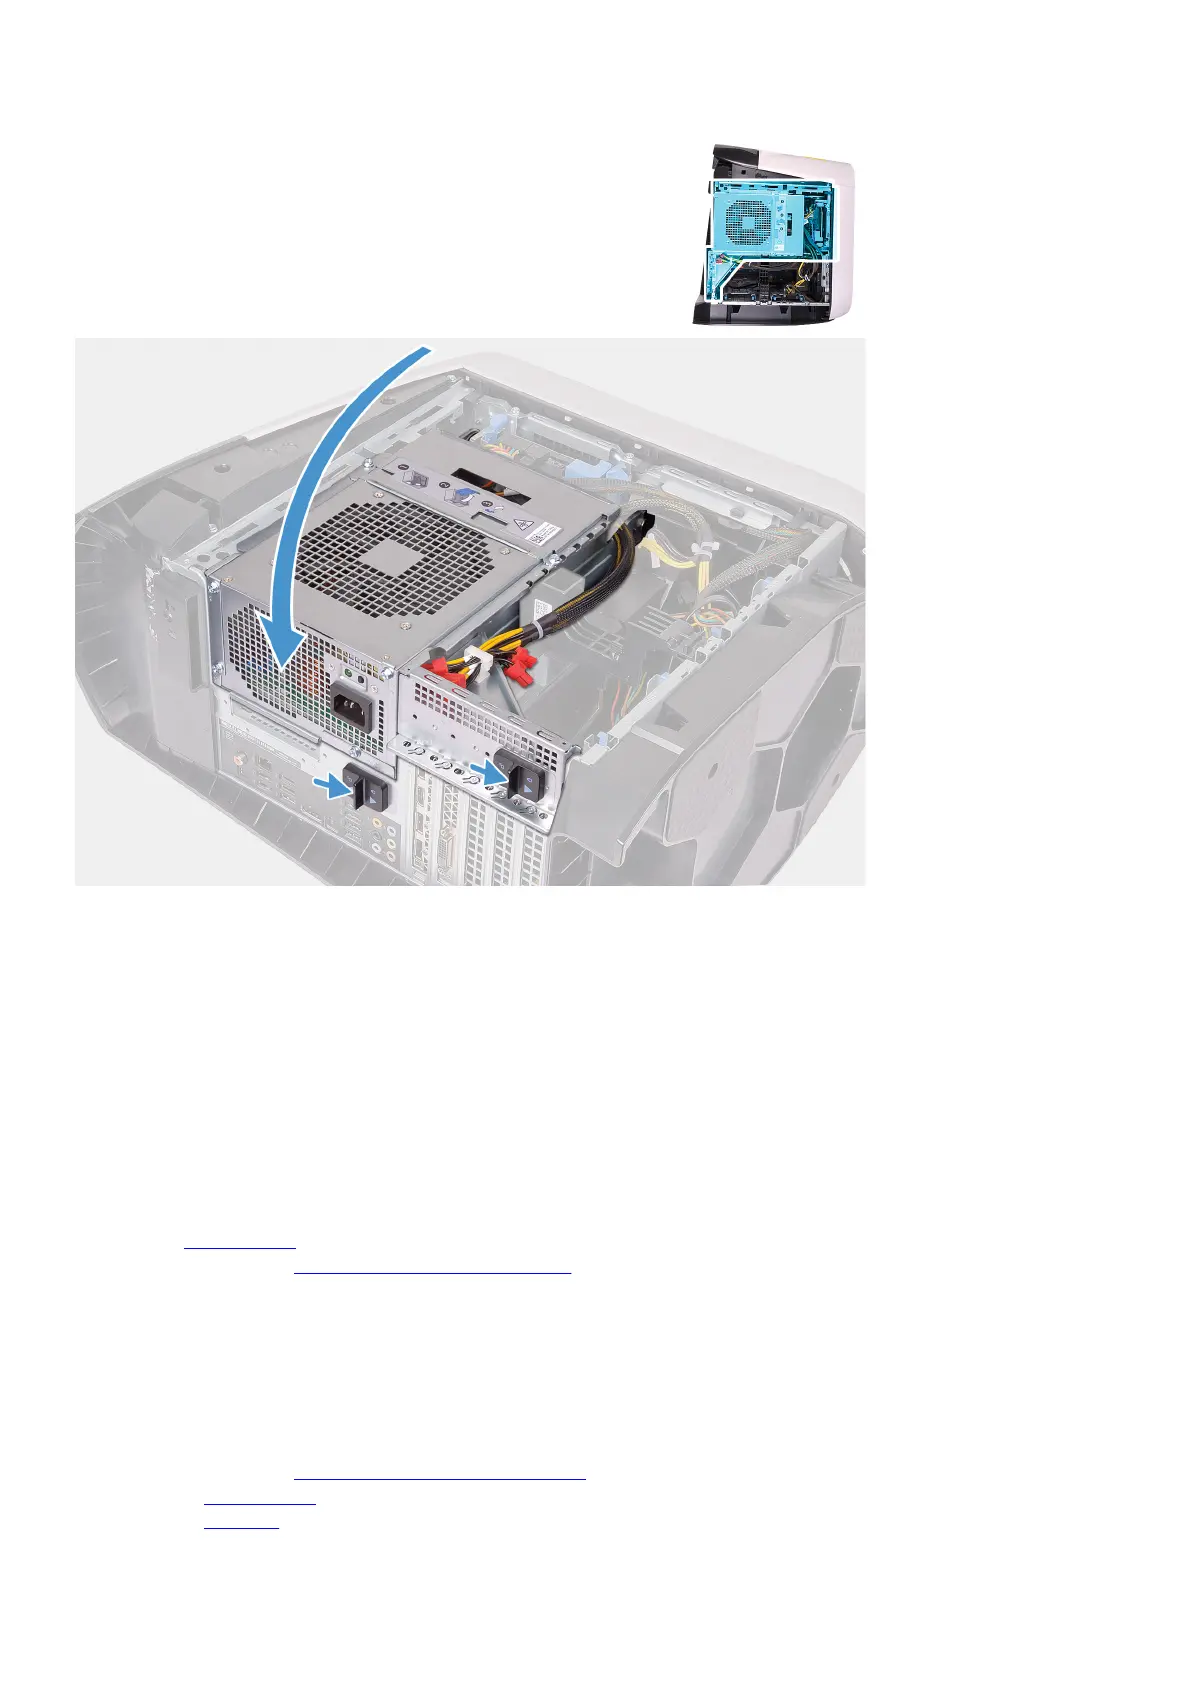
7. Rotate the power-supply unit cage towards the chassis.
8. Slide the power-supply unit cage release latches towards the locked position.
Next steps
1. Install the left-side cover.
2. Follow the procedure in After working inside your computer.
Front bezel
Removing the front bezel
Prerequisites
1. Follow the procedure in Before working inside your computer.
2. Remove the left-side cover.
3. Remove the top-cover.
57