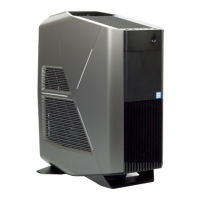
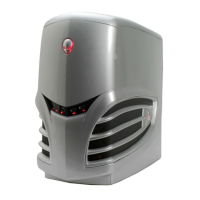
Do you have a question about the Alienware Aurora R6 and is the answer not in the manual?
Steps to prepare the computer before internal servicing, including shutdown and disconnection procedures.
Guidelines to protect the computer from potential damage and ensure personal safety during servicing.
Lists essential tools required for performing various maintenance procedures outlined in the manual.
Steps to properly reassemble and secure the computer after internal maintenance or repair.
Visual identification of the main internal components and their locations within the computer chassis.
Detailed labeling and description of various connectors, jumpers, and slots on the system board.
Step-by-step instructions for safely detaching the stability foot from the computer's base.
Step-by-step instructions for securely reattaching the stability foot to the computer's base.
Instructions for releasing and removing the left-side access panel of the computer chassis.
Instructions for aligning and securing the left-side access panel back onto the computer chassis.
Instructions for releasing and removing the right-side access panel of the computer chassis.
Instructions for aligning and securing the right-side access panel back onto the computer chassis.
Lists necessary steps, such as cover removal, before detaching the top-cover assembly.
Step-by-step guide to safely detach the computer's top-cover assembly.
Step-by-step guide to securely reattach the computer's top-cover assembly.
Lists necessary steps to perform after reattaching the top-cover assembly.
Lists necessary steps, such as cover removal, before detaching the bottom cover.
Step-by-step guide to safely detach the computer's bottom cover.
Step-by-step guide to securely reattach the computer's bottom cover.
Lists necessary steps to perform after reattaching the bottom cover.
Lists necessary steps, such as cover removal, before detaching the 3.5-inch hard drive.
Step-by-step guide to safely detach and remove a 3.5-inch hard drive from its carrier.
Step-by-step guide to install and secure a 3.5-inch hard drive into its carrier and cage.
Lists necessary steps to perform after reattaching the 3.5-inch hard drive.
Lists necessary steps, such as cover removal, before detaching the 2.5-inch hard drive.
Step-by-step guide to safely detach and remove a 2.5-inch hard drive from its carrier.
Step-by-step guide to install and secure a 2.5-inch hard drive into its carrier and cage.
Lists necessary steps to perform after reattaching the 2.5-inch hard drive.
Lists necessary steps, such as cover removal, before detaching the U.2 solid-state drive.
Step-by-step guide to safely detach and remove a U.2 solid-state drive.
Step-by-step guide to install and secure a U.2 solid-state drive.
Lists necessary steps to perform after reattaching the U.2 solid-state drive.
Lists necessary steps, such as cover and drive removal, before detaching the hard-drive cage.
Step-by-step guide to safely detach and remove the hard-drive cage from the chassis.
Step-by-step guide to install and secure the hard-drive cage back into the chassis.
Lists necessary steps to perform after reattaching the hard-drive cage.
Lists necessary steps, such as cover removal, before detaching the power-supply unit.
Detailed step-by-step guide to safely detach and remove the power-supply unit from the chassis.
Detailed step-by-step guide to install and secure the power-supply unit back into the chassis.
Lists necessary steps to perform after reattaching the power-supply unit.
Lists necessary steps, such as cover and power-supply removal, before detaching the cooling assembly.
Step-by-step guide to safely detach and remove the processor fan and heat-sink assembly.
Step-by-step guide to install and secure the processor fan and heat-sink assembly.
Lists necessary steps to perform after reattaching the processor-cooling assembly.
Lists necessary steps, such as cover removal, before detaching the coin-cell battery.
Step-by-step guide to safely detach and remove the coin-cell battery from the motherboard.
Step-by-step guide to install and secure a new coin-cell battery into the motherboard socket.
Lists necessary steps to perform after reattaching the coin-cell battery.
Lists necessary steps, such as cover removal, before detaching memory modules.
Step-by-step guide to safely detach and remove memory modules from their slots.
Step-by-step guide to install and secure memory modules into their slots.
Lists necessary steps to perform after reattaching memory modules.
Lists necessary steps, such as cover and graphics card removal, before detaching the solid-state drive.
Step-by-step guide to safely detach and remove a solid-state drive from the system board.
Step-by-step guide to install and secure a solid-state drive onto the system board.
Lists necessary steps to perform after reattaching the solid-state drive.
Lists necessary steps, such as cover and power-supply removal, before detaching the graphics card.
Step-by-step guide to safely detach and remove the graphics card from the PCIe slot.
Step-by-step guide to install and secure the graphics card into the PCIe slot.
Lists necessary steps to perform after reattaching the graphics card.
Lists necessary steps, such as cover and power-supply removal, before detaching the processor cooling assembly.
Step-by-step guide to safely detach and remove the processor fan and heat-sink assembly.
Step-by-step guide to install and secure the processor fan and heat-sink assembly.
Lists necessary steps to perform after reattaching the processor fan and heat-sink assembly.
Lists necessary steps, such as cover and cooling assembly removal, before detaching the processor.
Step-by-step guide to safely detach and remove the processor from its socket.
Step-by-step guide to install and secure the processor into its socket correctly.
Lists necessary steps to perform after reattaching the processor.
Lists necessary steps, such as cover removal, before detaching the wireless card.
Step-by-step guide to safely detach and remove the wireless card from its slot.
Step-by-step guide to install and secure the wireless card into its slot.
Lists necessary steps to perform after reattaching the wireless card.
Lists necessary steps, such as cover removal, before detaching the antenna.
Step-by-step guide to safely detach and remove the antenna from the chassis.
Step-by-step guide to install and secure the antenna onto the chassis.
Lists necessary steps to perform after reattaching the antenna.
Lists necessary steps, such as cover removal, before detaching the front-chassis fan.
Step-by-step guide to safely detach and remove the front-chassis fan.
Step-by-step guide to install and secure the front-chassis fan.
Lists necessary steps to perform after reattaching the front-chassis fan.
Lists necessary steps, such as cover removal, before detaching the top-chassis fan.
Step-by-step guide to safely detach and remove the top-chassis fan.
Step-by-step guide to install and secure the top-chassis fan.
Lists necessary steps to perform after reattaching the top-chassis fan.
Lists necessary steps, such as cover removal, before detaching the optical drive.
Step-by-step guide to safely detach and remove the optical drive assembly.
Step-by-step guide to install and secure the optical drive assembly.
Lists necessary steps to perform after reattaching the optical drive.
Lists necessary steps, such as cover removal, before detaching the front bezel.
Step-by-step guide to safely detach and remove the front bezel from the chassis.
Step-by-step guide to install and secure the front bezel onto the chassis.
Lists necessary steps to perform after reattaching the front bezel.
Lists necessary steps, such as cover removal, before detaching the power-button board.
Step-by-step guide to safely detach and remove the power-button board.
Step-by-step guide to install and secure the power-button board.
Lists necessary steps to perform after reattaching the power-button board.
Lists necessary steps, such as cover removal, before detaching the rear trim cover.
Step-by-step guide to safely detach and remove the rear trim cover from the chassis.
Step-by-step guide to install and secure the rear trim cover onto the chassis.
Lists necessary steps to perform after reattaching the rear trim cover.
Lists necessary steps, including component removals, before detaching the system board.
Detailed step-by-step guide to safely detach and remove the system board from the chassis.
Detailed step-by-step guide to install and secure the system board back into the chassis.
Lists necessary steps to perform after reattaching the system board.
Guide to entering the computer's Service Tag in the BIOS after system board replacement.
Instructions for downloading and installing the audio driver from the support website.
Instructions for downloading and installing the graphics driver from the support website.
Instructions for downloading and installing USB drivers from the support website.
Instructions for downloading and installing the chipset driver from the support website.
Instructions for downloading and installing the network driver from the support website.
Explains how to bypass the default boot order to start from a specific device.
Details the function of keys used for navigating within the System Setup utility.
Provides general information and important cautions regarding BIOS settings.
Lists and describes various features and capabilities configurable within the BIOS.
Step-by-step guide on how to access the computer's BIOS setup utility.
Details various configuration settings available within the BIOS for system customization.
Guide to setting up new system logon and BIOS access passwords.
Instructions for modifying or removing existing system and BIOS passwords.
Procedure for resetting forgotten system or BIOS passwords.
Lists necessary steps, such as cover removal, before clearing CMOS settings.
Step-by-step guide to clear CMOS settings and reset BIOS to default values.
Lists necessary steps to perform after clearing CMOS settings.
Instructions for downloading and applying BIOS updates to the system.
Guide to updating the system BIOS using a bootable USB drive.
Information on the integrated system diagnostics tool for hardware checks.
Steps to initiate and execute the ePSA diagnostics tool for hardware testing.
Explanation of system diagnostic LED patterns and their corresponding error indicators.
Procedure to discharge residual static electricity from the computer.
Steps to resolve Wi-Fi connectivity issues by power cycling network devices.
Provides links to online resources for product information, troubleshooting, and support.
| Bus type | DMI3 |
|---|---|
| Stepping | B0 |
| Tjunction | 100 °C |
| Processor cache | 8 MB |
| Processor cores | 4 |
| Processor model | i7-7700K |
| System bus rate | 8 GT/s |
| Processor family | Intel® Core™ i7 |
| Processor series | Intel Core i7-7700 Desktop series |
| Processor socket | LGA 1151 (Socket H4) |
| Processor threads | 8 |
| Processor codename | Kaby Lake |
| Number of QPI links | 0 |
| Processor frequency | 4.2 GHz |
| Processor cache type | Smart Cache |
| Processor lithography | 14 nm |
| Processor manufacturer | Intel |
| PCI Express slots version | 3.0 |
| Processor boost frequency | 4.5 GHz |
| Processor operating modes | 64-bit |
| ECC supported by processor | No |
| PCI Express configurations | 1x16, 1x8+2x4, 2x8 |
| Thermal Design Power (TDP) | 91 W |
| Number of processors installed | 1 |
| Maximum number of PCI Express lanes | 16 |
| Memory types supported by processor | DDR3L-SDRAM, DDR4-SDRAM |
| Memory voltage supported by processor | 1.35 V |
| Memory clock speeds supported by processor | 1333, 1600, 2133, 2400 MHz |
| Maximum internal memory supported by processor | 64 GB |
| Memory slots | 4x DIMM |
| Internal memory | 16 GB |
| Memory channels | Dual-channel |
| Internal memory type | DDR4-SDRAM |
| Maximum internal memory | - GB |
| HDD size | 3.5 \ |
| HDD speed | 7200 RPM |
| HDD interface | SATA III |
| Storage media | HDD |
| Card reader integrated | - |
| Total storage capacity | 1000 GB |
| CUDA cores | 2560 |
| Discrete graphics card | Yes |
| On-board graphics card ID | 0x5912 |
| Discrete graphics card model | NVIDIA® GeForce® GTX 1080 |
| On-board graphics card model | Intel® HD Graphics 630 |
| Discrete graphics card memory | 8 GB |
| Discrete graphics memory type | GDDR5X |
| Graphics card DisplayPorts quantity | 3 |
| On-board graphics card OpenGL version | 4.4 |
| On-board graphics card base frequency | 350 MHz |
| On-board graphics card DirectX version | 12.0 |
| On-board graphics card dynamic frequency (max) | 1150 MHz |
| Wi-Fi standards | Wi-Fi 5 (802.11ac) |
| Bluetooth version | 4.2 |
| Cabling technology | 10/100/1000Base-T(X) |
| Ethernet LAN data rates | 10, 100, 1000 Mbit/s |
| USB 2.0 ports quantity | 6 |
| USB 3.2 Gen 1 (3.1 Gen 1) Type-A ports quantity | 7 |
| Chassis type | Midi Tower |
| Product color | Black, Silver |
| Placement supported | Vertical |
| Product type | PC |
| Market positioning | Gaming |
| Motherboard chipset | Intel® Z170 |
| Motherboard form factor | micro ATX |
| Scalability | 1S |
| Processor code | SR338 |
| Processor ARK ID | 97129 |
| Processor package size | 37.5 x 37.5 mm |
| Supported instruction sets | AVX 2.0, SSE4.1, SSE4.2 |
| Thermal solution specification | PCG 2015D |
| Intel Identity Protection Technology version | 1.00 |
| Intel Stable Image Platform Program (SIPP) version | 0.00 |
| Cables included | AC |
| Power supply | 850 W |
| Depth | 360.5 mm |
|---|---|
| Width | 212 mm |
| Height | 472.52 mm |
| Weight | 14819 g |
