Steps
1. Disconnect the front panel USB cables from the system board.
2. Disconnect the hard drive data cables from the system board.
3. Disconnect the front panel audio cable from the system board.
4. Disconnect the LED controller cable from the system board.
5. Disconnect the graphics-card power cable from the system board.
6. Disconnect the processor power cable from the system board.
7. Disconnect the top-chassis fan cable from the system board.
8. Disconnect the system-board power cable from the system board.
9. Disconnect the front-chassis fan cable from the system board.
10. Remove the antenna cables from the routing guides on the chassis.
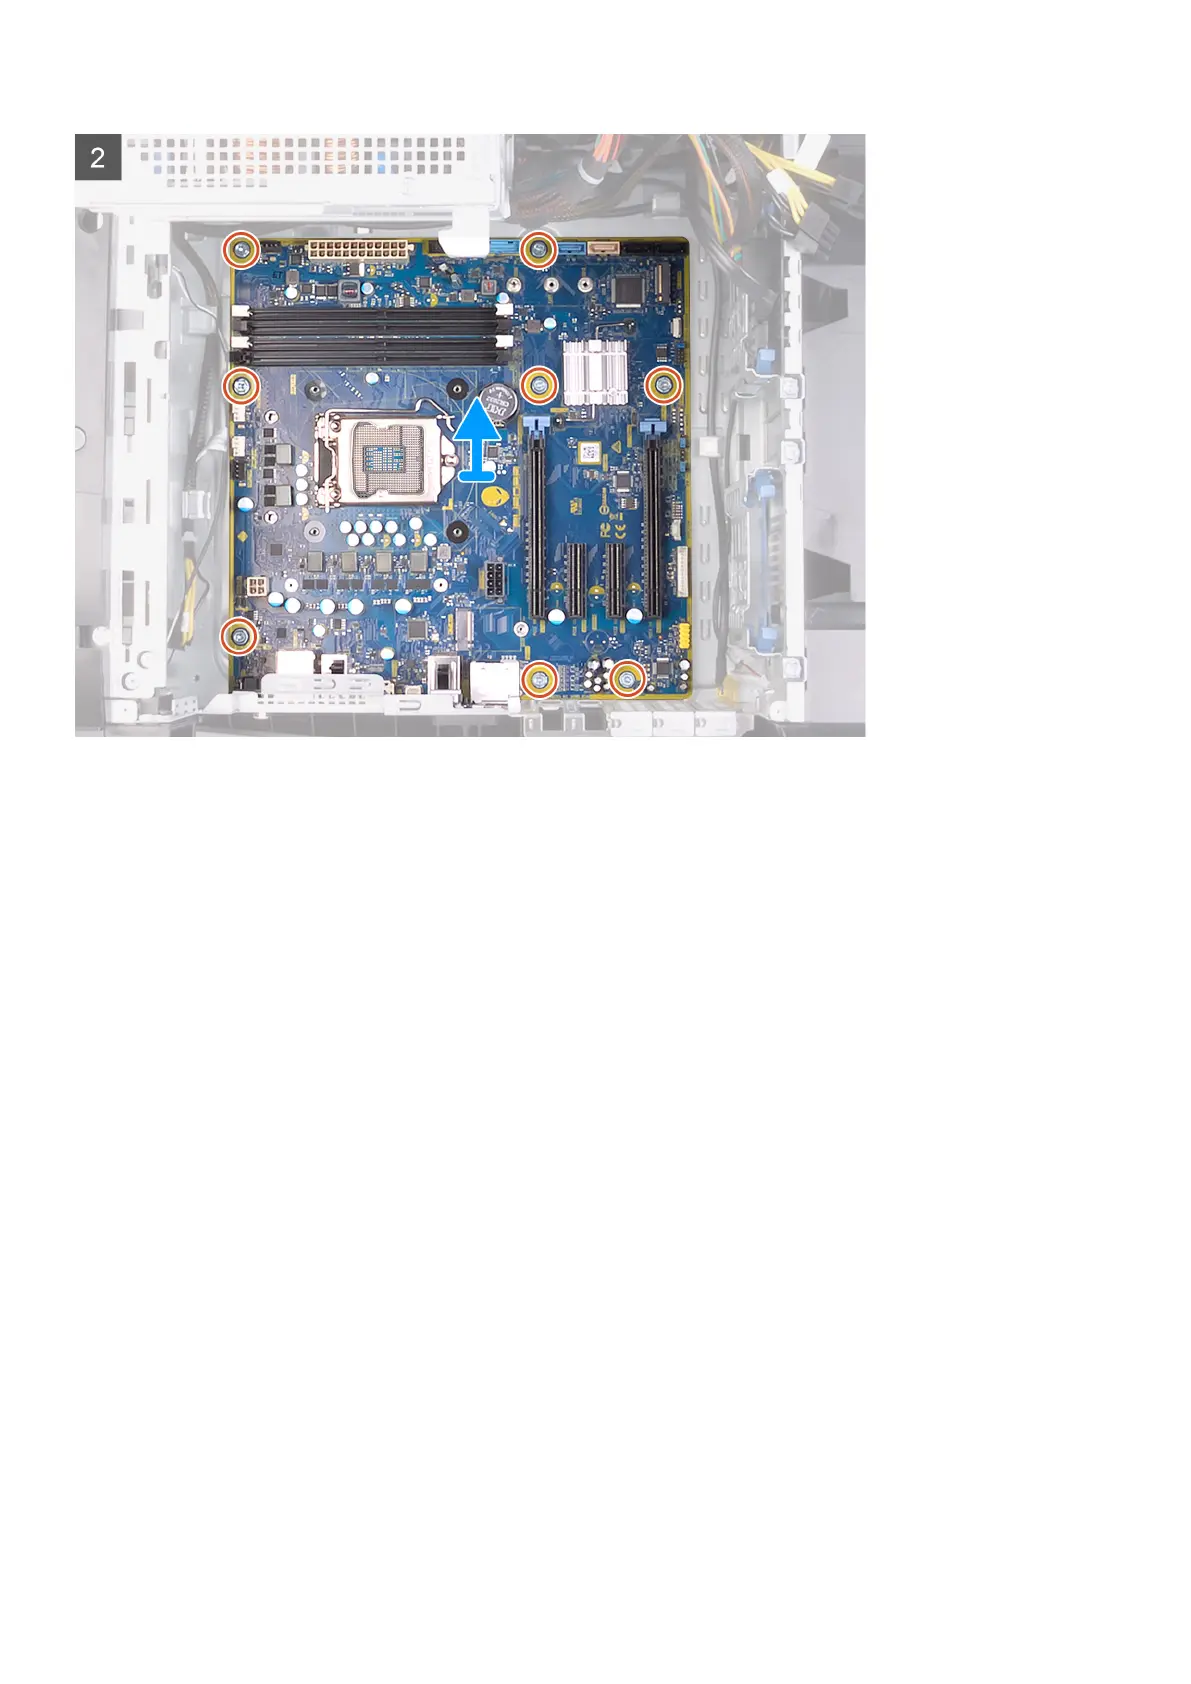
11. Remove the eight screws (#6-32) that secure the system-board assembly to the chassis.
12. Lift the system board off the chassis.
Installing the system board
Prerequisites
If you are replacing a component, remove the existing component before performing the installation procedure.
About this task
The following images indicate the location of the system board and provides a visual representation of the installation procedure.
88