Installation
Chapter 3
34
2. Connect the 1770-T12 programmer to the PLC-4 Microtrol
programmable controller as described in the PLC-4 Microtrol
Programmable Controller Product Guide (publication 1773-800).
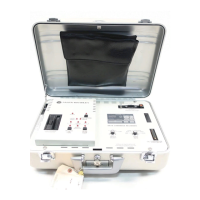
3. Connect a Digital Cassette Recorder Cable (cat. no. 1772-TH)
between the recorder and the unused connector on the 1770-T12
programmer cable. connect the end labeled CASSETTE to the
connector labeled A-B CONTROLLER EQUIPMENT on the
recorder. Connect the other end to the unused connector on the
1770T12 Programmer cable.
Use the following procedure to connect the recorder to series 8200 CNCs
(Figure 3.4):
Figure 3.4
Connection
to a Series 8200 CNC
POWER
8200 Processor
Communication
Interface
Module
(cat. no.
8000KAC_)
Peripheral
Panel
Data Cartridge
Recorder Internal
Cable (cat. no.
800032KH)
Data Cartridge Recorder External Cable (cat. no. 8000CS)
11295
1. Connect the power cable between the recorder and a grounded 115V
AC outlet.
NOTE: If the recorder has been converted for 230V AC, use a 230V AC
outlet.
2. Connect cable 8000-CS between the recorder and the Series 8200
control. Connect one end of the cable to the recorder connector
labeled A-B CONTROLLER EQUIPMENT.
Connect the other end of the cable to the peripheral panel port labeled
SERIAL 1/TAPE PUNCH if the control is a standard Series 8200 control.
If the control does not have a peripheral panel, connect the cable to Port A
of the communication module. If the control is a Series 8200 robot
version, connect the other end of the cable to the port labeled
CARTRIDGE.
Connection to Series 8200 CNCs
Artisan Technology Group - Quality Instrumentation ... Guaranteed | (888) 88-SOURCE | www.artisantg.com
 Loading...