NeXGen Gilbarco/Bennett - Installation and Start Up Guide
Copyright 2018 by Allied Electronics, Inc.
October 18, 2018 Page
3-6
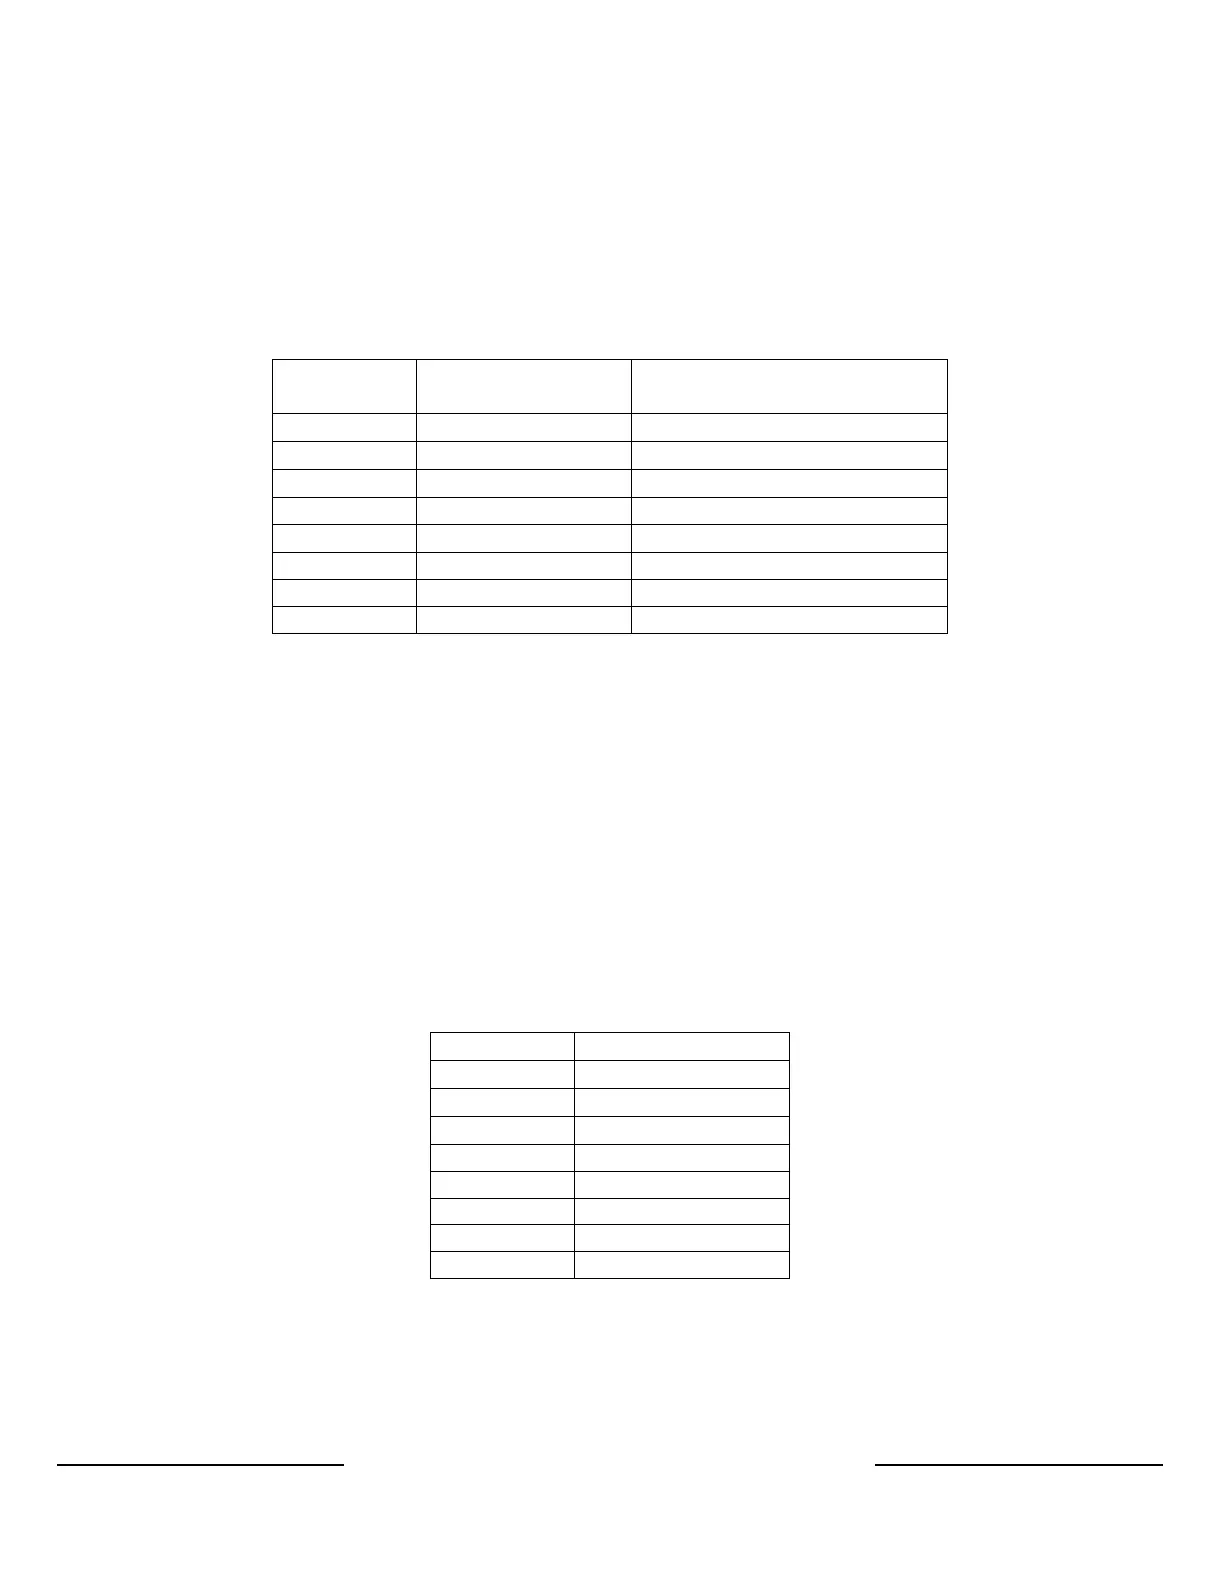
Model 3 + 1 Variable Blender
The table below lists the proper product to position assignment for each blender type which
is set via the POS fueling point configuration menu.
The blender type setting is not used and should be set to zero (0).
Position Advantage
Product
Adv. w/optimized & Encore
Product
1 Low grade Low grade
2 Not assigned
Blended product
3 Blended product High grade
4 Not assigned Not assigned
5 High grade
Not assigned
6 Diesel Diesel
7 Not assigned Not assigned
8 Not assigned Not assigned
* The low grade and the high grade products may be switched depending on the
position of the dispenser and the installation of the product lines.
Product to Position Mapping Fixed Blenders (Advantage and Optimized)
A Gilbarco fixed blender does not require any special product mapping. The table below lists
the proper product to position assignment for this blender type and is programmed via the
POS fueling point configuration menu.
The blender type setting is not used and should be set to zero (0).
Position Product
1 Low grade
2 Blended product
3 High grade
4 Not assigned
5 Not assigned
6 Not assigned
7 Not assigned
8 Not assigned
* The low grade and the high grade products may be switched depending on the
position of the dispenser and the installation of the product lines.