Chapter 2: Installation
44
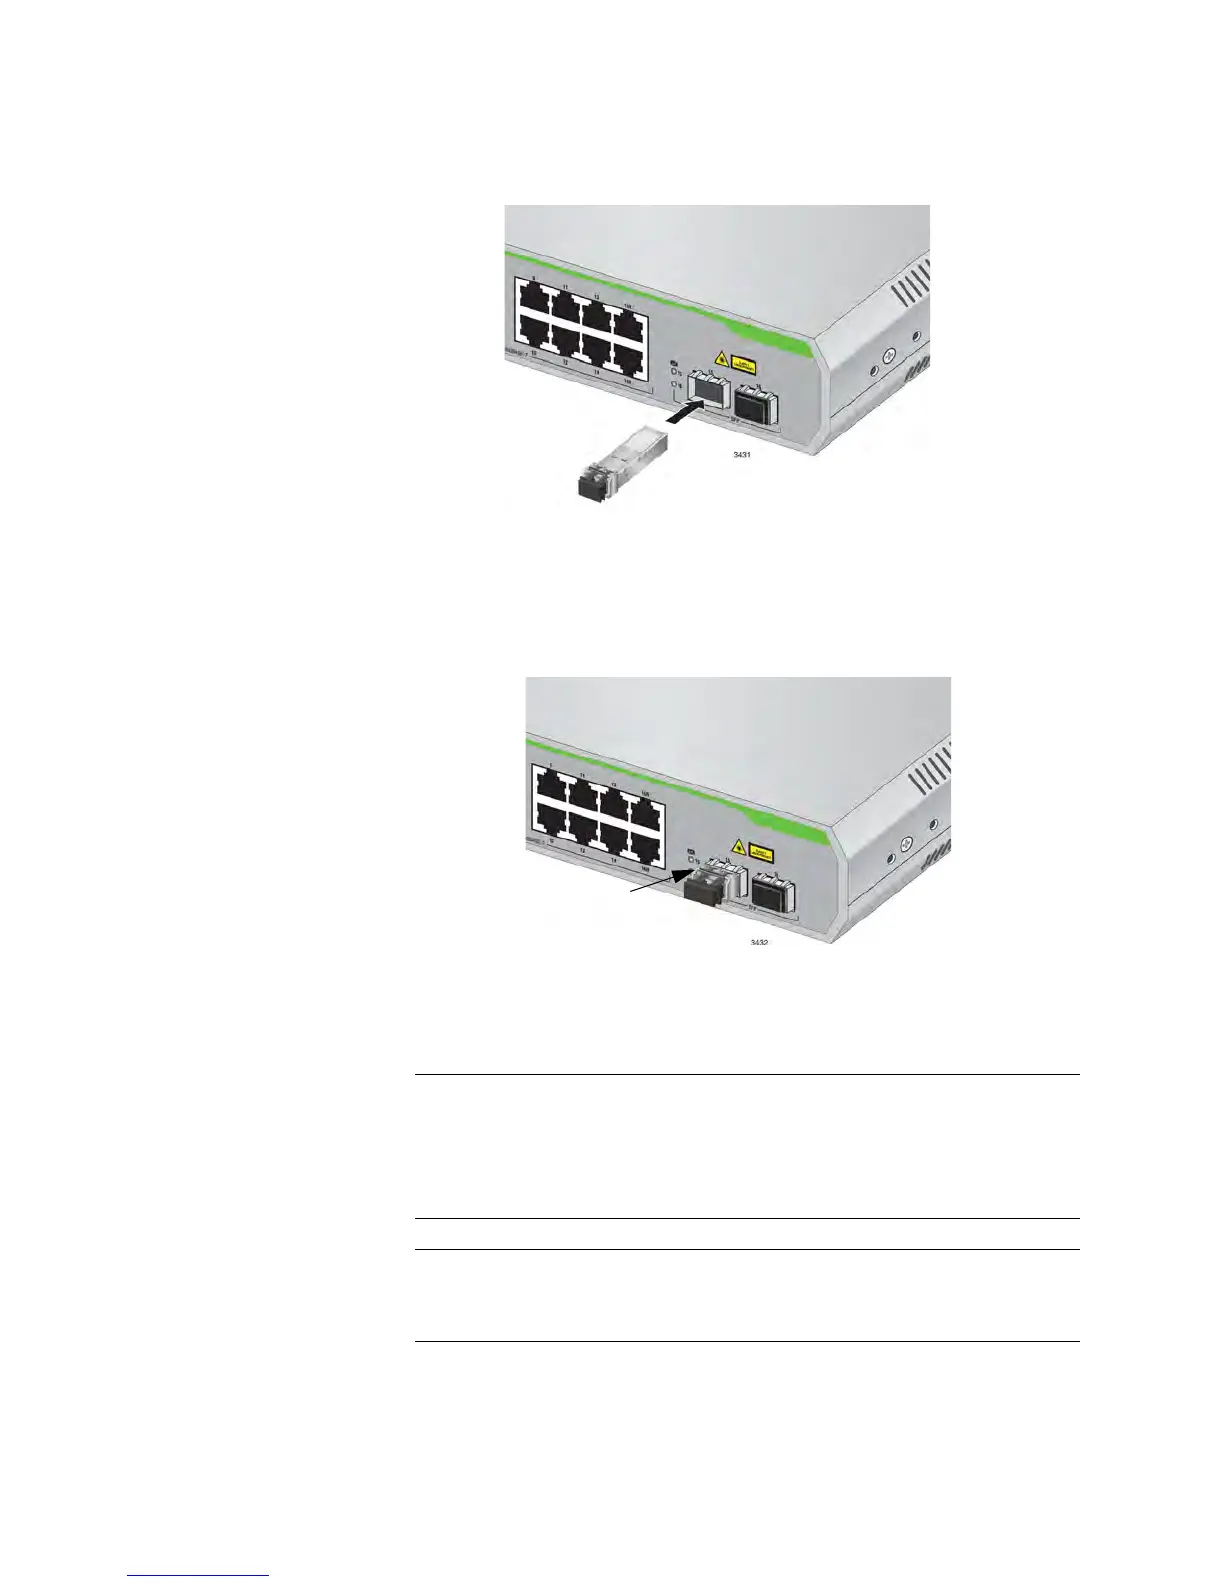
4. Slide the transceiver into the SFP slot until it clicks into place. See
Figure 13.
Figure 13. Inserting the SFP
5. Verify that the handle on the transceiver is in the upright position, as
shown in Figure 14. This secures the transceiver and prevents it from
being dislodged from the slot.
Figure 14. Positioning the SFP Handle in the Upright Position
6. Repeat Step 2 through Step 5 to install additional SFP transceivers.
SFP transceivers are dust-sensitive. Always keep the plug in the
optical bores when a fiber-optic cable is not installed, or when
storing the SFP. When you do remove the plug, keep it for future
use.
Unnecessary removal and insertion of an SFP can lead to
premature failure.
For information on the cable specifications of the SFP, consult the
documentation shipped with the SFP.
 Loading...