ALL-VPN10 VPN/Firewall WLAN-N WAN Router
© ALLNET GmbH München 2013 - All rights reserved
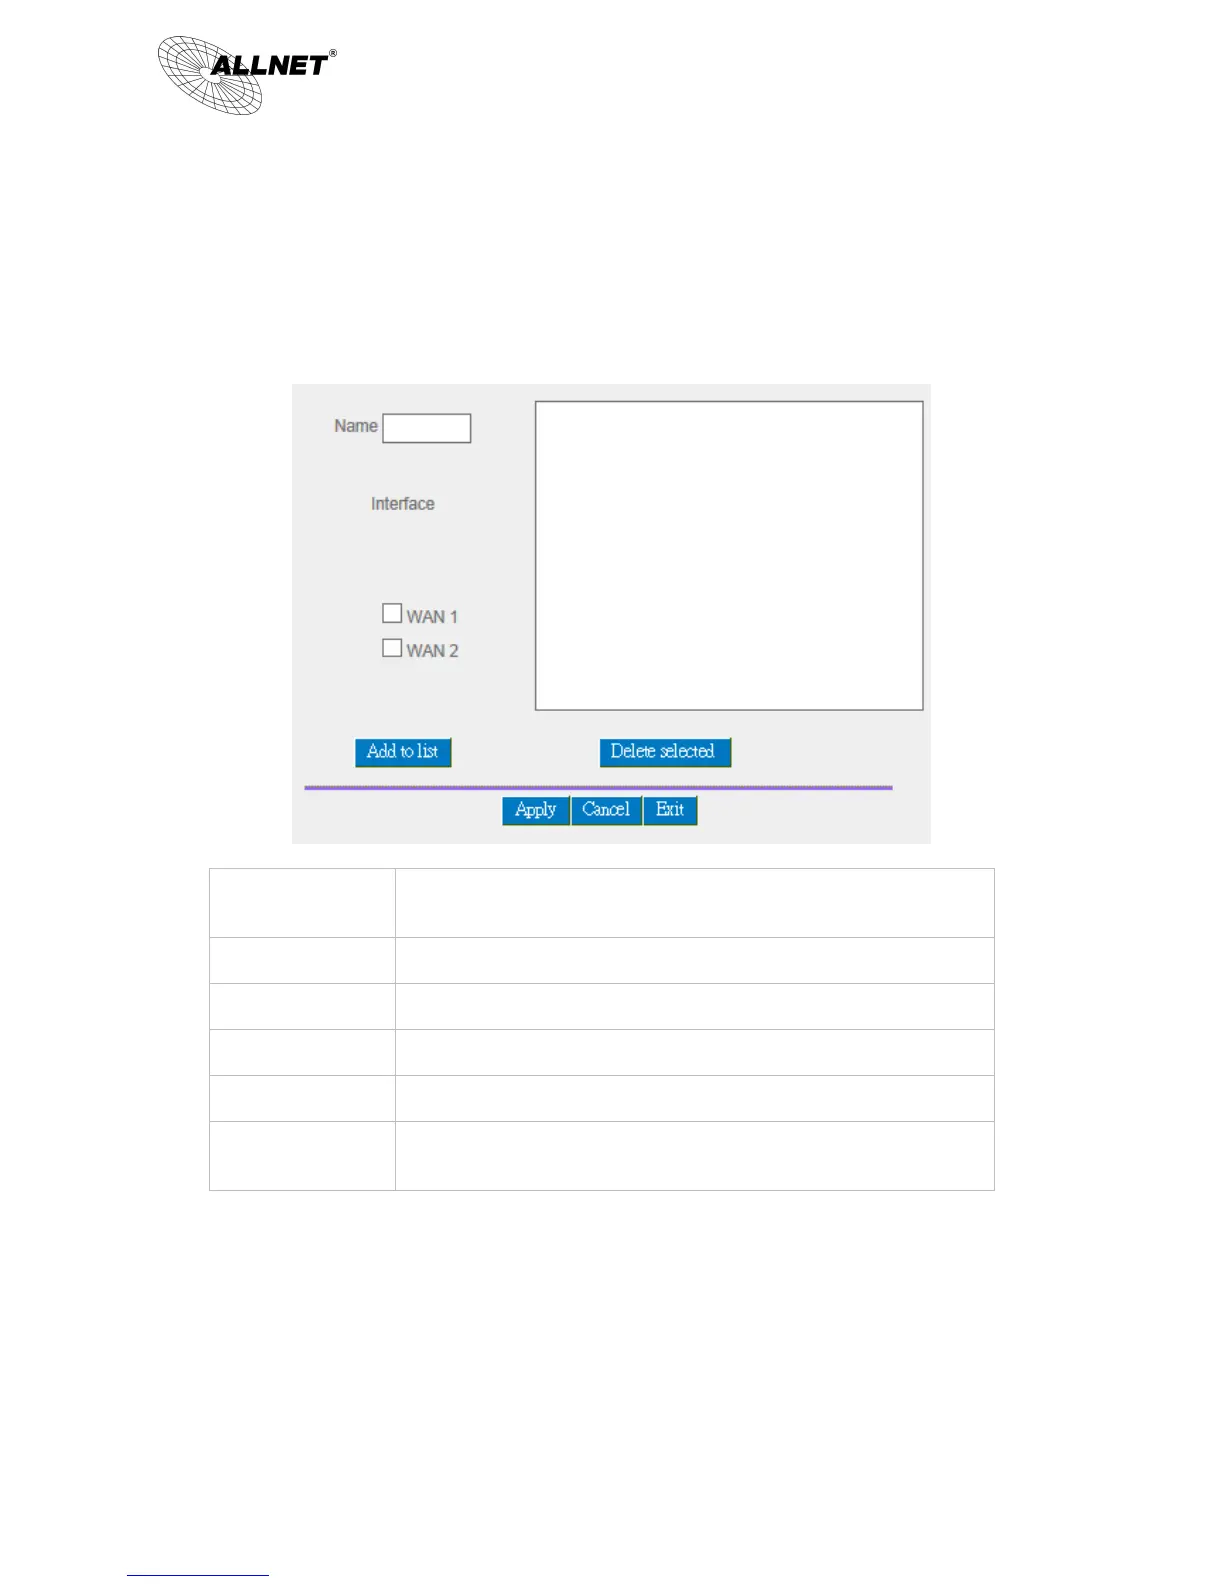
Set WAN Grouping:
If more than one WAN is connected with Netcom, to apply a similar division of traffic policy to these WANs,
a combination for the WANs must be made. Click “Set WAN Grouping”; an interactive window as shown in the
figure below will be displayed.
To define a name for the WAN grouping in the box, such as “Education”
etc. The name is for recognizing different WAN groups.
Check the boxes for the WANs to be added into this combination.
To add a WAN group to the grouping list.
To remove selected WANs from the WAN grouping.
Click “Apply” to save the modification.
Click “Cancel” to cancel the modification. This only works before “Apply”
is clicked.
After the configuration is completed, in the China Netcom Policy window users can select WANs in combination to
connect with Netcom.
Import Strategy:
A division of traffic policy can be defined by users too. In the “Import Strategy” window, select the WAN or WAN
group (ex. WAN 1) to be assigned and click the “Import IP Range” button; the dialogue box for document importation
 Loading...