After you have clicked refresh the WiFlyer network will be listed.
b. Click OK.
c. In the “Available networks” box, highlight WiFlyer, and check “Allow
me to connect to the selected wireless network, even though it is not
secure”.
d. Click connect.
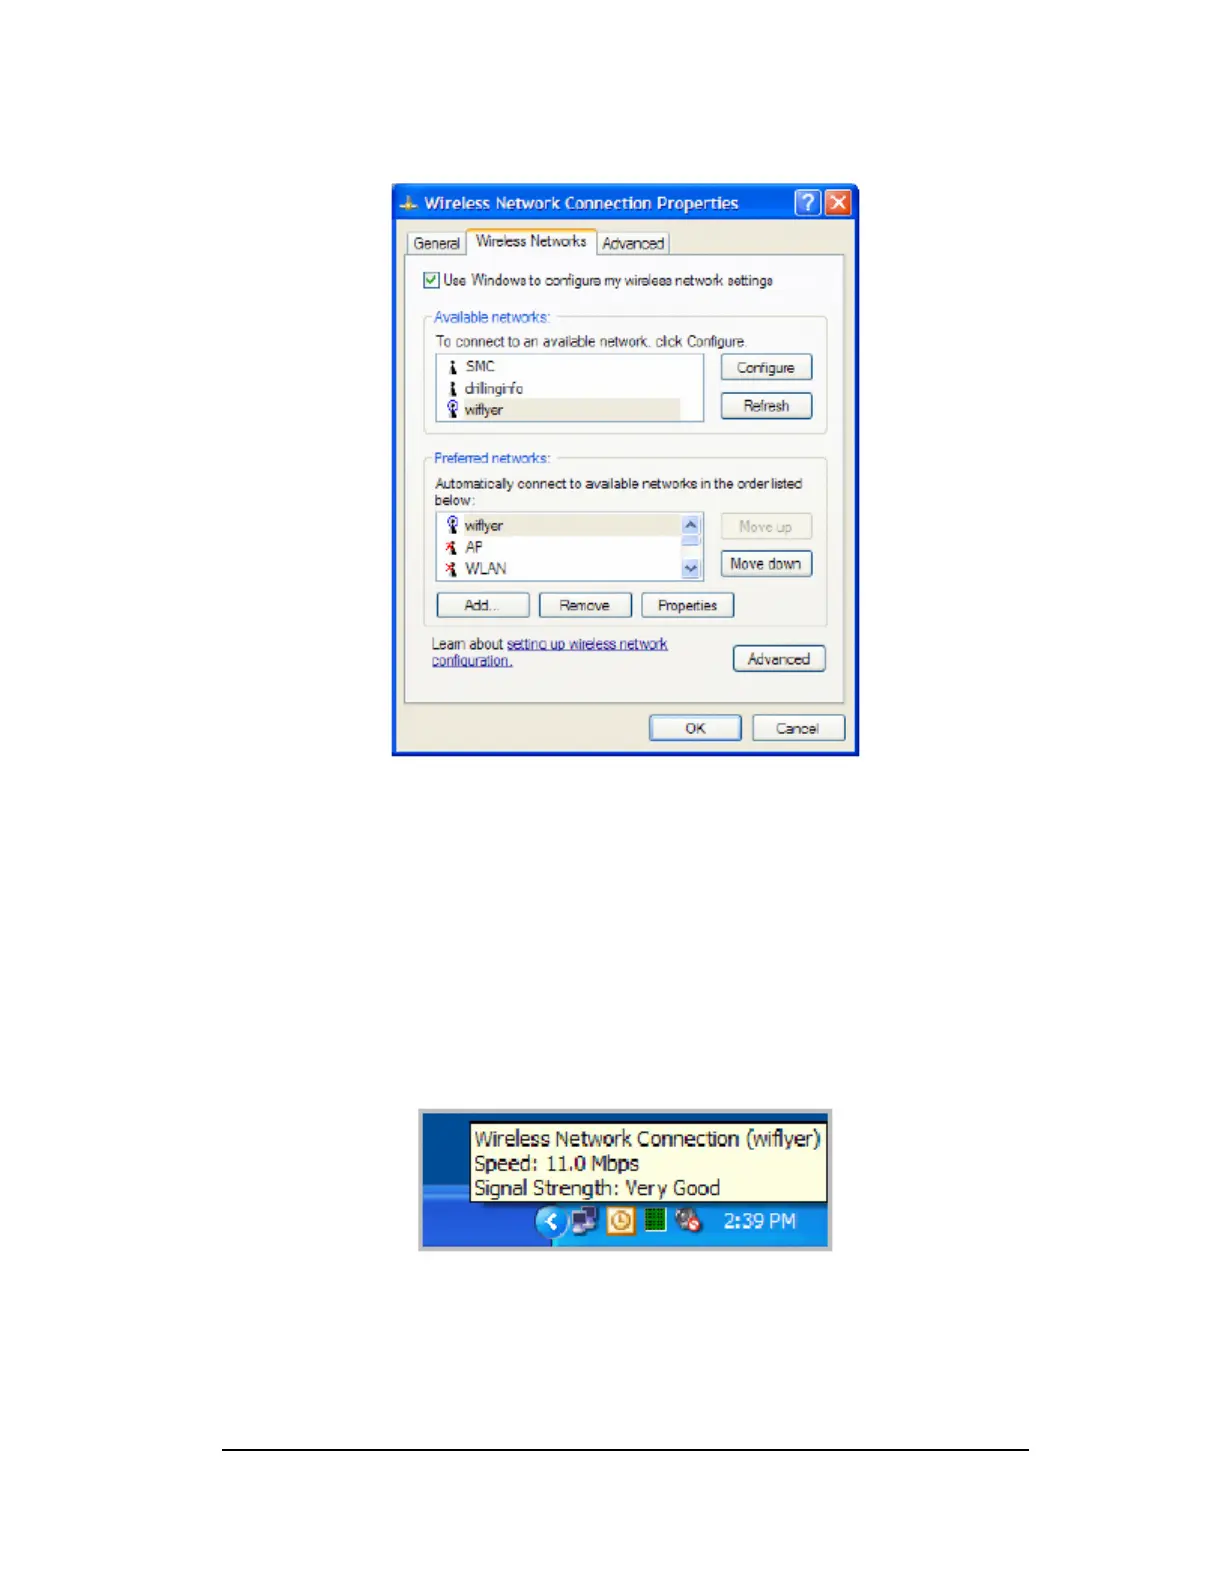
5. Wait for “Connected to WiFlyer” to appear above the Wireless Network
Connection icon on your taskbar.
You are now on the WiFlyer WiFi network. Continue to the dialup section to connect
for dialup, or skip to the broadband section to configure broadband connectivity.
9
 Loading...